Product Designer · Mechanical Engineer

Portfolio I M M A N U E L R I E T Z L E R

Scroll
Immanuel Rietzler portrait
Profile

Where form and function work as one

As a product designer with a solid background in mechanical engineering, I combine technical engineering with high-quality aesthetics.

Through my work at Technische Universität Dresden and the Fraunhofer Institute, I am used to translating complex functional requirements into intuitive, visually convincing design solutions.

In my free time I am into music (piano & sampling) and sports (football & snowboarding).

Based in
Frankfurt am Main, DE
Contact
immanuel329@gmail.com
Curriculum

Experience
& Craft

Work Experience

Product Designer
Fraunhofer IWU, Dresden · Internship, followed by working student
2024 & 2025
Graphic Designer
Technische Universität Dresden · Student assistant
2022 & 2023

Education

Diploma in Engineering (Dipl.-Ing.)
Technische Universität Dresden · General & design-oriented mechanical engineering / product design
2026
Abitur
Liebigschule – Europaschule, Frankfurt am Main
2013

Software

Blender
Photoshop
SolidWorks
Illustrator
Unreal Engine
Clo3D
Selected Work

Six chapters
of making things

Modular adventure motorcycle suit in a concrete courtyard
01

Diploma Thesis

Modular motorcycle suit · TU Dresden × HELD
Chapter 01 — Diploma Thesis

Protection that
can be repaired

My diploma thesis develops a textile adventure motorcycle suit – jacket and trousers – based on circular economy strategies, in cooperation with industry partner HELD.
User, crash and product analyses led to modular concepts that combine protection with repairability, adaptability and a longer service life. Three of them were developed in Clo3D and checked for fit; the final rendering places the design in a realistic use scenario.

Modular adventure motorcycle suit next to a motorcycle in a concrete courtyard
Users & Crash Zones

One question,
two riders

The thesis started from one question: how can circular economy strategies – repair, refurbish and reuse in particular – be applied to safety-relevant protective clothing? The focus was textile adventure motorcycle gear, which has to combine protection, climate comfort and everyday usability over long periods of use.

Two personas condense the target group: Thomas, the long-distance tourer, and Lena, who switches between everyday riding, short trips and her first off-road tours. A user journey from purchase and travel to care, repair and disposal showed where today's products reach their limits: heat build-up, fasteners that are hard to use with gloves – and missing repair options.

An expert interview with HELD sharpened the focus: repair and local replaceability are seen as far more practical in the market than pure recycling concepts.

Crash Zones & CO₂ Footprint

Where suits
wear out

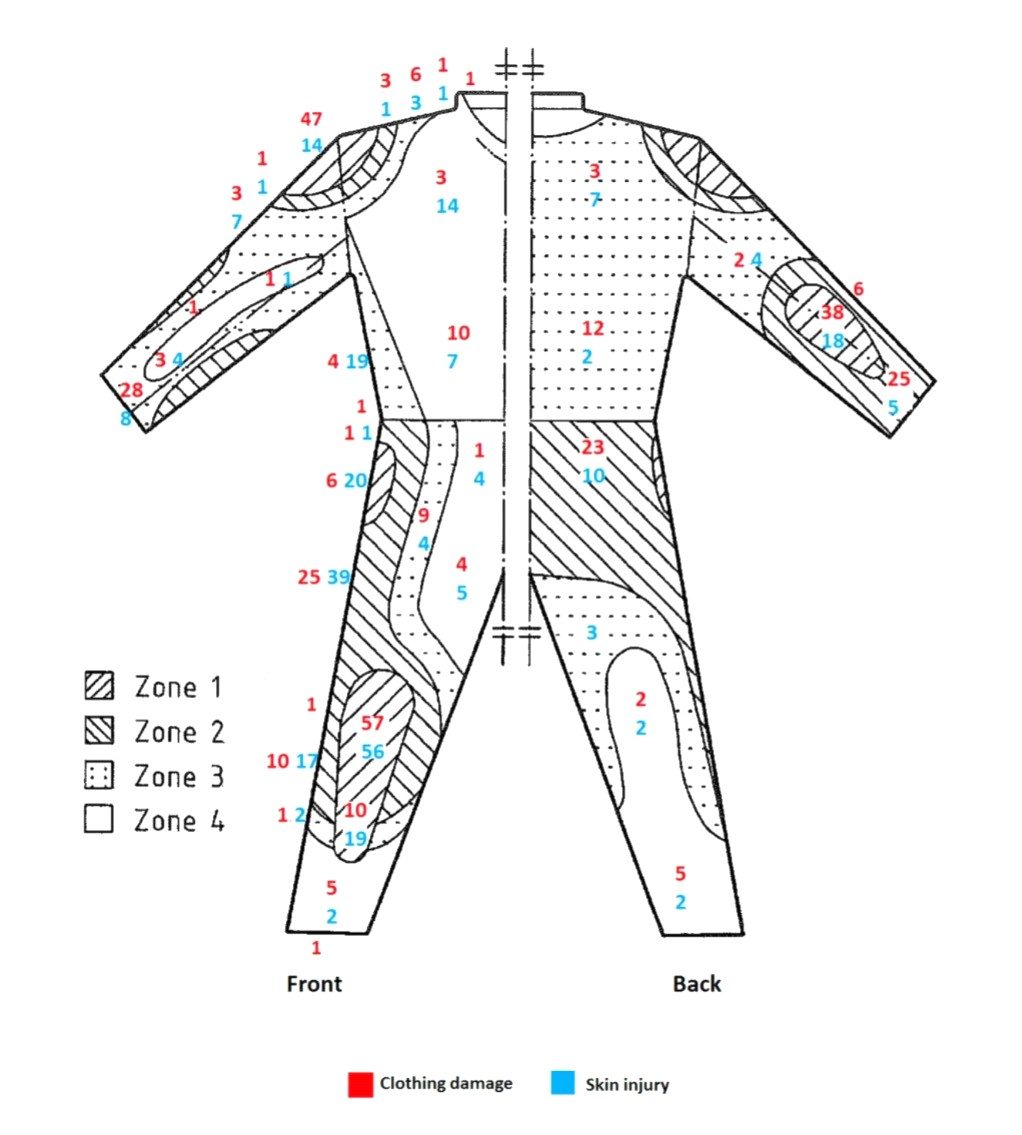
Accident and damage studies show that loads are not evenly distributed: shoulders, elbows, hips and knees are protection and wear zones at the same time – and therefore the starting point for targeted replaceability.

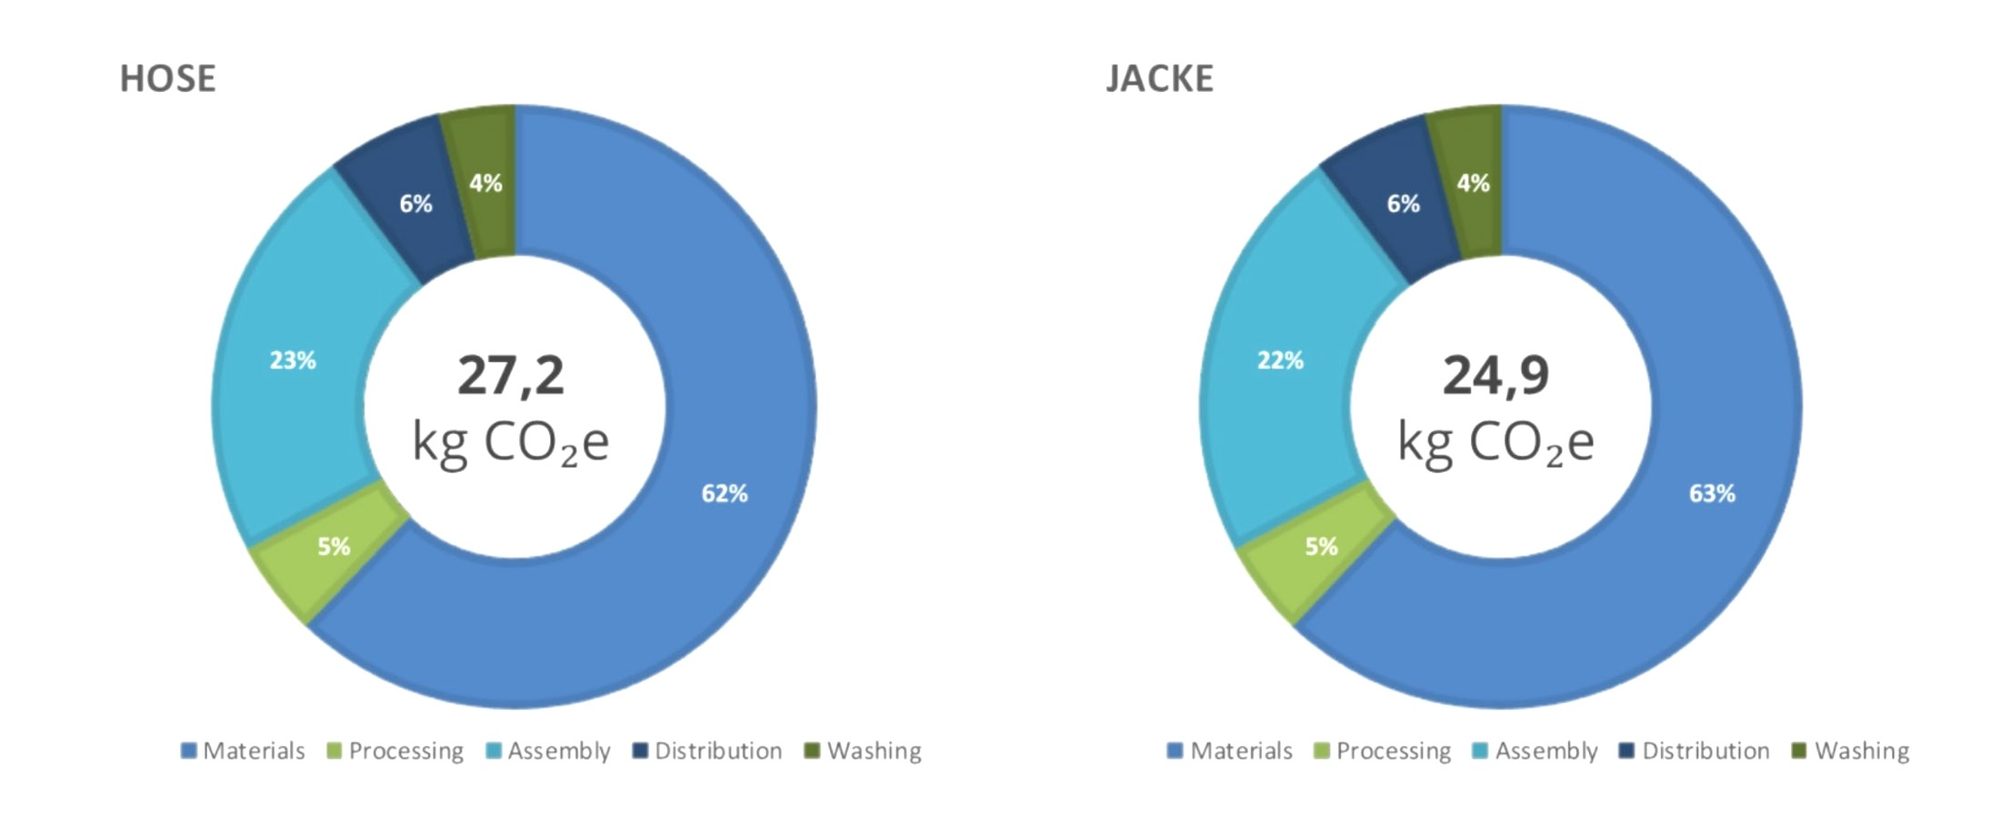
The life-cycle assessment of the reference product shows that more than 60 percent of its CO₂ footprint comes from materials. Every extension of the use phase therefore has a direct effect.

Crash zone map of a motorcycle suit
CO2 footprint of reference trousers and jacket
93
Percent of damage on arms,
legs and pelvis
69
Percent of damage
caused by abrasion
27.2
kg CO₂ equivalent of the
reference trousers
Ideation

Six directions
from one gap

The analysis showed that modularity is established in motorcycle clothing – as layering, removable protectors or detachable sleeves – but so far serves almost only comfort and climate. It is rarely used to make heavily stressed crash and wear zones replaceable. Six directions emerged from this gap.

Base layer sketch
Base Layer
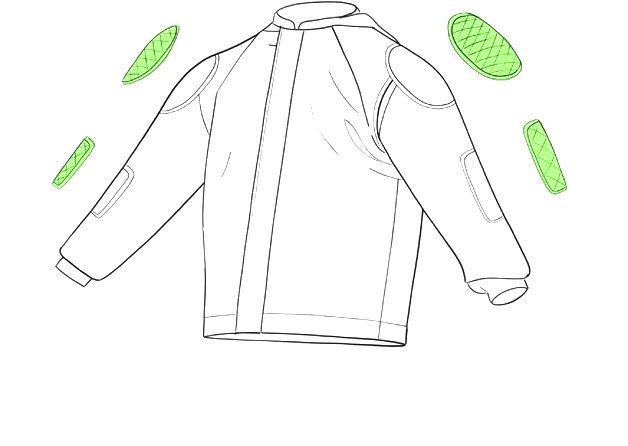
All protectors in a separate base layer – the outer layers can be combined freely.
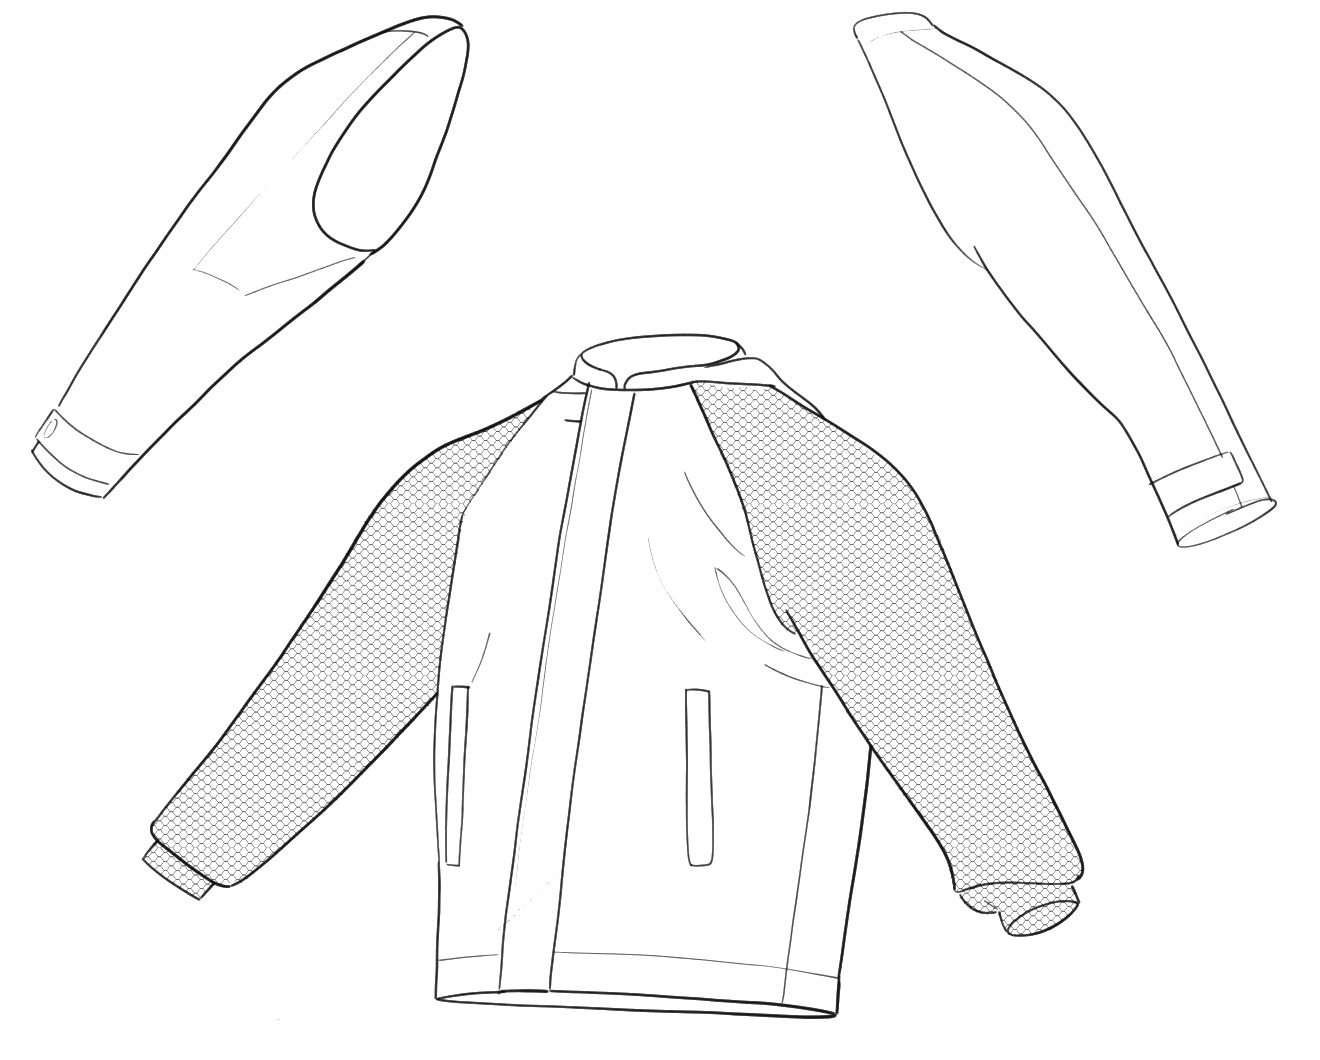
Detachable segments sketch
Detachable Segments
Sleeves and trouser legs as separate modules: more climate flexibility, damaged zones replaceable.
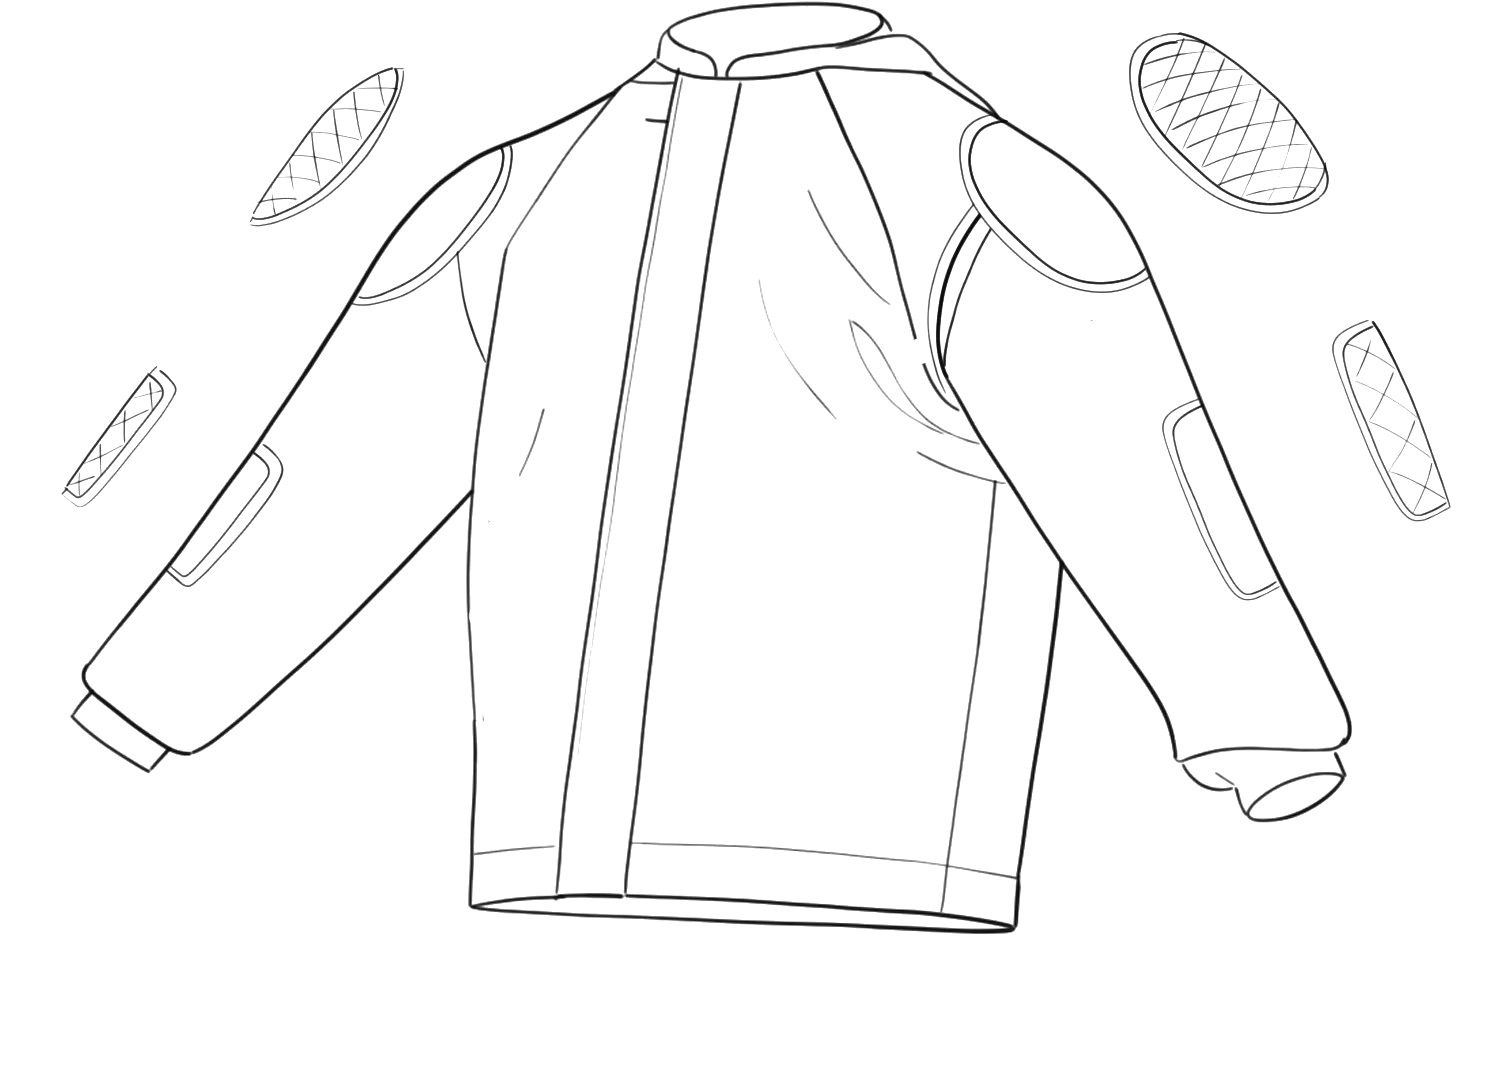
Replaceable patches sketch
Replaceable Patches
Robust overlays on the main crash zones protect the base material and are replaced after damage.
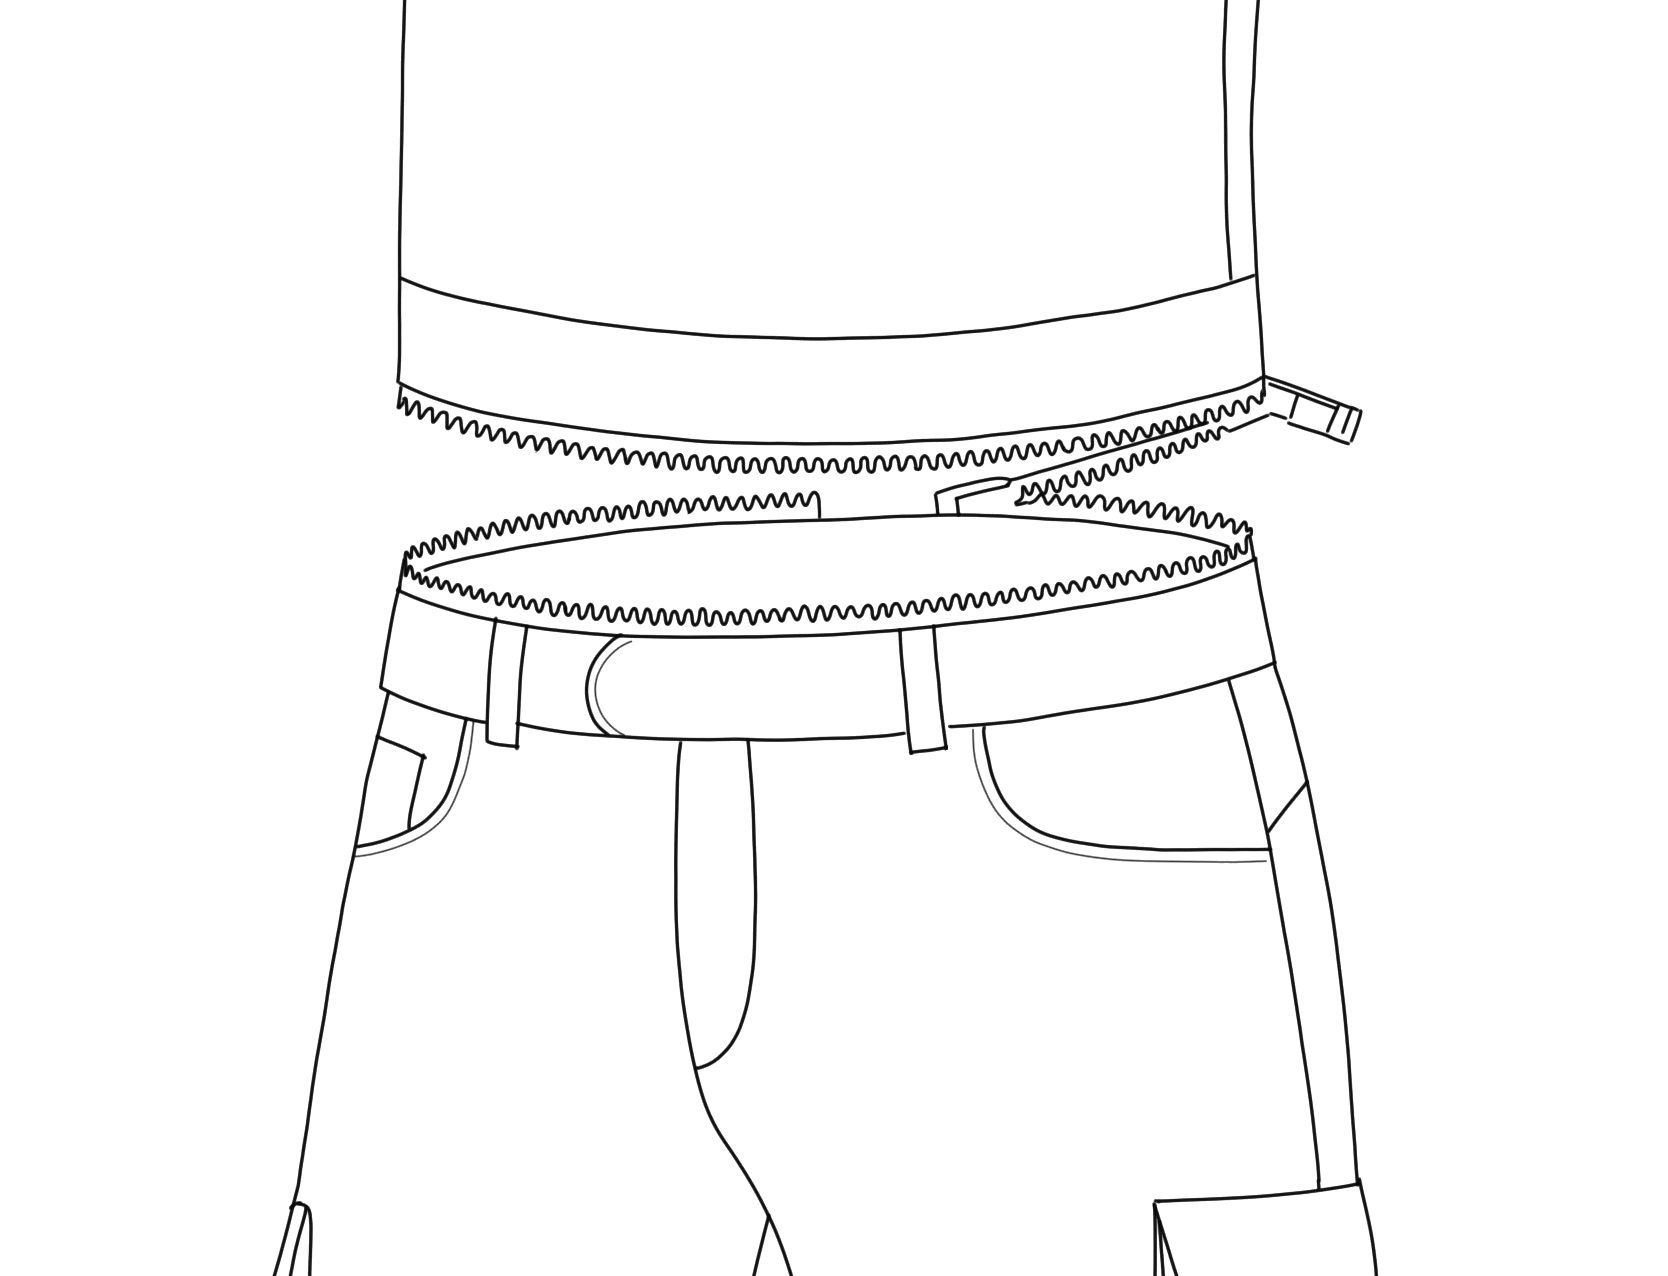
Jacket-trouser link sketch
Jacket-Trouser Link
A connection that keeps hips and lower back covered in a crash.
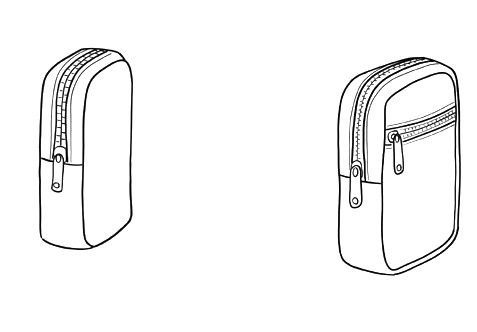
Modular pockets sketch
Modular Pockets
A discreet attachment system for pockets and add-ons, depending on use.
Visual customisation sketch
Visual Customisation
Exchangeable accents and reflective elements keep the product up to date for years.
Connections & Variants

The interface
decides

Whether a module works in everyday use depends on its interface. Zips, hook-and-loop, press studs and magnets, MOLLE, buckles, form-fit as well as screw and rivet connections were rated for each module on injury risk, stability, separability, comfort and durability.

Zips proved best for large segments, hook-and-loop for quickly exchangeable elements. The variants within each idea were then compared with weighted criteria; a morphological box combined the building blocks into three concepts.

Segmentation of the jacket / utility value
3.35
T-shirt
4.5
Tank top
4.5
Vest
3.55
Apron
2.45
Small parts
Jacket-trouser link / utility value
2.9
All-round zip
3.7
Side zip
3.0
Back zip
Concept 01

Segment Modules

Large-scale modularity through detachable sleeves, legs and hood. The garment becomes a transformable system that adapts to weather conditions and intensity of use. After damage, heavily stressed segments can be replaced efficiently, significantly extending the life of the whole product.

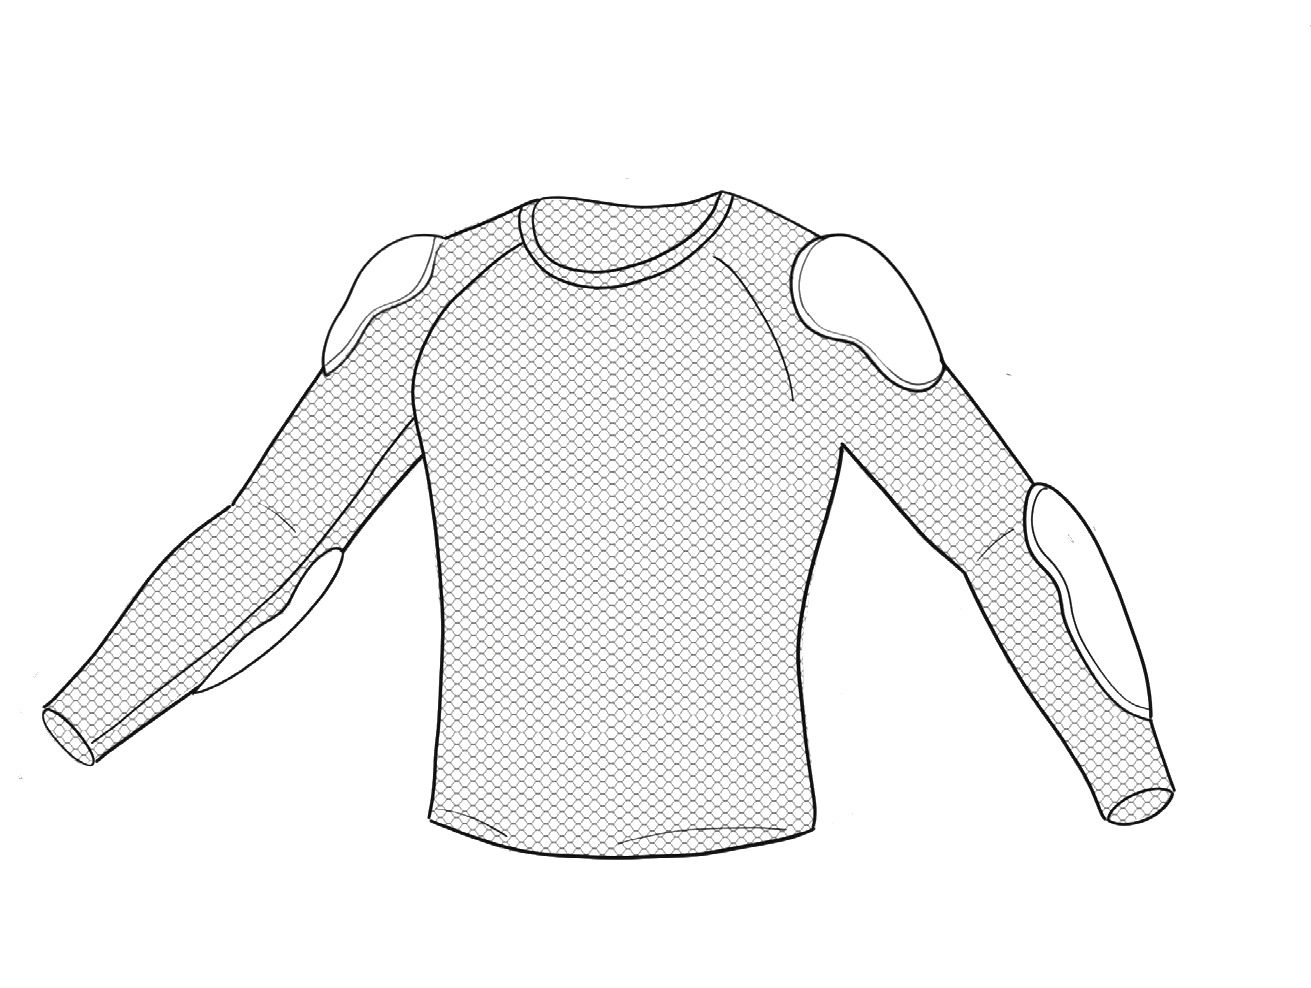
The modular split also offers potential for individual fit adjustment; an additional mesh layer with exo-protectors optimises the system for warm weather. The constructive challenge lies in the safety-relevant interfaces, which must provide both protection and easy handling.

Concept 02

Chest Modules

Functional and climatic adaptation of the torso through an exchangeable front module. The emphasis is on seasonal variability: in warm conditions, the standard module can be replaced by a mesh version to maximise ventilation immediately.

Modules in different sizes allow precise adaptation to different body shapes or layers worn underneath. While the focus is on thermal comfort and ergonomics, the main crash zones remain untouched in favour of lower complexity.

Concept 03

Replaceable Patches

A targeted repair approach focused on the primary crash zones at shoulder, elbow and knee. These highly stressed areas are protected by replaceable textile patches that act as a sacrificial layer above the base material.

Tool-free attachment is provided by a large hook-and-loop connection, secured against slipping by adjustment straps and locking tabs. Besides repair, the patches carry protectors and accentuate the design language. The key challenge is redundant fixation, ensuring reliability even under extreme load in a crash.

Fit & Evaluation

Tested in
riding poses

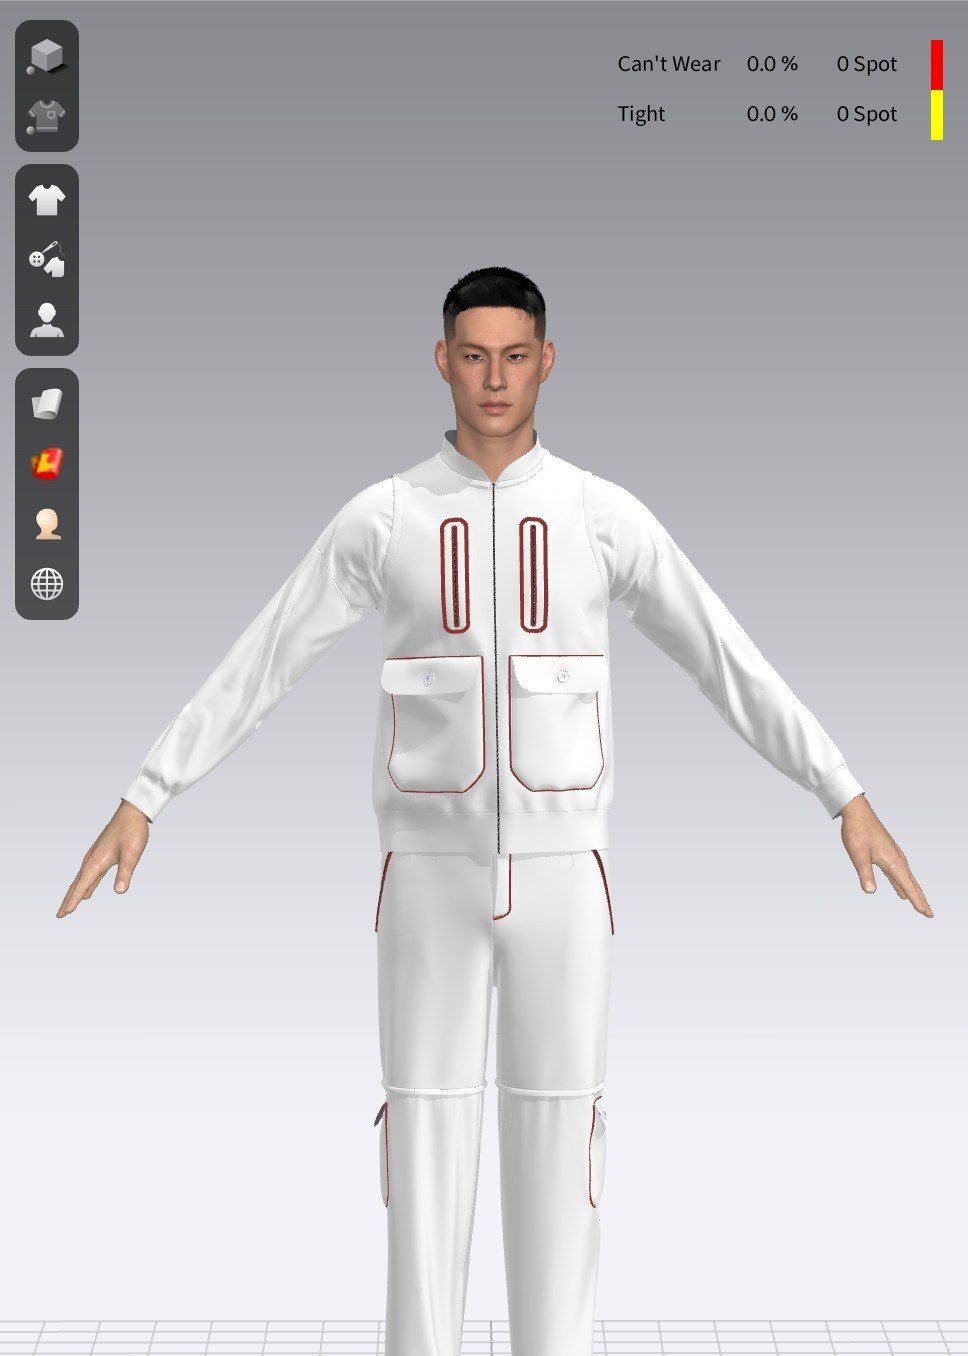
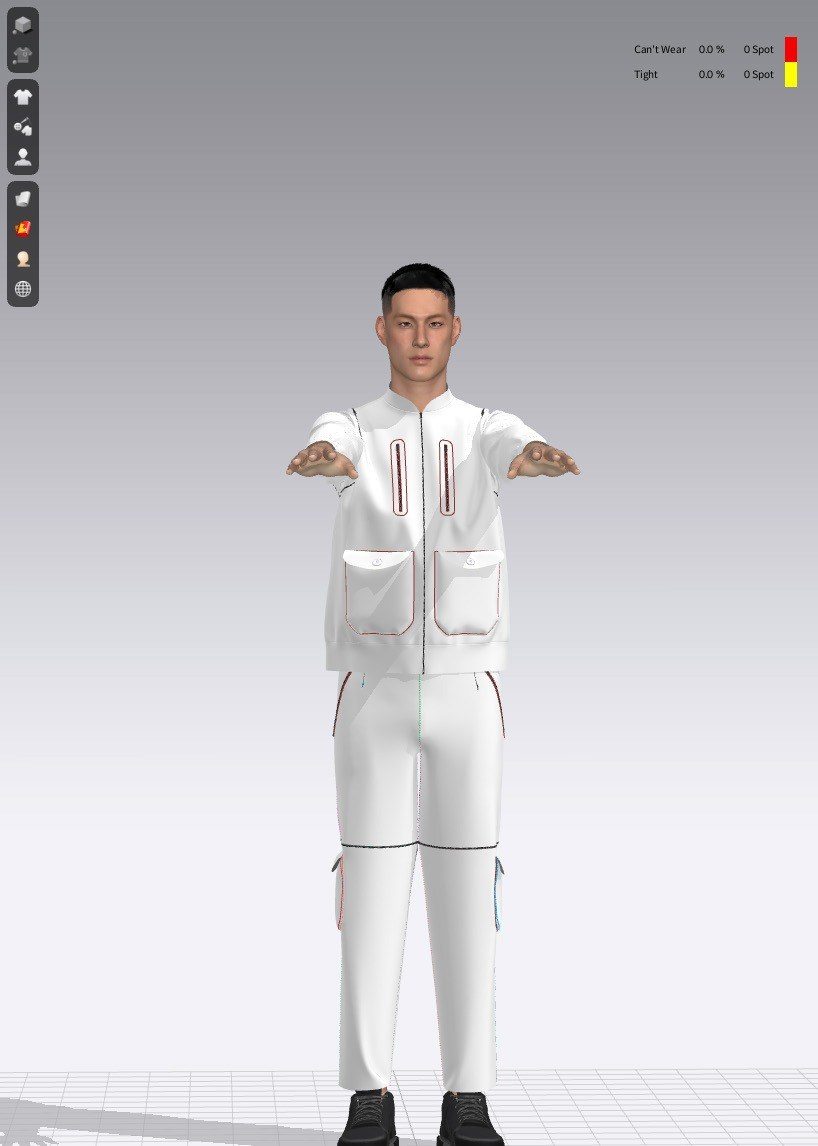
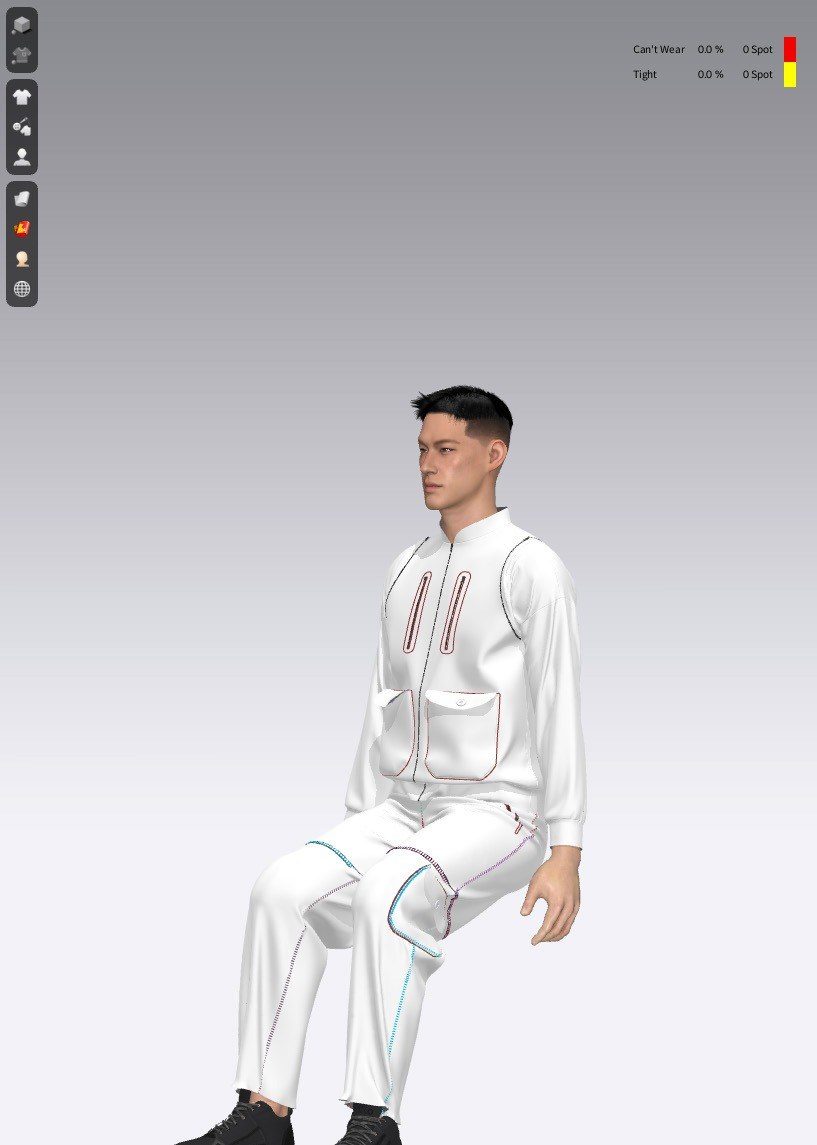
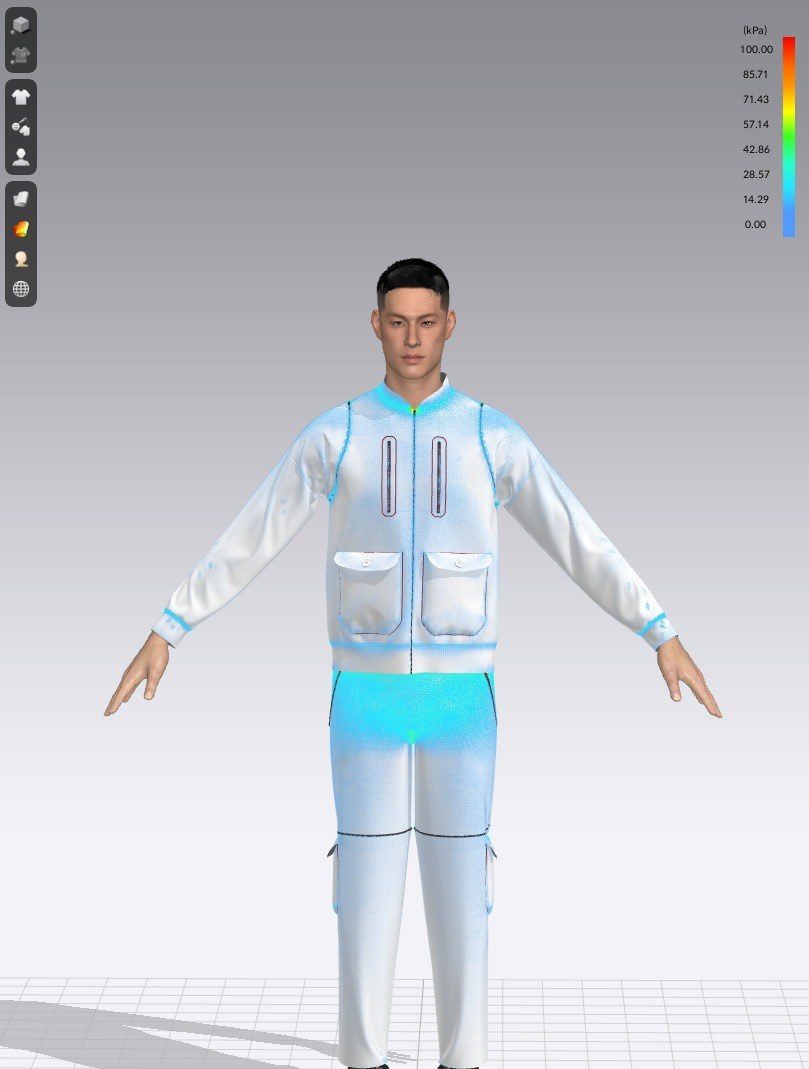
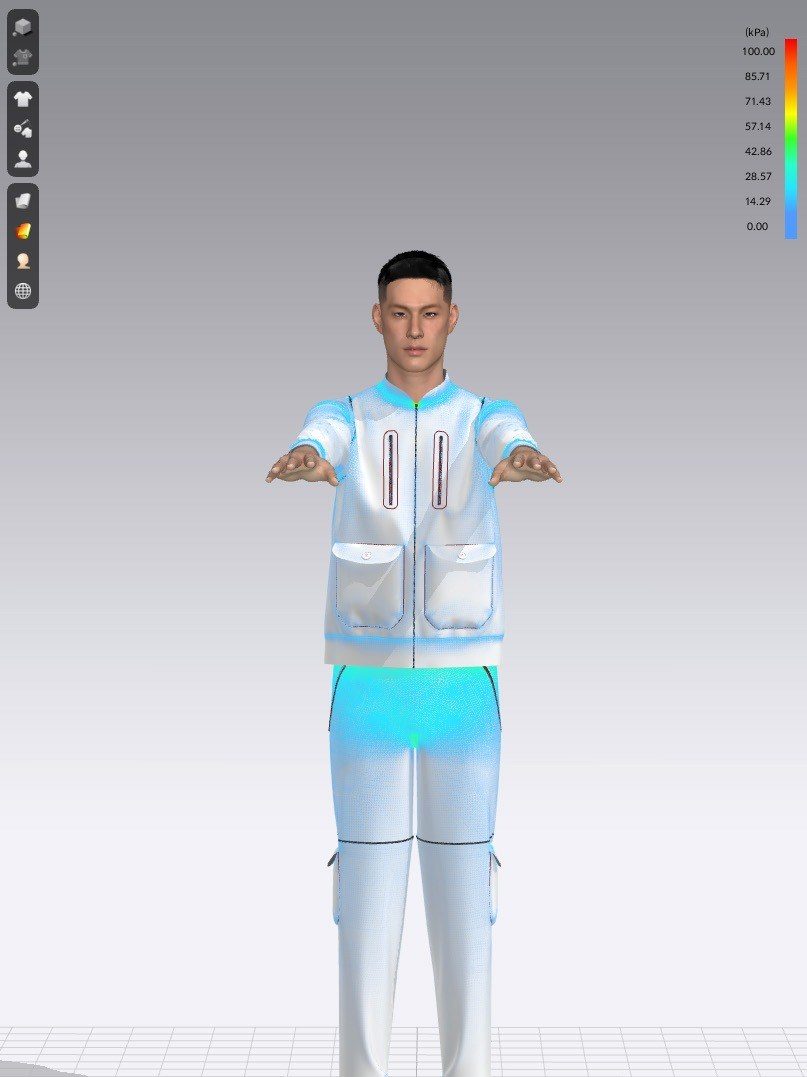
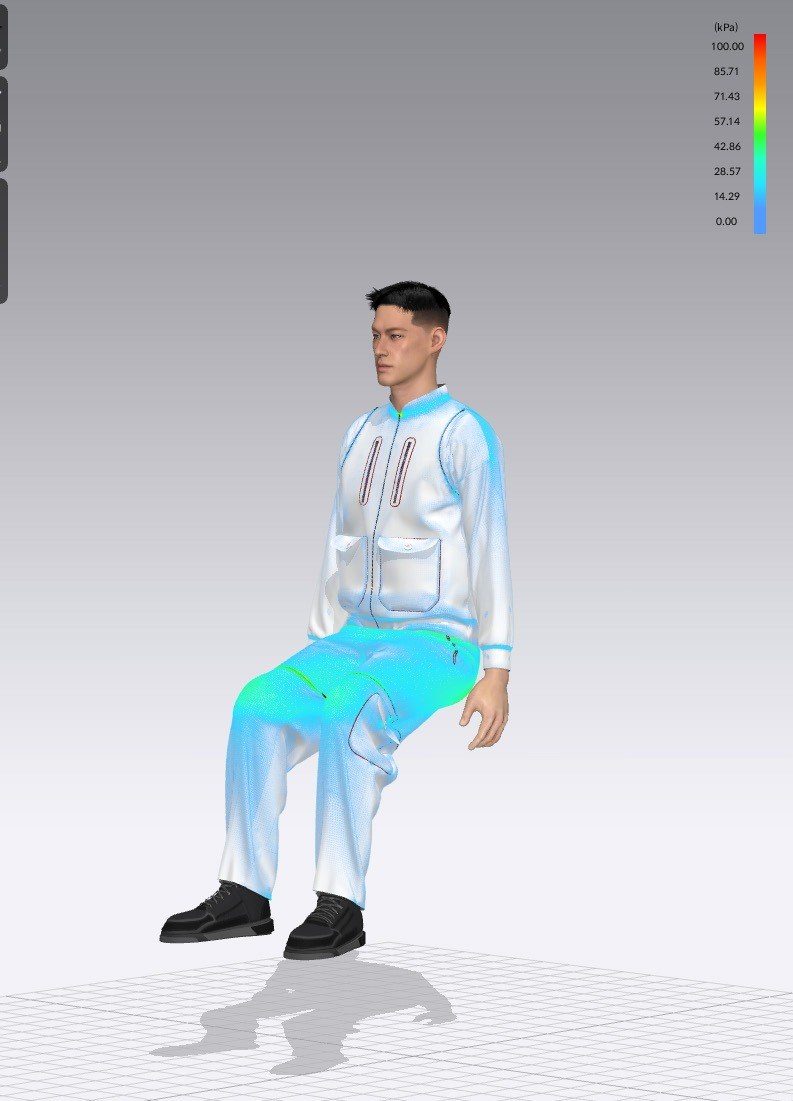
The developed concepts were checked in CLO3D with fit maps and stress maps in riding-relevant poses – standing, arms stretched out and seated. This made tight areas, stress peaks at module transitions and critical seams visible early on and allowed the variants to be compared.

Fit map standing
Fit map arms stretched
Fit map seated
Stress map standing
Stress map arms stretched
Stress map seated
Fit maps (left) and stress maps (right) / segment modules
Conclusion

Modularity in protective clothing can do more than adapt to the weather: it enables repair, fit adjustment and the local renewal of highly stressed zones – and with that a longer service life.

At the same time, additional interfaces in safety-relevant areas create new trade-offs. The concepts therefore represent a digitally developed stage that serves as the basis for physical prototypes and certification tests.

According to HELD, fit adjustments account for a noticeable share of service requests – modules in different sizes could address this directly.

Camera adapter for UR5e robot
02

Camera Adapter

Mechanical Design Challenge 2026
Chapter 02 — Camera Adapter

Part of the product,
not a bracket

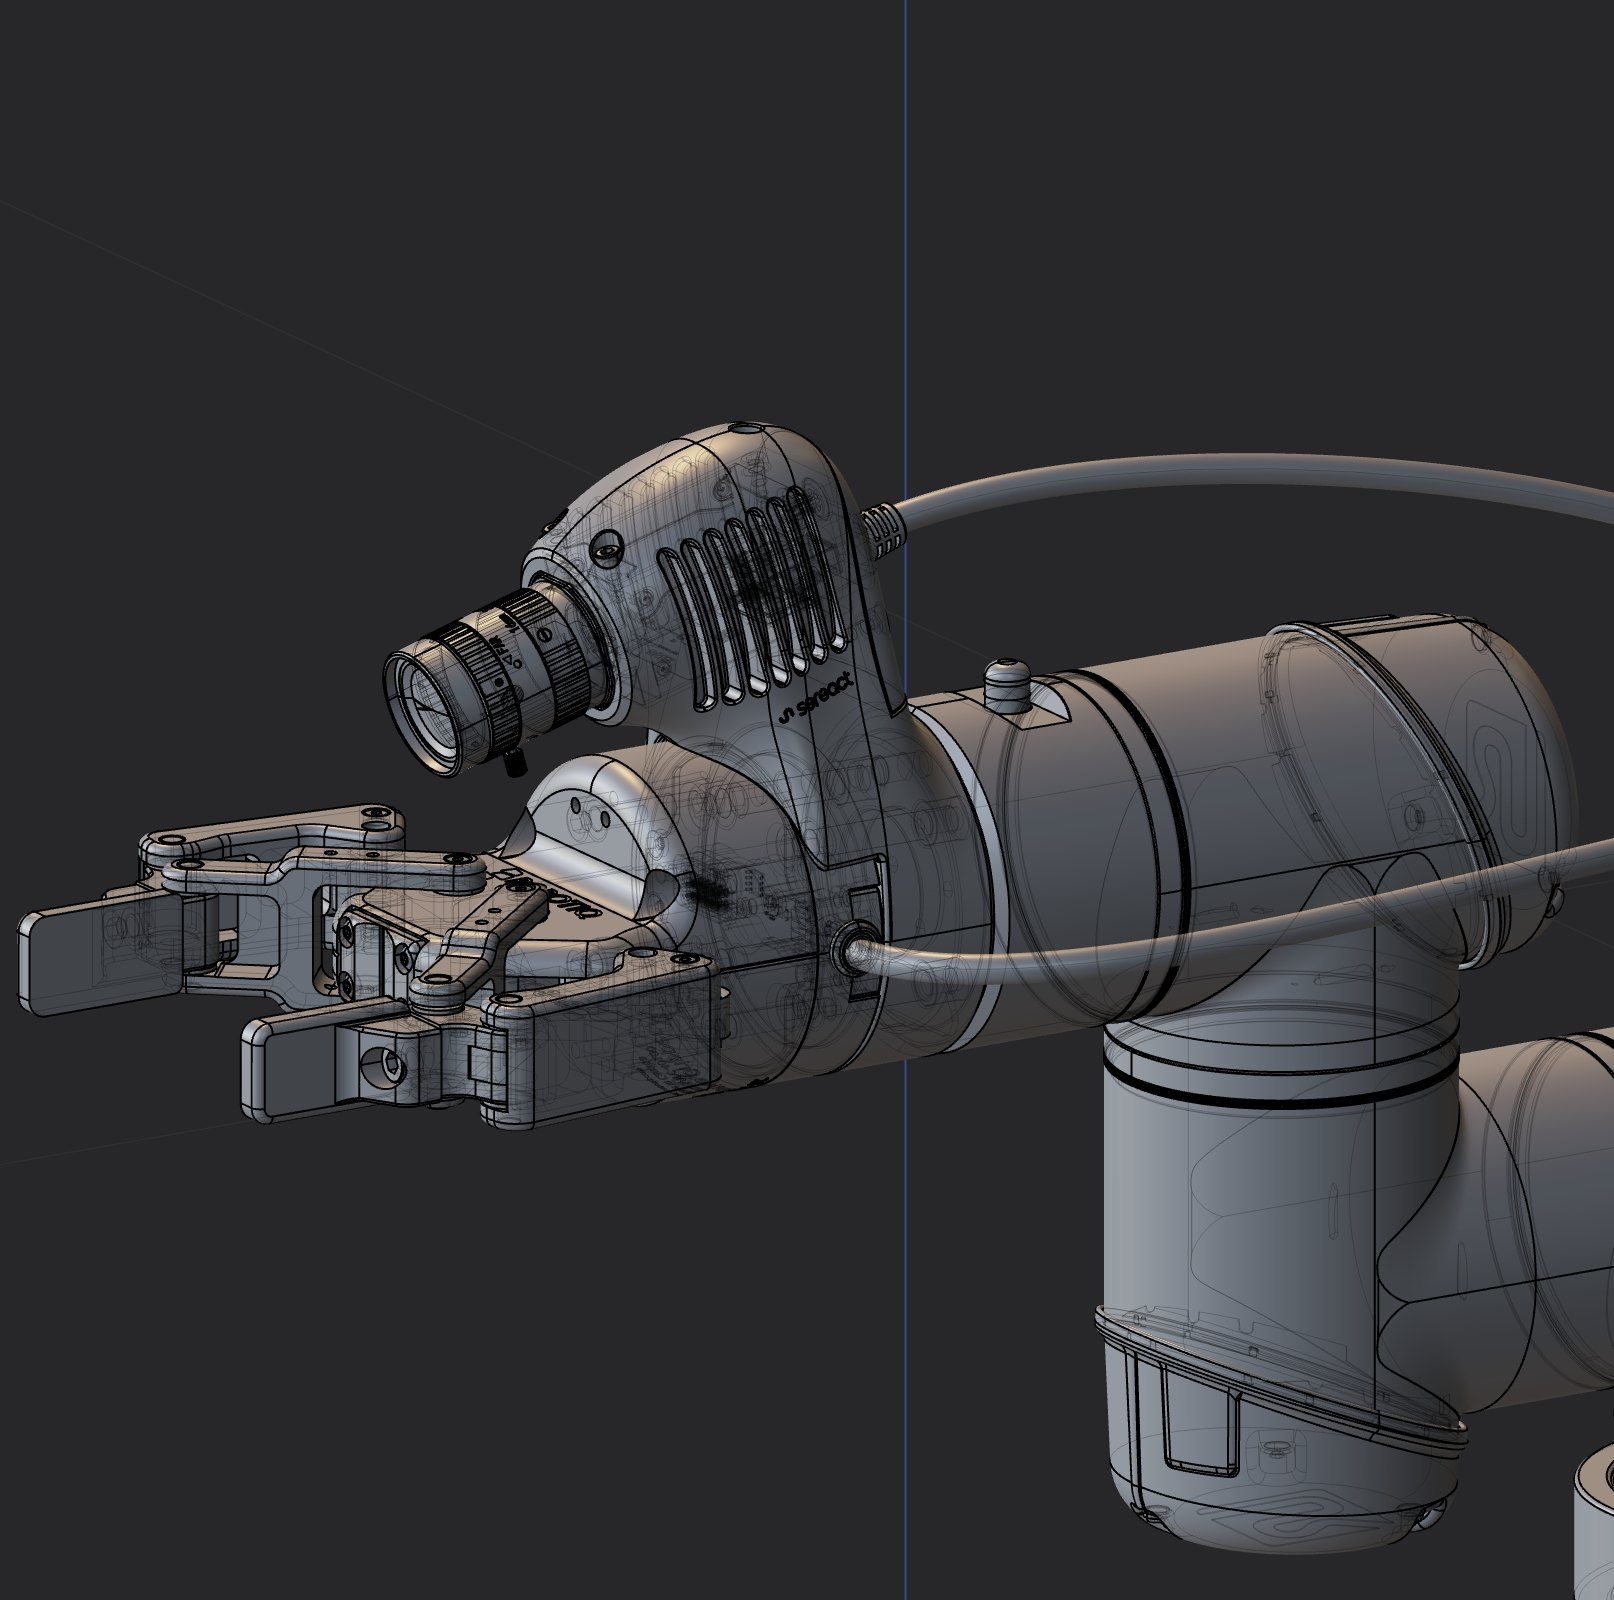
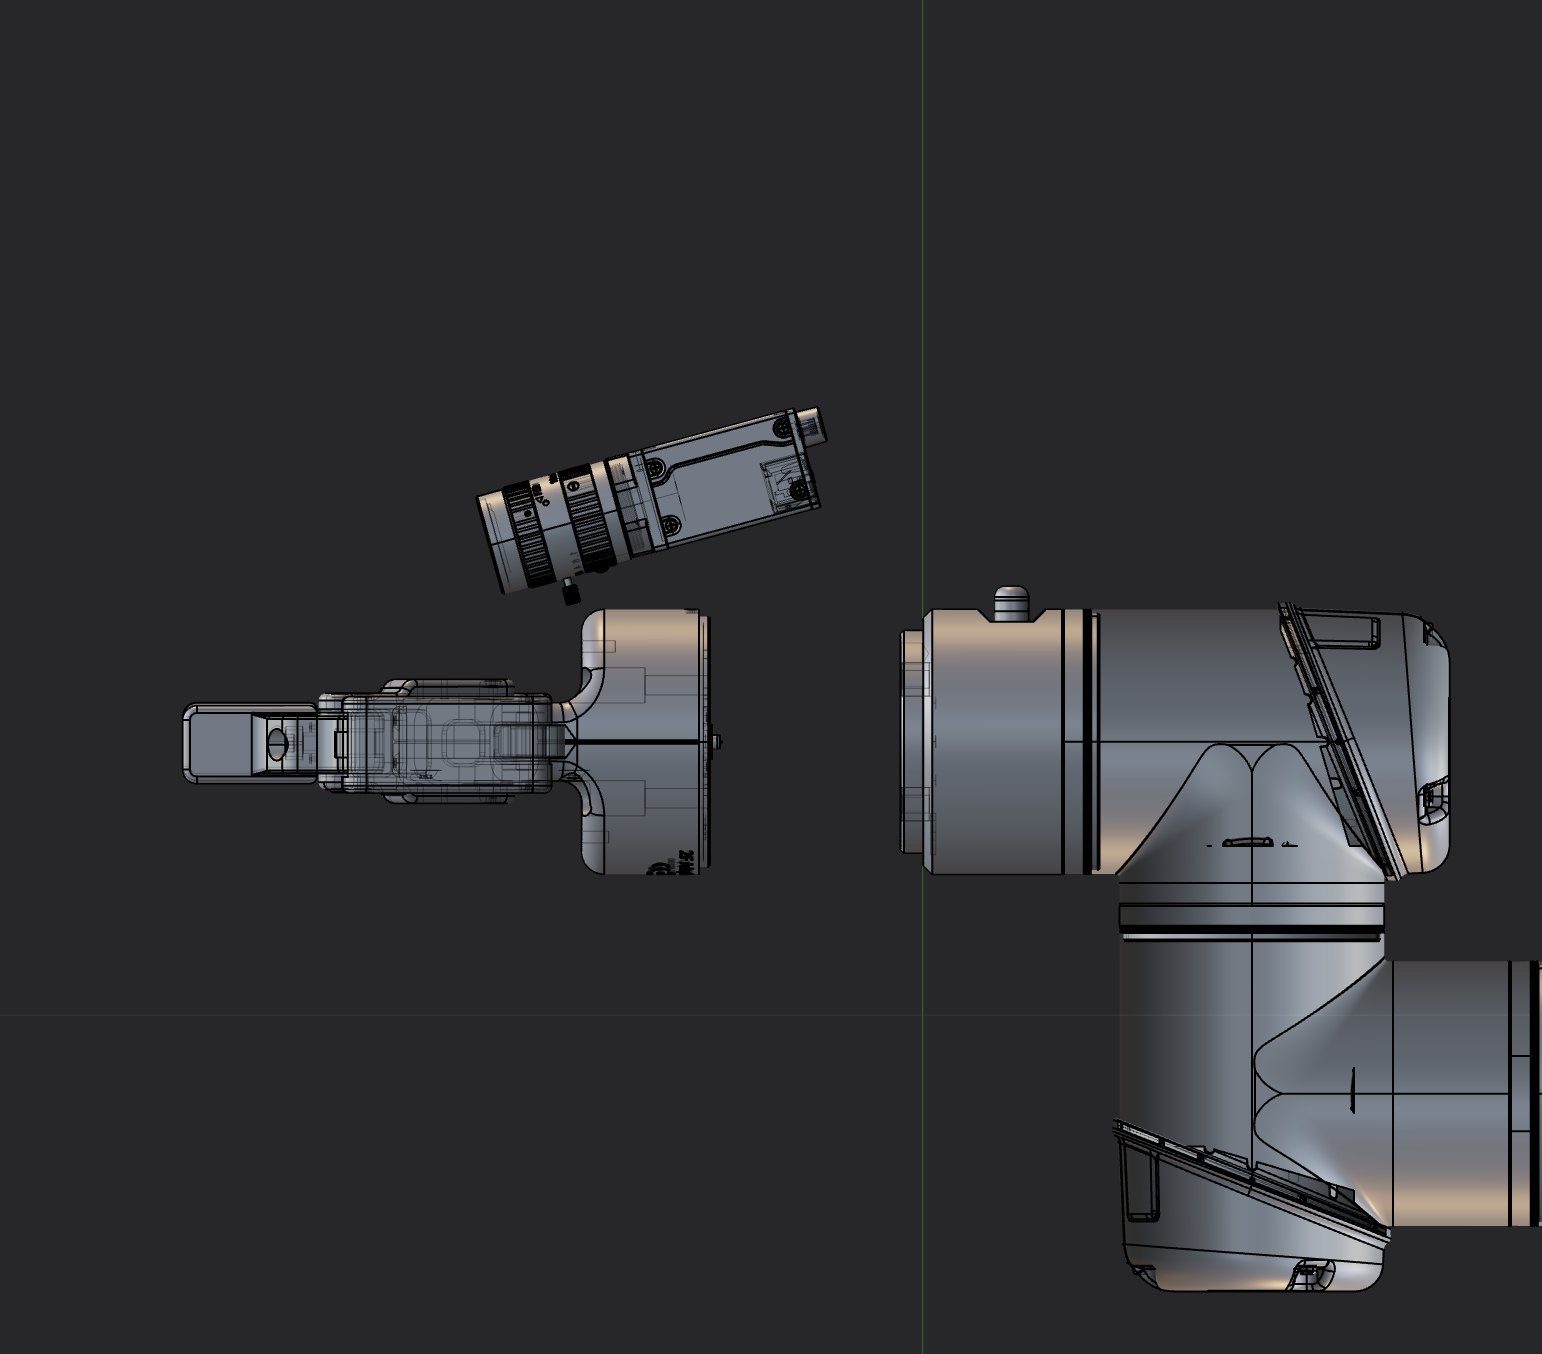
A UR5e robot picks parts with a Robotiq 2F-85 gripper. For vision-guided operation, an industrial camera had to be integrated directly at the wrist – between the robot flange and the gripper.

The goal was an adapter that holds the camera, dissipates its heat passively, guides the cable along the arm and stays within the payload budget – while reading as part of the product rather than an add-on bracket.

Camera adapter with lens and flange interface
Form-Finding & Interfaces

From sketch
to surface

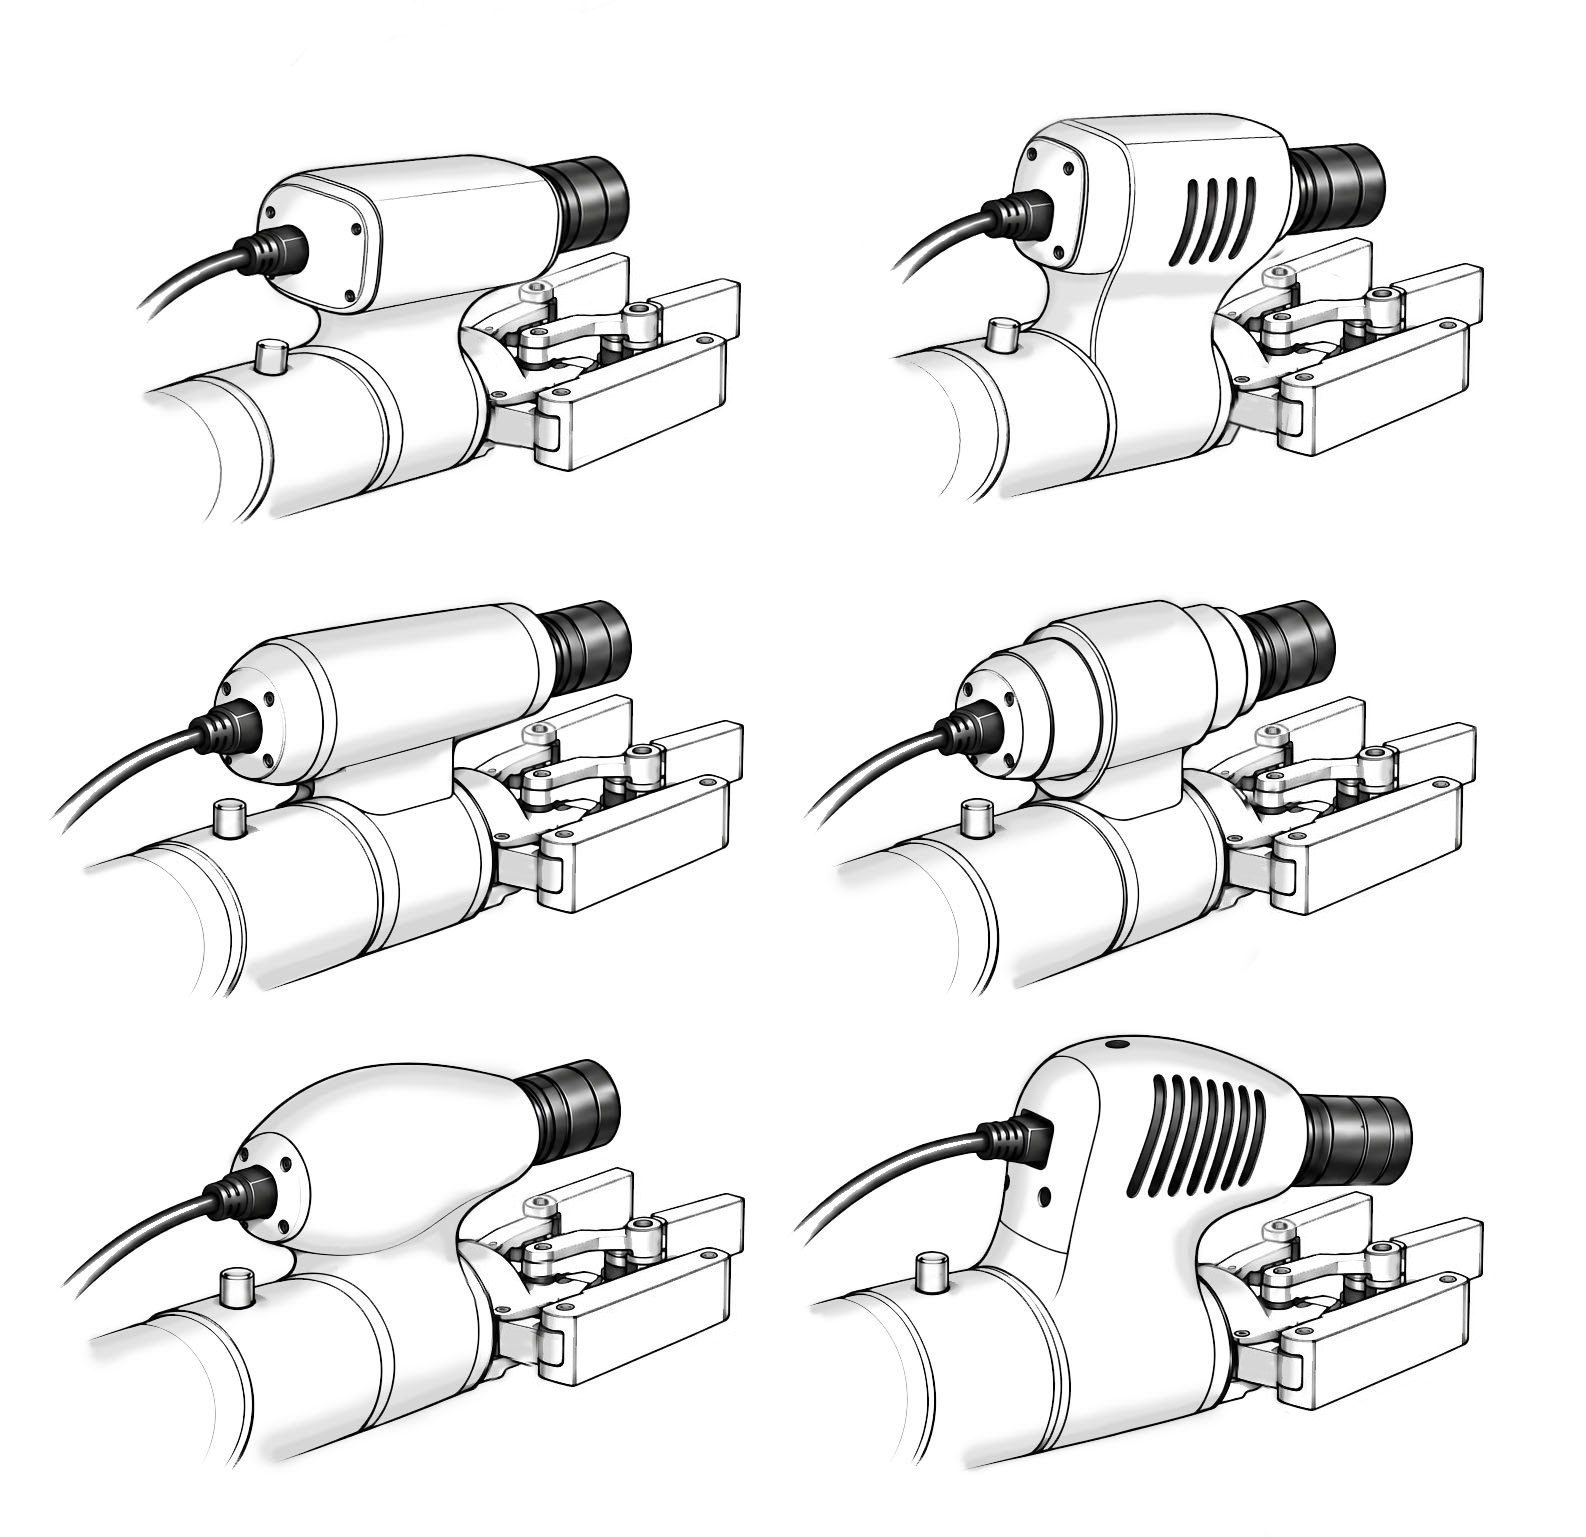
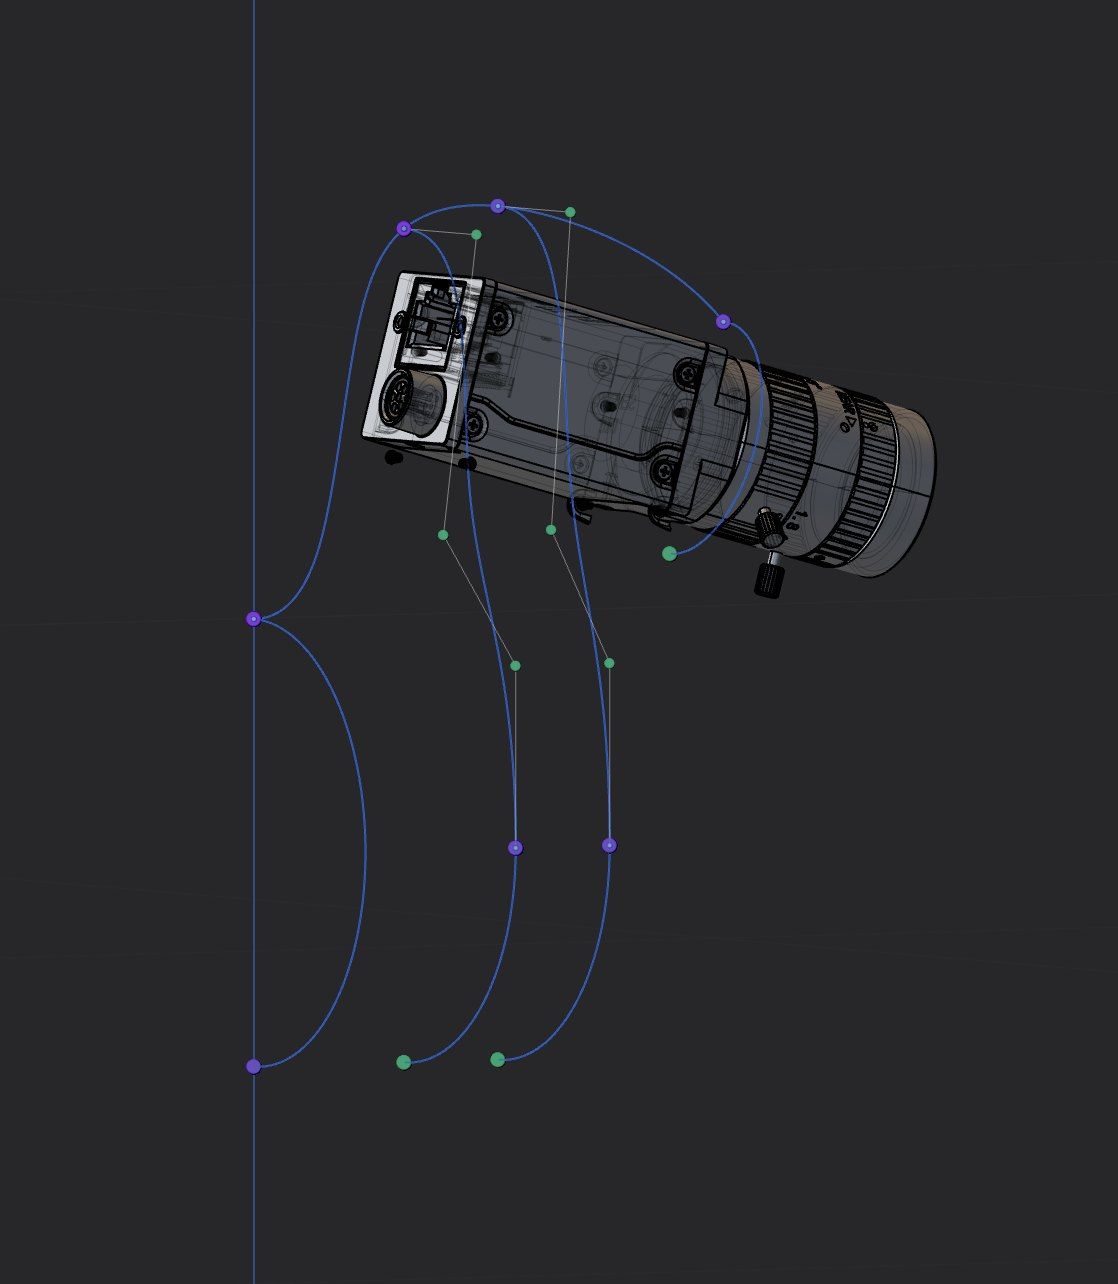
Sketches explored cylindrical, faceted, tapered and stepped geometries. The chosen direction is a compact cylindrical base that continues the round flange and transitions in a controlled way into a camera head tilted by 15°.

The adapter was modelled in Plasticity around reference models of robot, coupling, gripper, camera and lens – from positioning and a curve-based blockout to surface refinement.

Form sketches of the adapter
00Sketches
Positioning
01Positioning
Blockout
02Blockout
Refinement
03Refinement

The adapter follows ISO 9409-1-50-4-M6 and reproduces the flange for the Robotiq coupling exactly. Four M6 screws clamp coupling, adapter and robot in one go – without a second, overlapping hole pattern.

The 5 MP camera slides in from the rear, is pulled against the machined top face by three M3 screws and closed by a rear cover. The gripper can still be changed independently.

Heat Dissipation & Cable Routing

The body is
the heat sink

The camera dissipates about 4.5 W. Instead of a fan, the aluminium body acts as the heat sink: thermal pads and direct metal contact conduct the heat into the body, and cooling slots on the head increase its surface area.

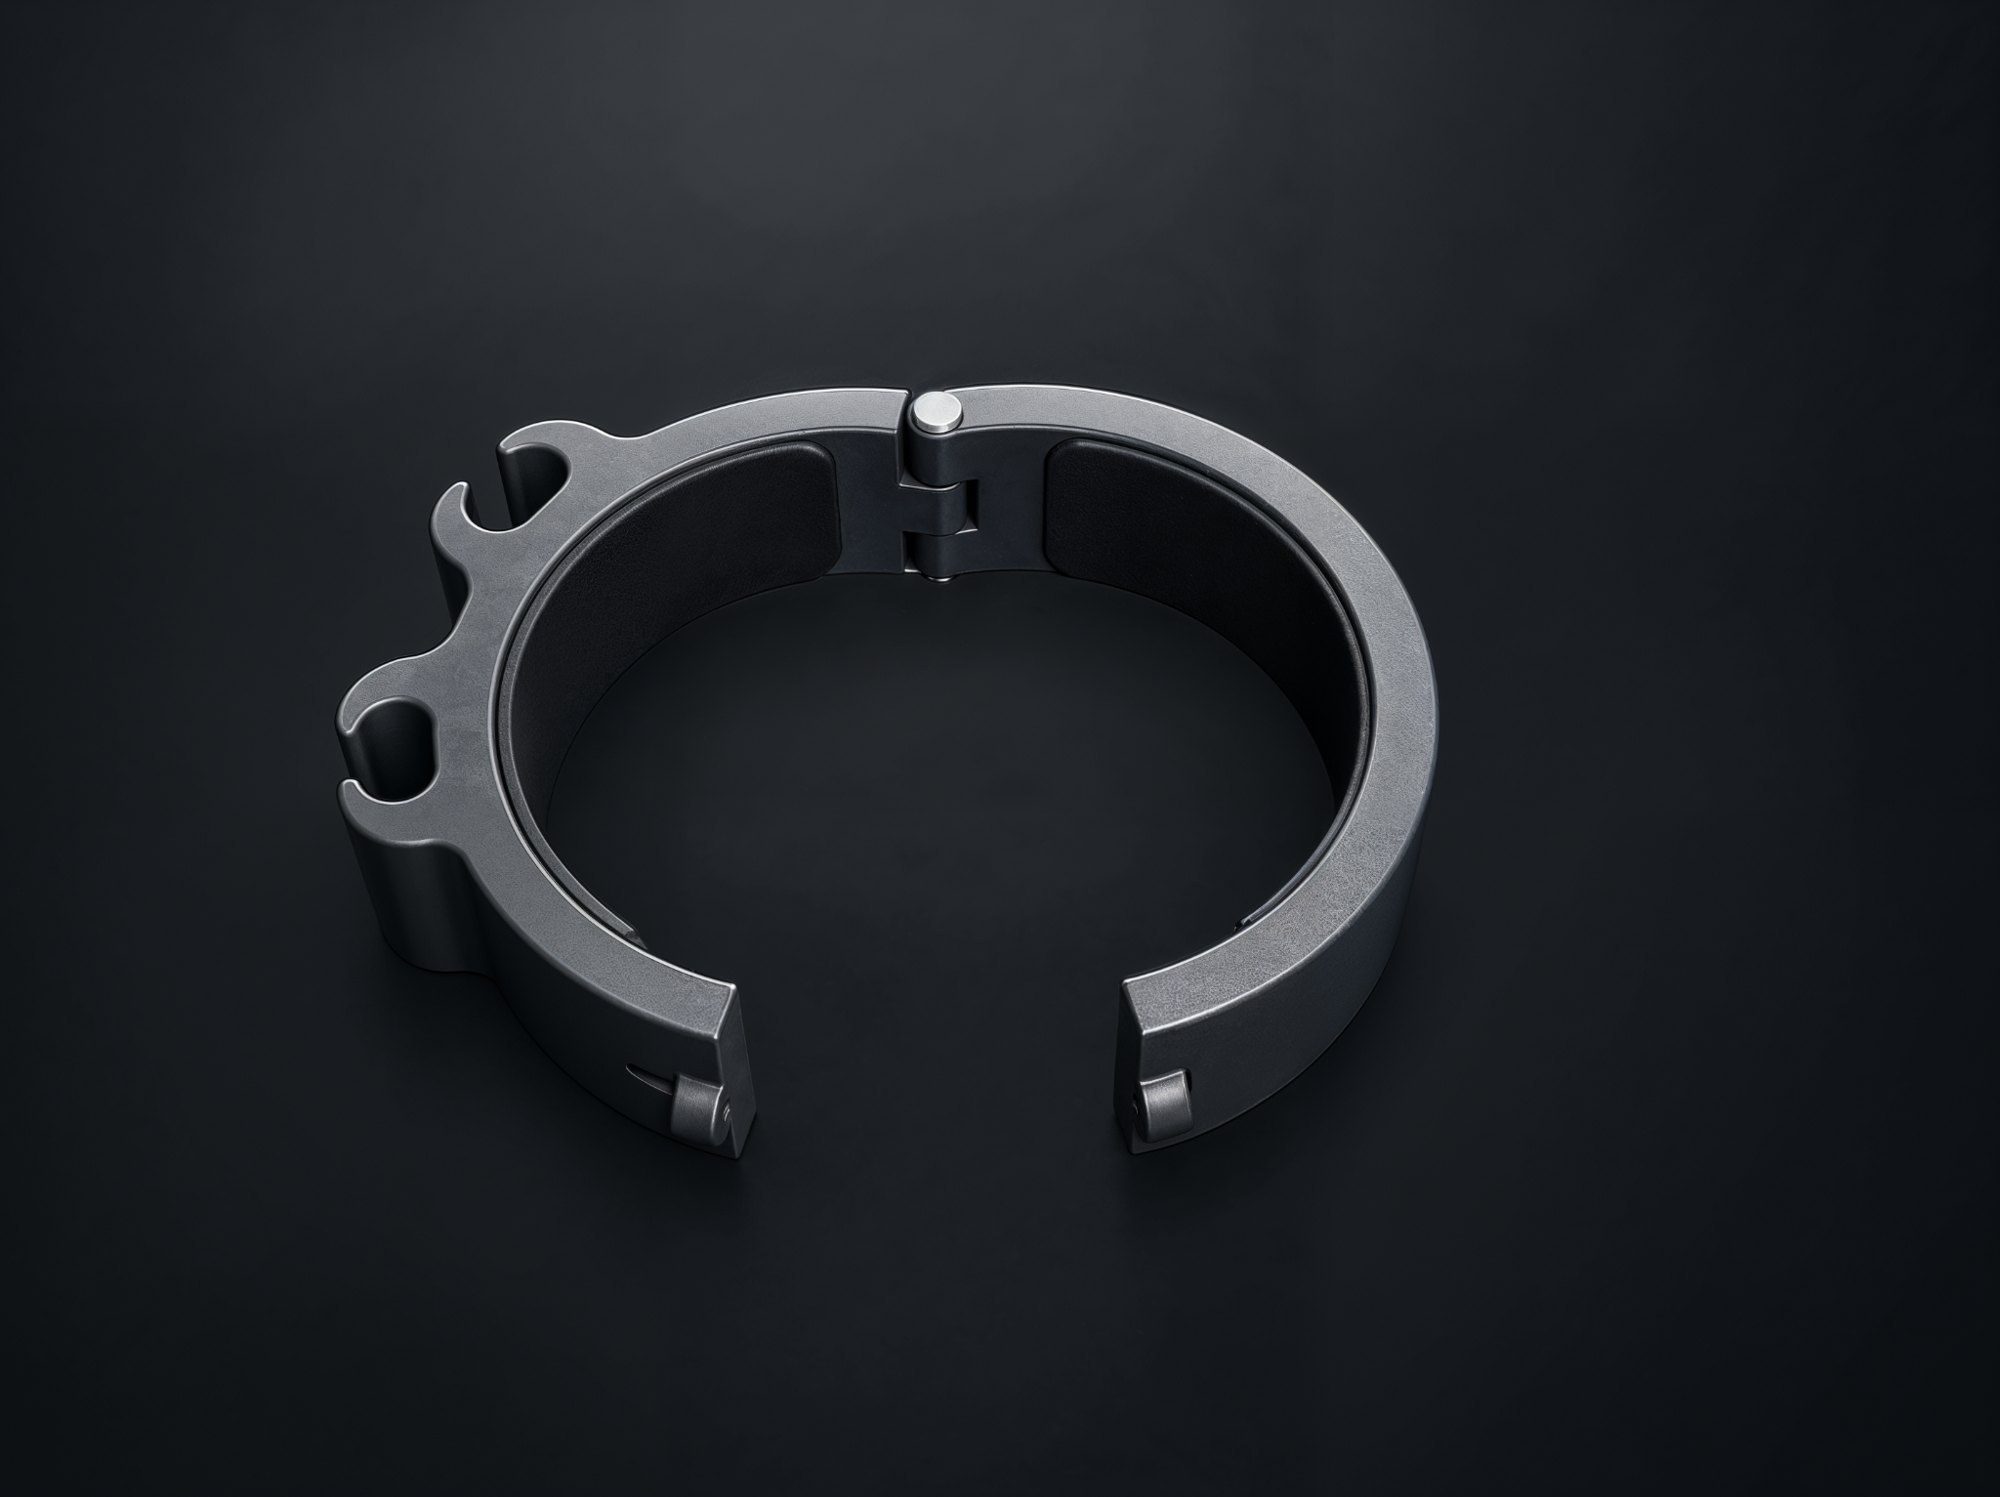
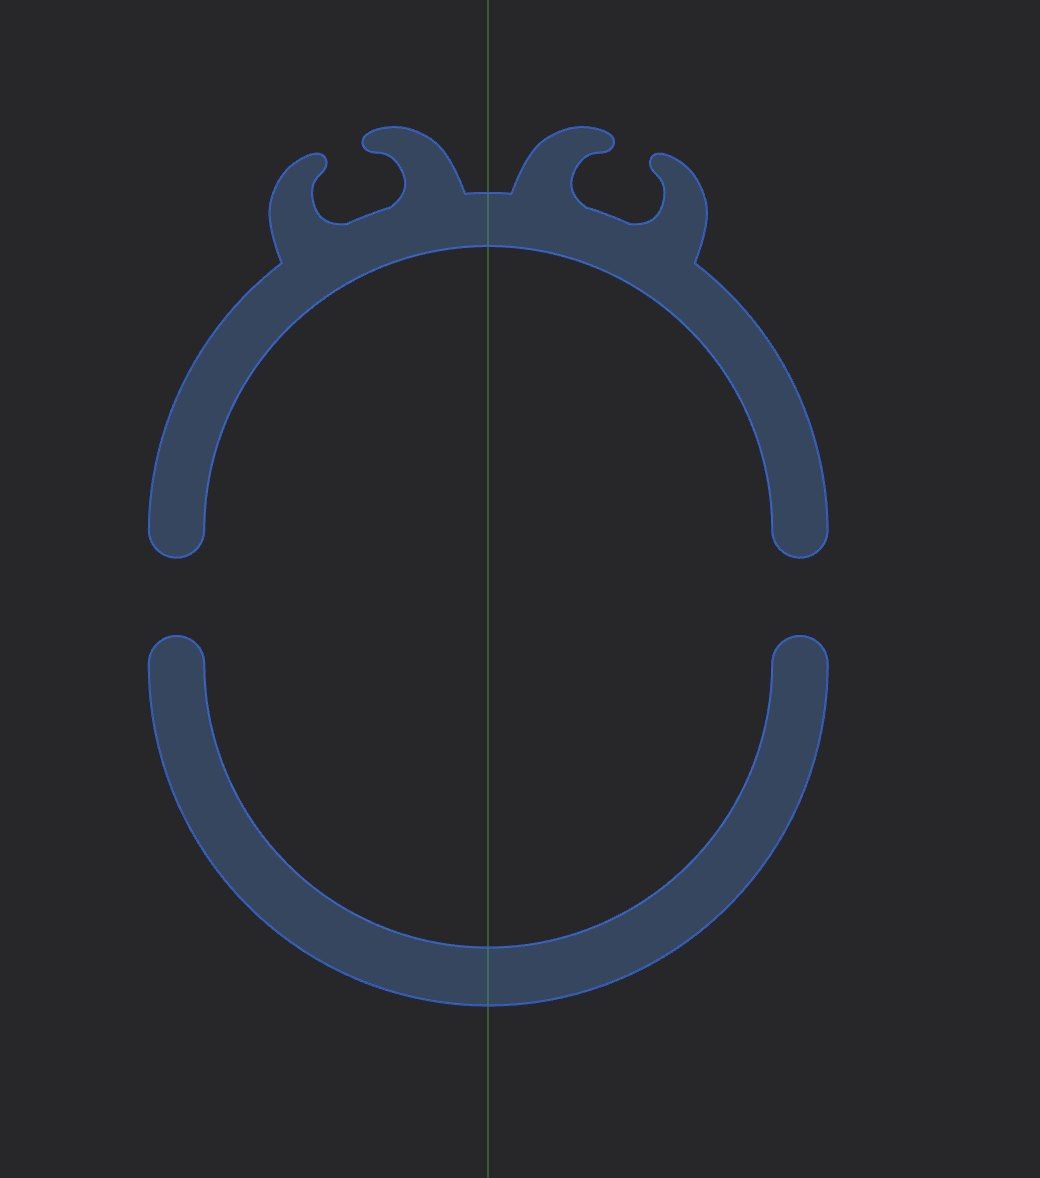
Camera and gripper cables run in service loops across the wrist joints and are guided by split clamps that can be fitted without dismantling the arm.

Adapter, cover and clamps are 5-axis milled from EN AW-6082-T6 and anodised in anthracite – the whole system reads as one product family.

Split cable clamp
Split cable clamp section
4.5
Watts of waste heat
40
Degrees housing at
30 degrees ambient
0.59
kg adapter
Payload UR5e / 5 kg
Gripper0.9 kg
Adapter0.59 kg
Coupling0.15 kg
Camera0.1 kg
Other0.2 kg
Free3.1 kg

With a tool mass of about 1.9 kg, roughly 3.1 kg of the 5 kg payload remain for the part; for heavier parts the adapter fits the UR7e unchanged.

03
Chapter 03 — Fraunhofer IWU Dresden

A screwdriver
printed with its wiring

Fraunhofer IWU researches production systems that print complete products, including their electronics, in one automated process. A key technology is WEAM (Wire Encapsulating Additive Manufacturing): the print head embeds electrical conductors directly into the part while printing.

My task was to demonstrate the process on a tangible product – a cordless screwdriver whose housing already contains its wiring. No soldering, no loose cables, no manual wiring.

Printed screwdriver held in hand
Starting Point

Taking apart
to rebuild

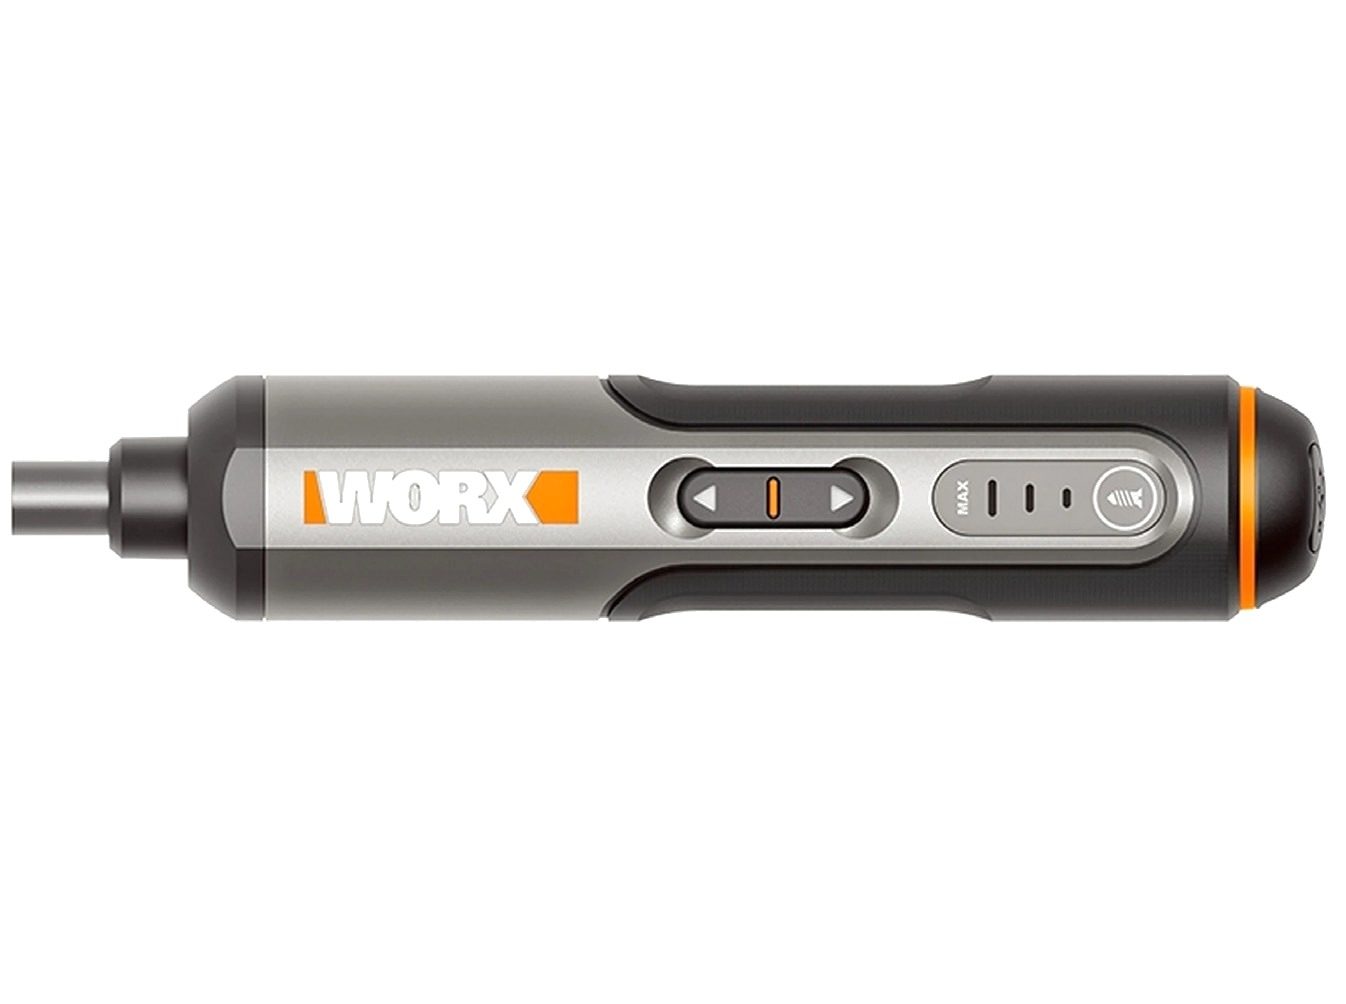
The technical basis was the 4-volt Worx WX240 cordless screwdriver. I took it apart completely to understand its structure and function and to identify the parts that could be reused.

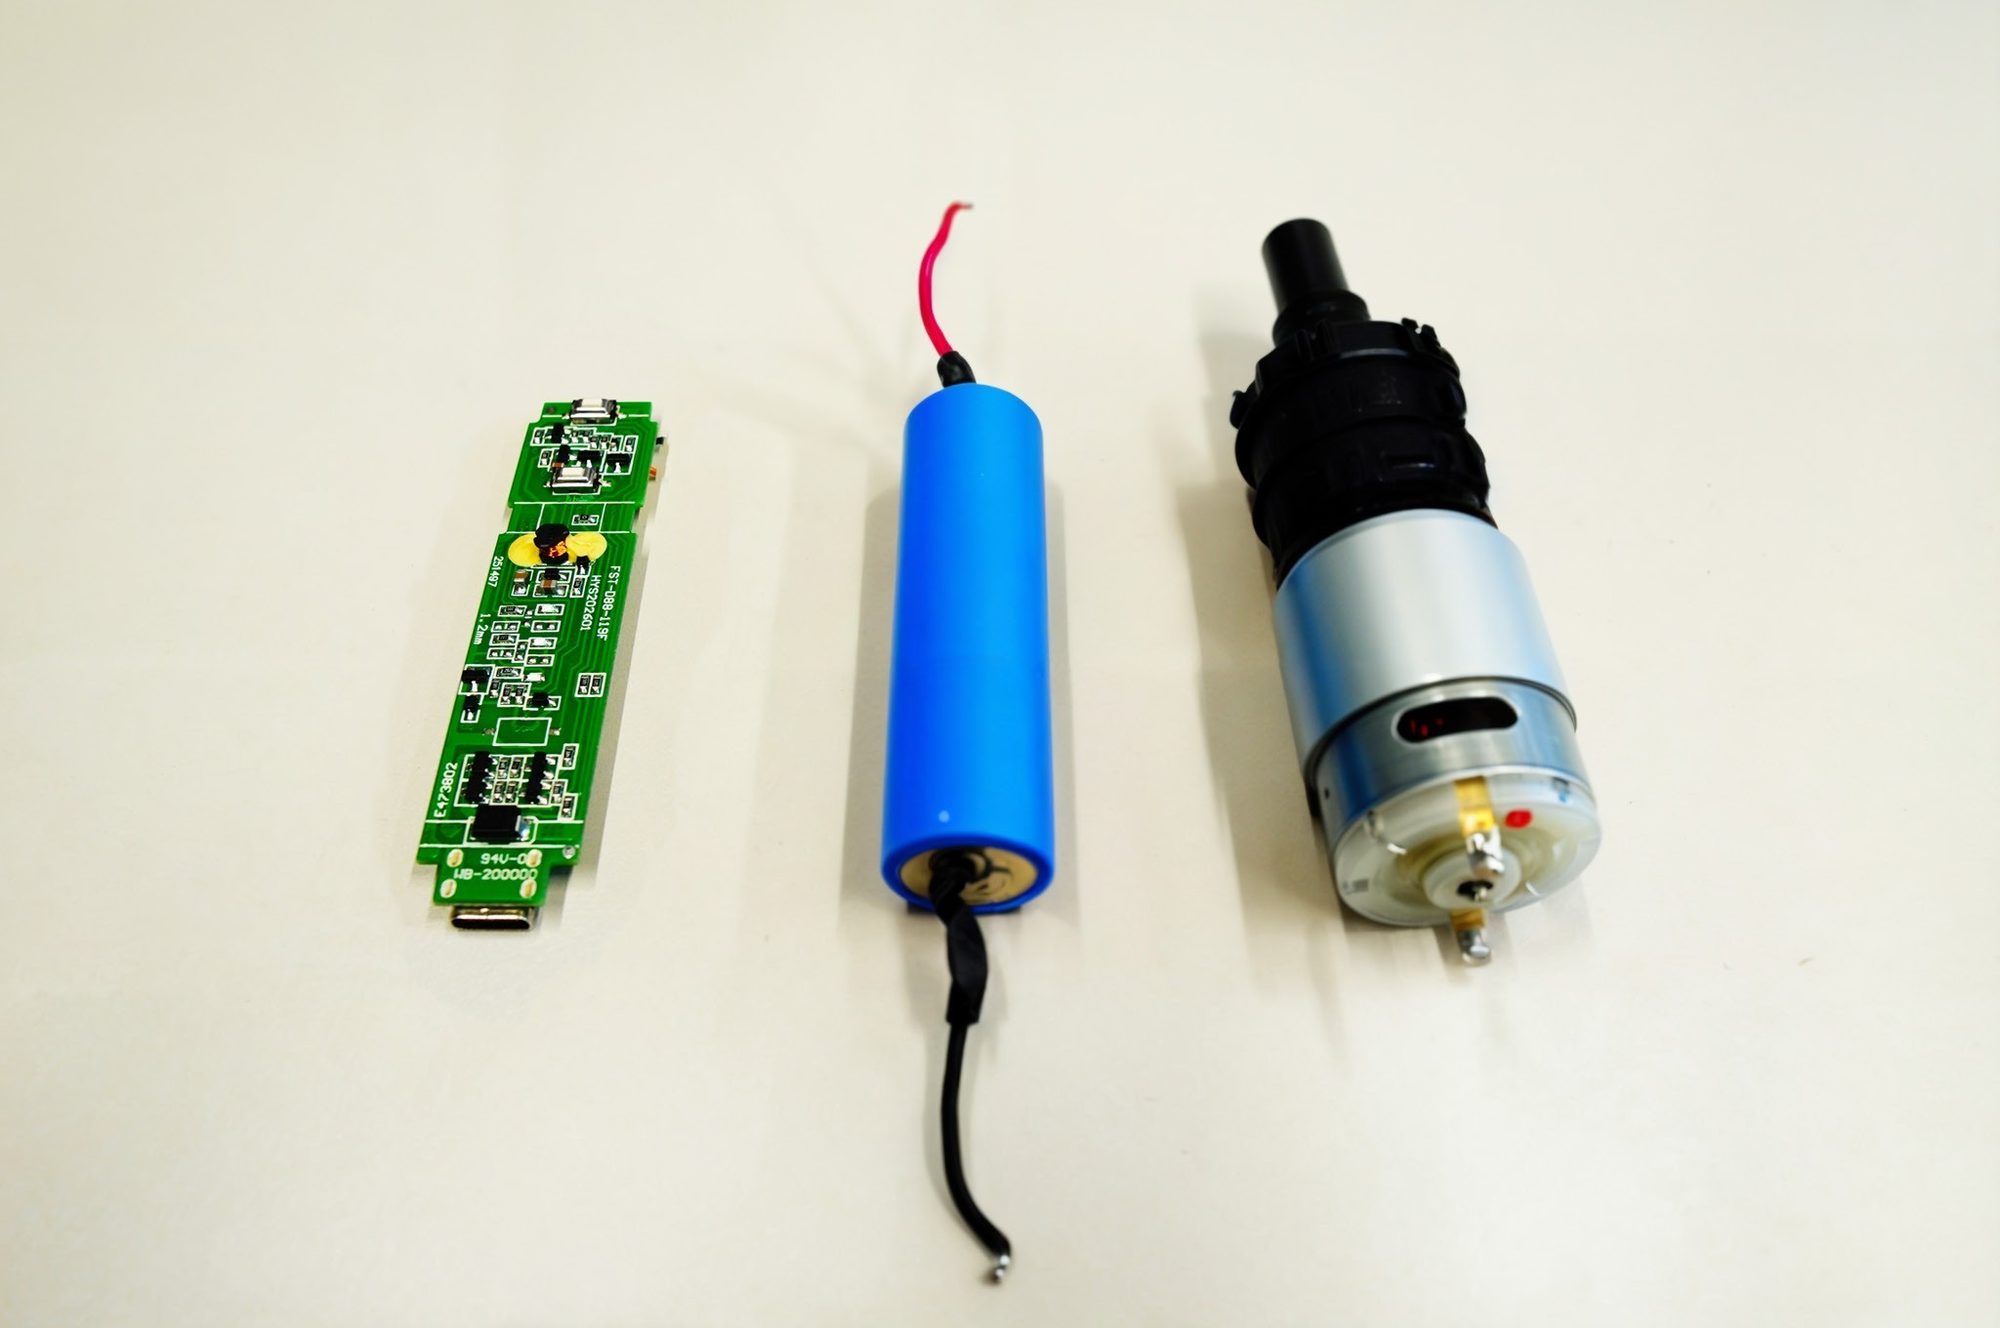
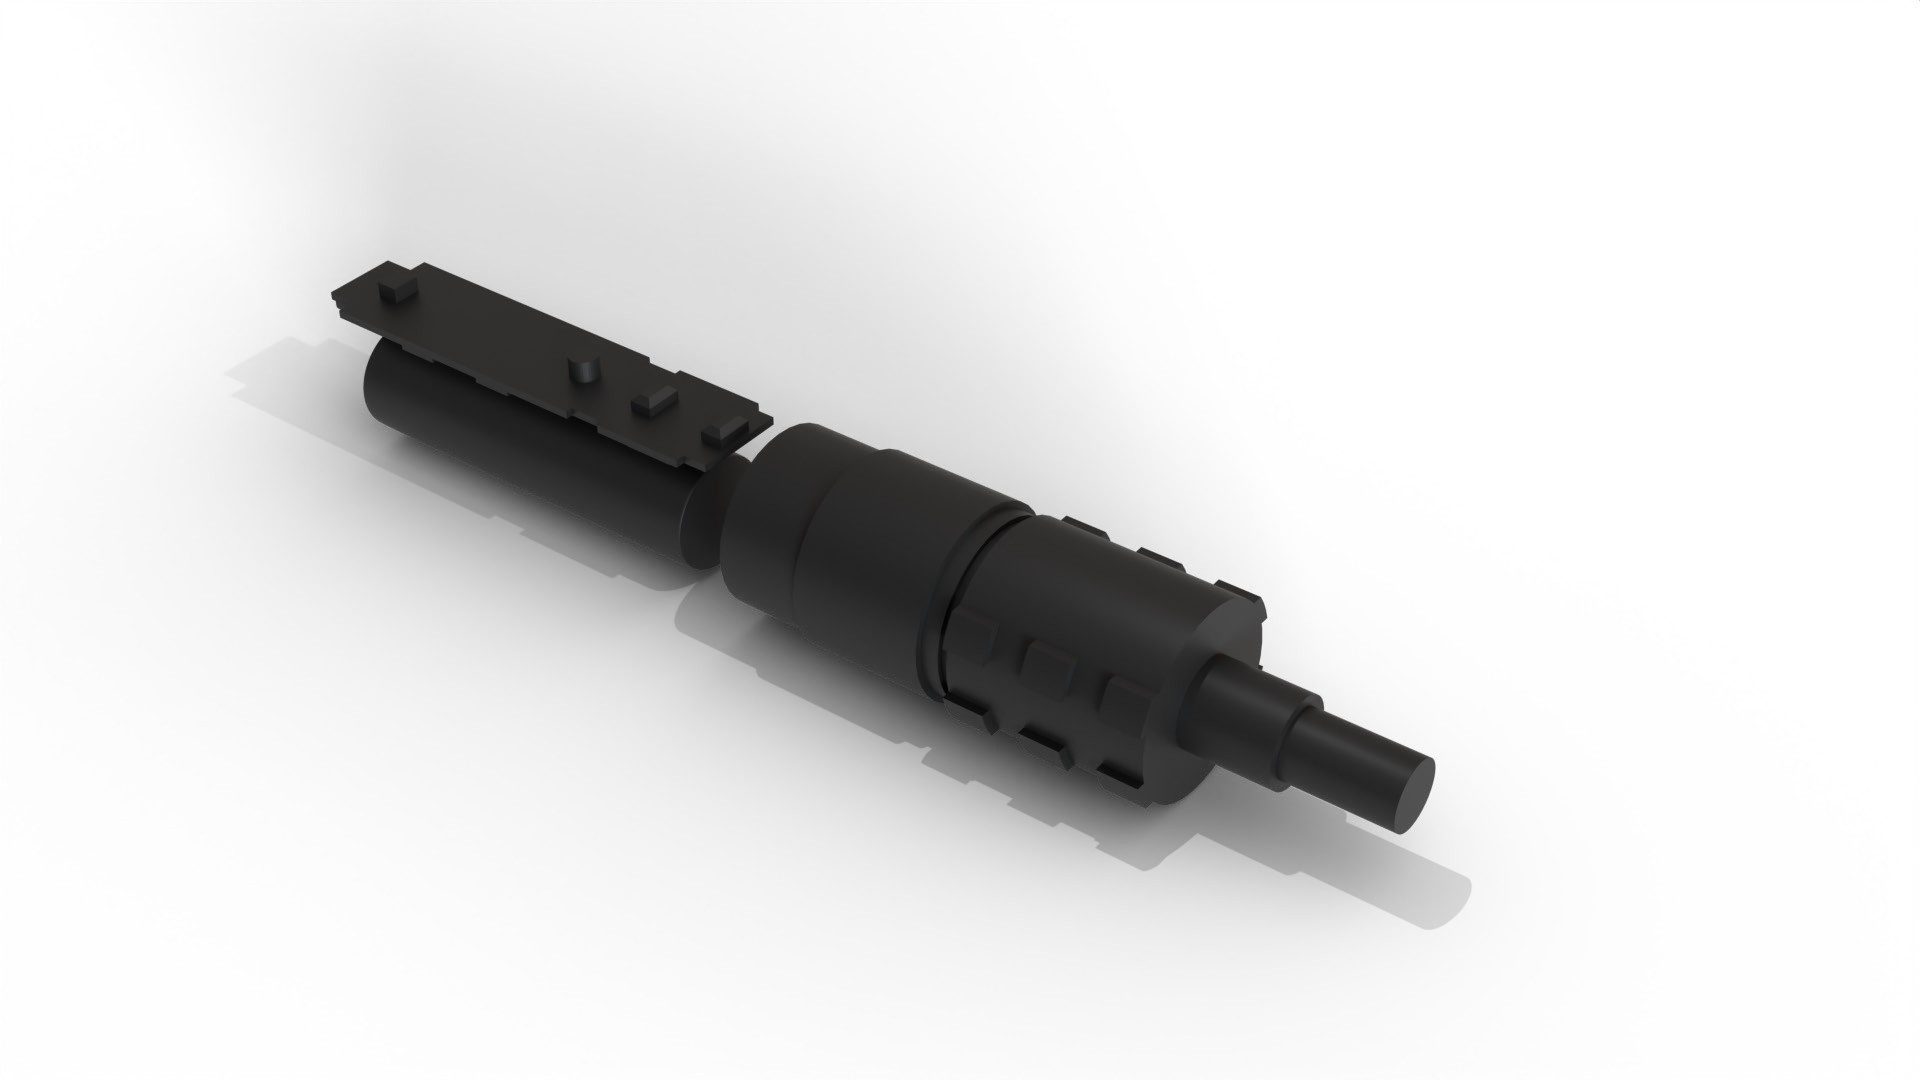
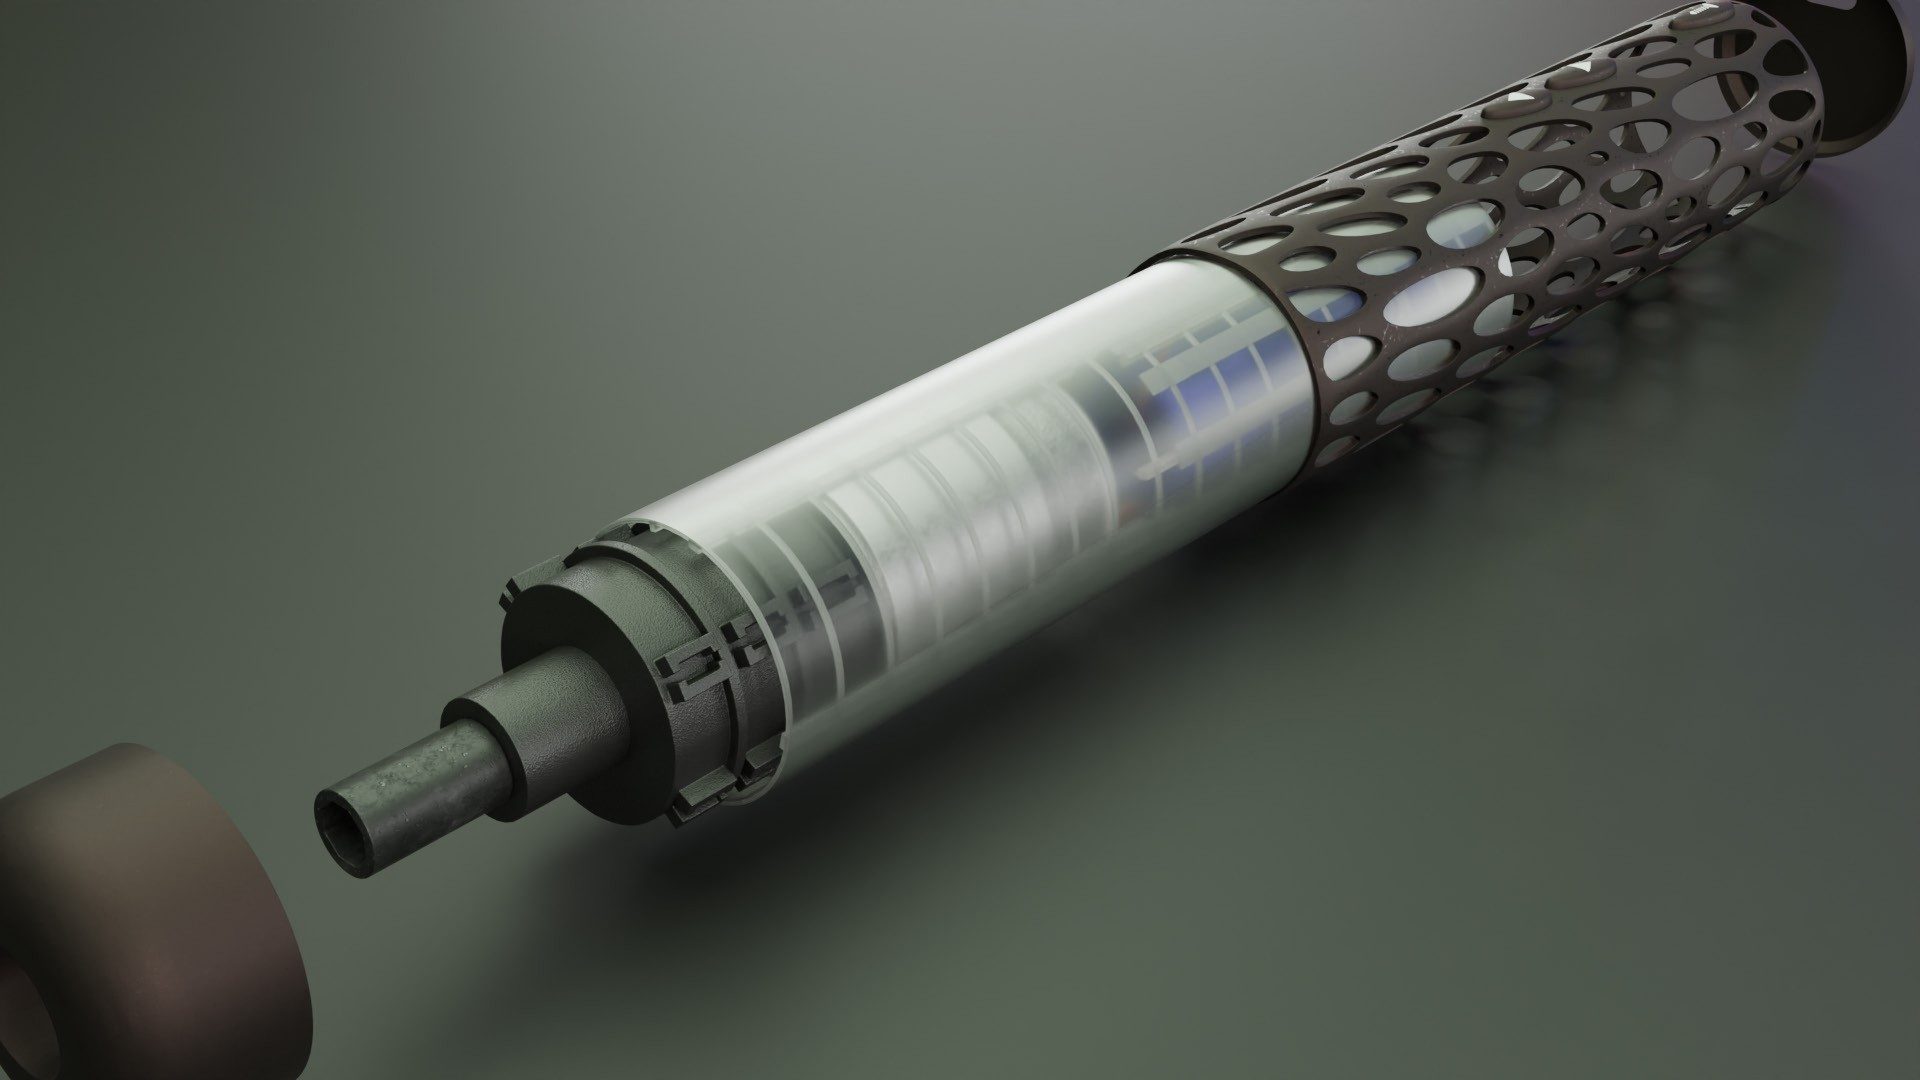
Circuit board, battery, motor and gearbox were carried over. Each component was measured and remodelled in SolidWorks – so the exact installation space the new housing had to hold was known.

Reference device Worx WX240
Reference Device
Reused components
Reused Components
CAD rebuild
CAD Rebuild
Print Flat, Then Form

A two-stage
process

A housing printed in the round would be stable, but needs a lot of support material and long print times – and conductors can hardly be embedded cleanly. This led to a two-stage process.

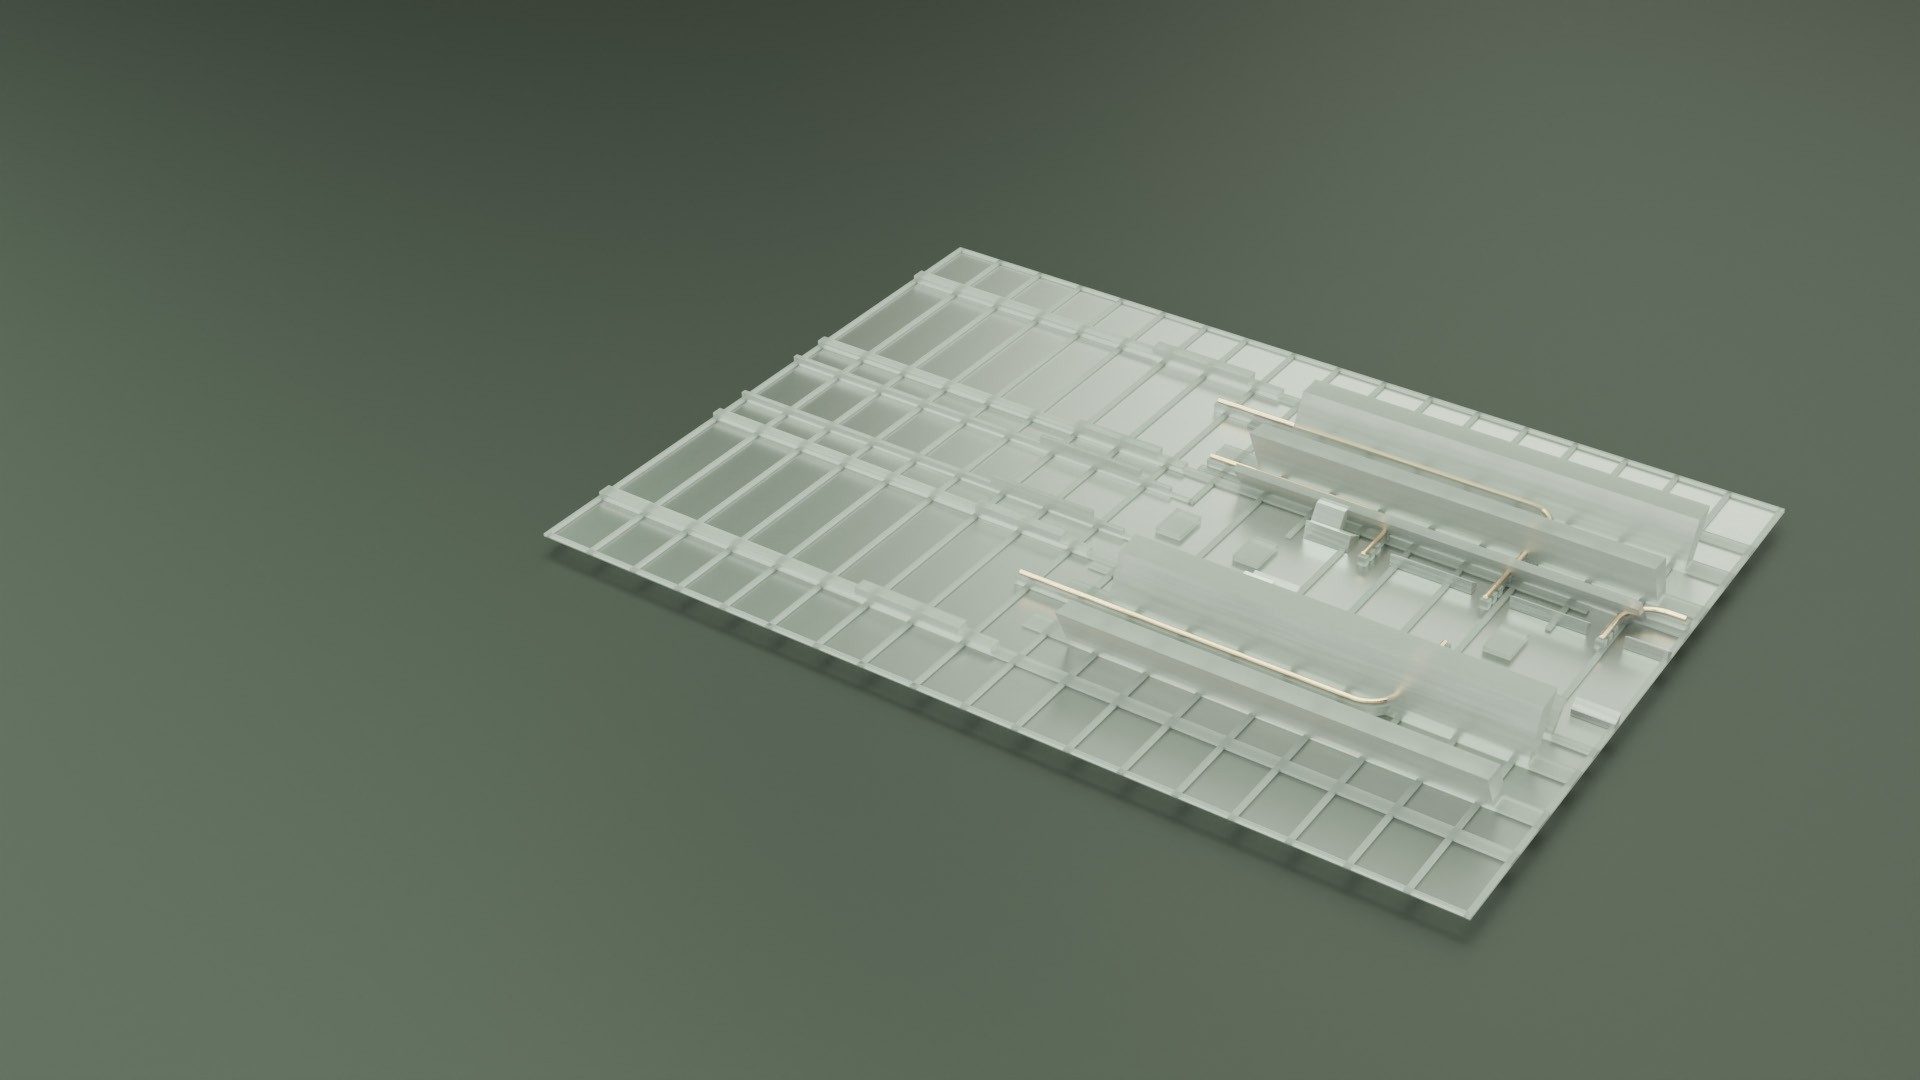
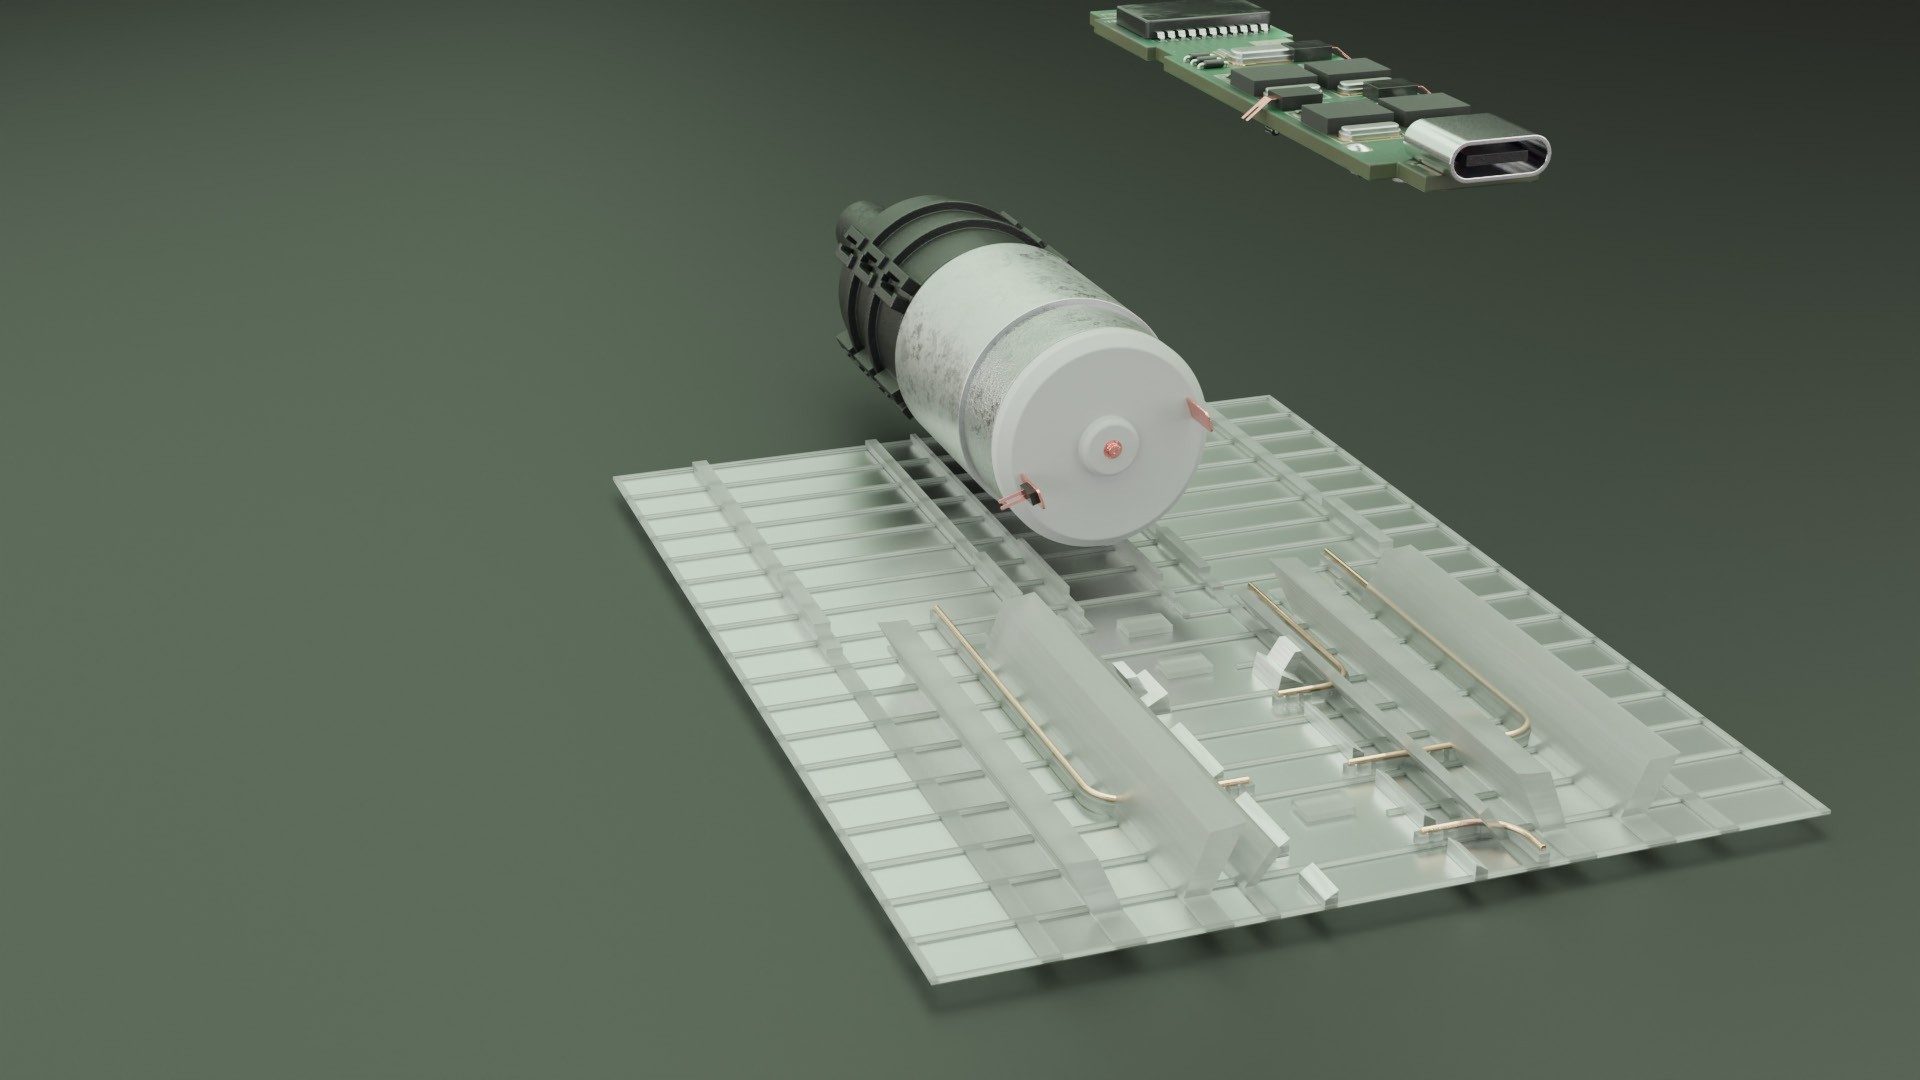
The housing is printed flat with the conductors embedded during printing. Only then is it bent around the components into its round shape – closing the electrical contacts at the same time.

Flat print
01Flat Print
The base structure is printed flat on a carrier film; the conductors are printed in directly.
Assemble
02Assemble
Motor, gearbox, battery and board are placed into precisely fitting cut-outs.
Form
03Form
The halves close into a tube, creating the electrical contacts in the process.
Contacting

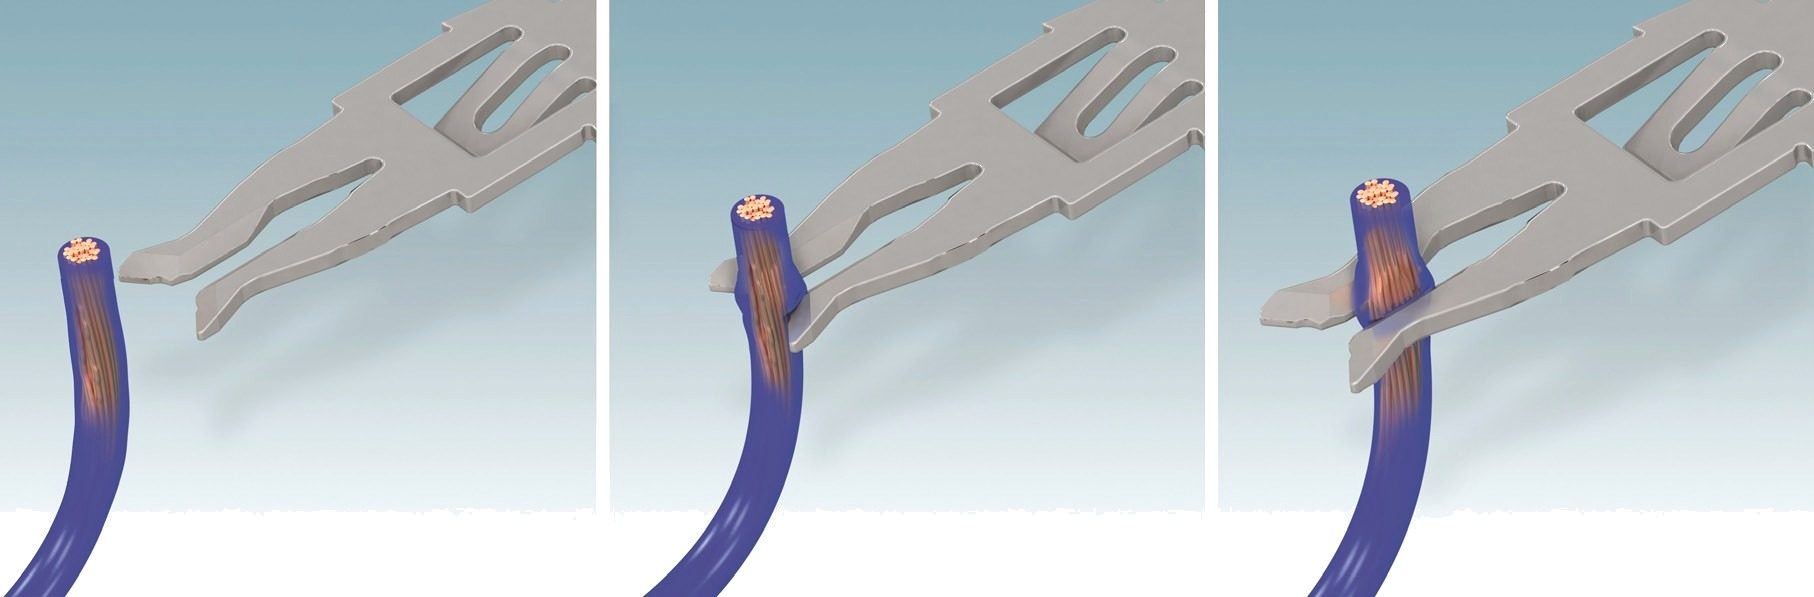
Insulation displacement contacts (IDC) make the connection: their forked edges cut through the insulation when pressed in and contact the conductor – no soldering, gas-tight, vibration-proof and easy to automate.

Insulation displacement contact sequence
Unfolding

No software
for this shape

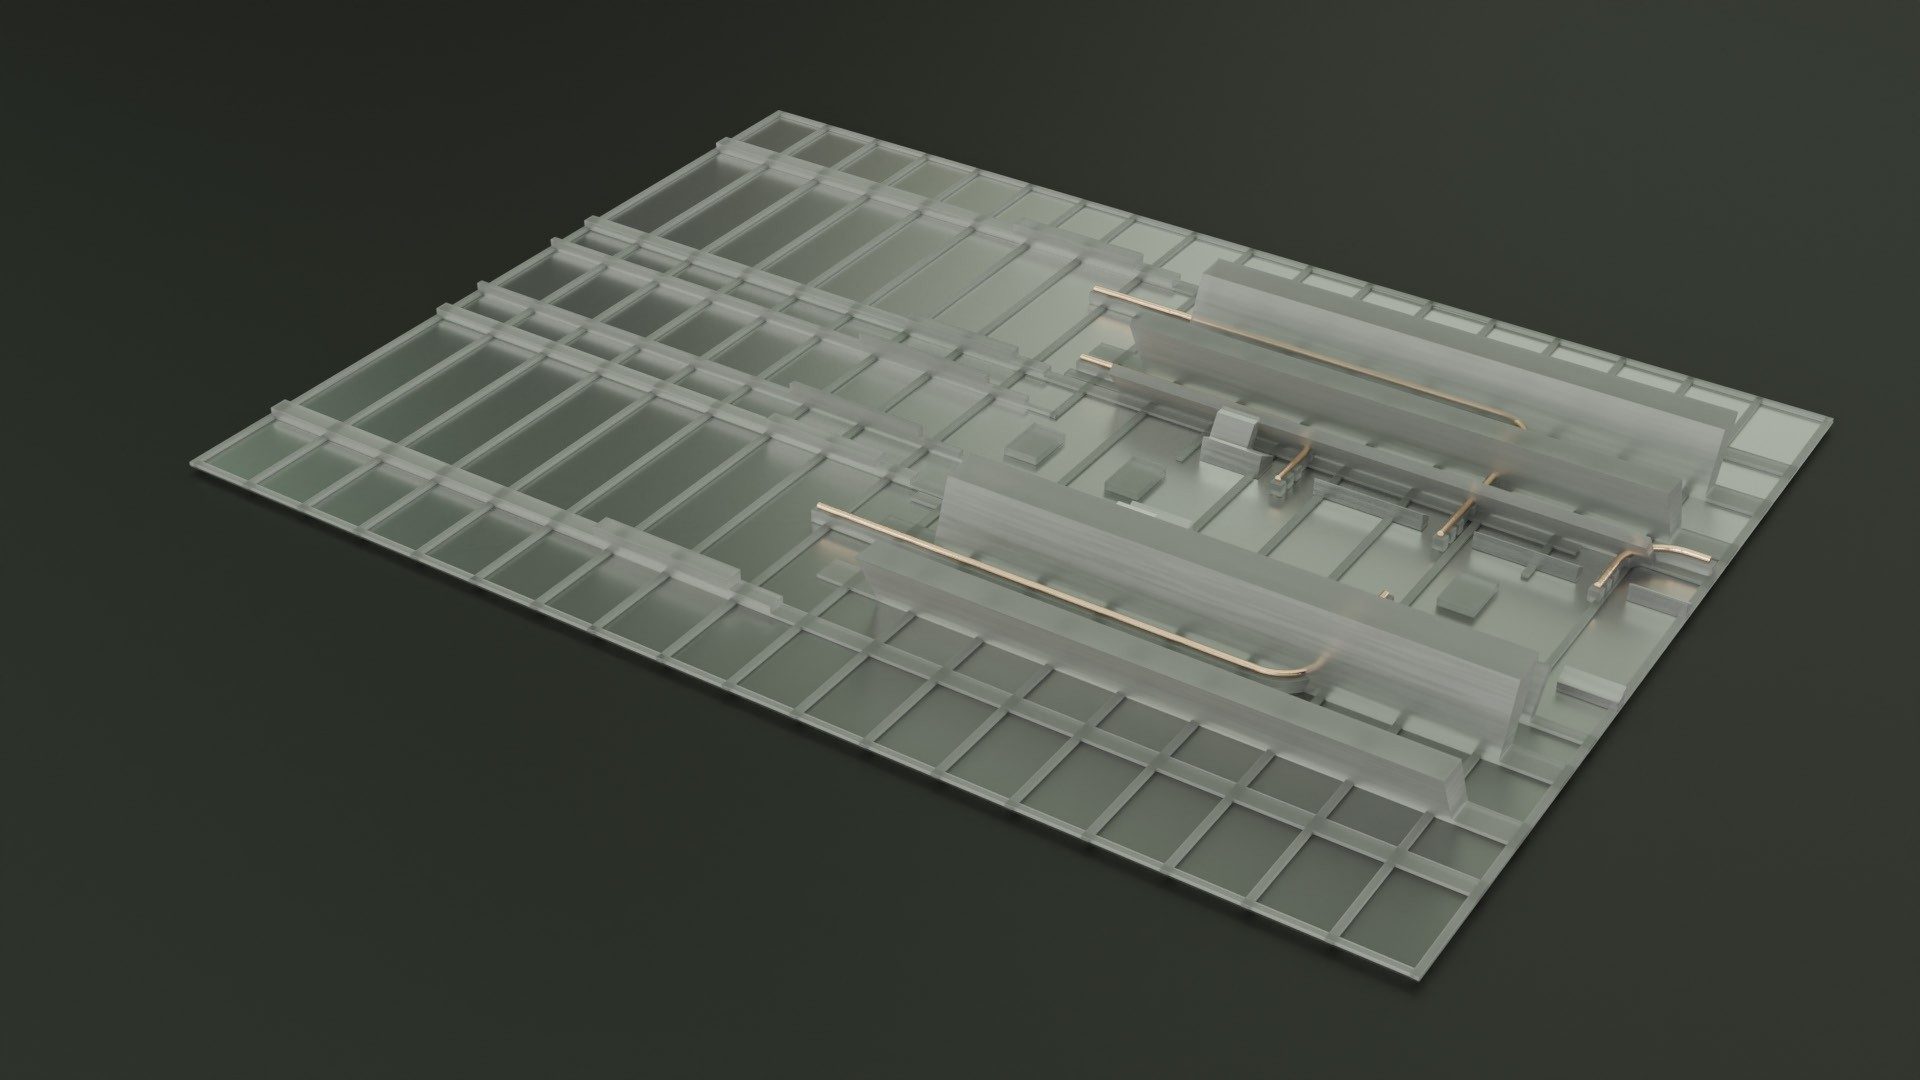
The biggest hurdle: the round housing with all its cut-outs had to be translated into a flat print template. No standard software exists for unfolding such a complex shape.

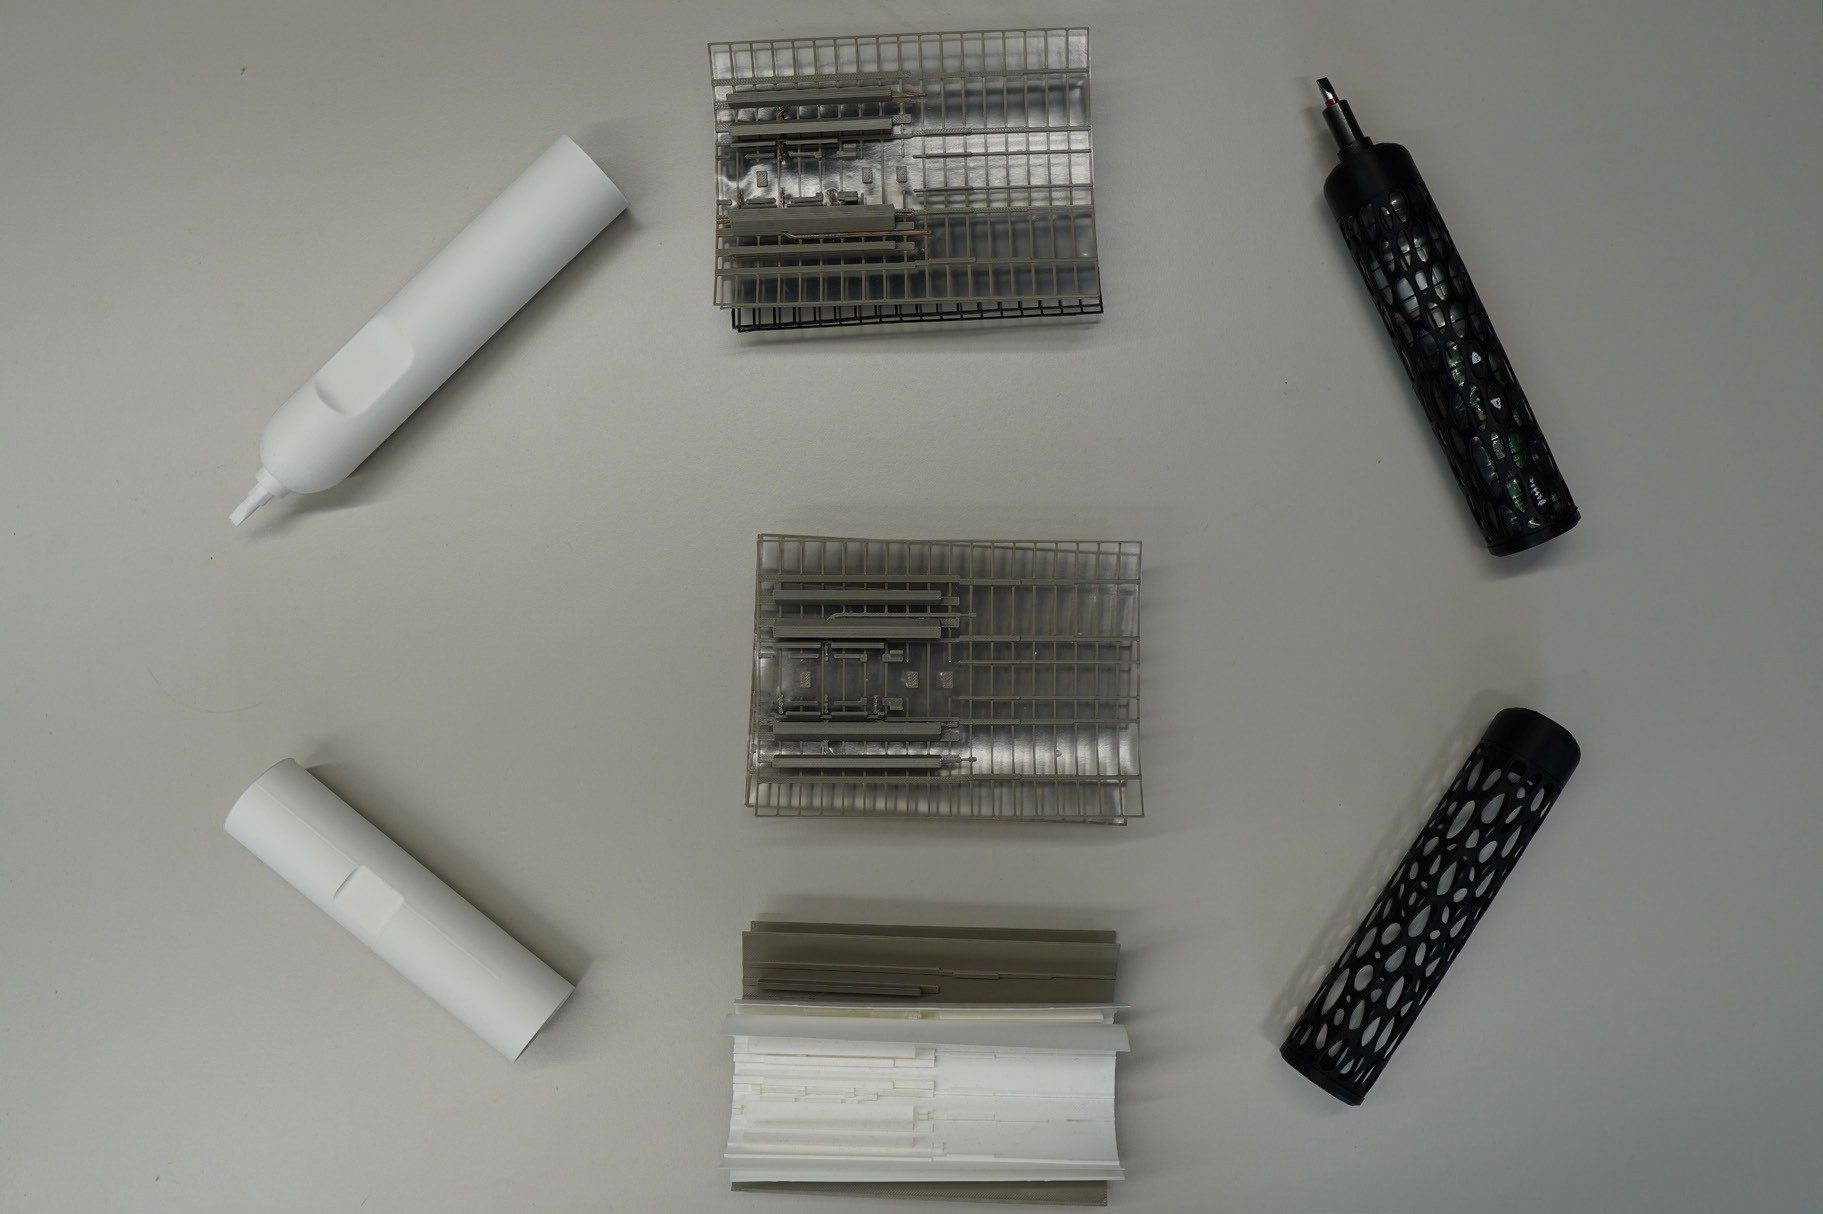
I therefore unfolded the geometry iteratively – printing it, bending it around the real components and adjusting it until the flat template fitted exactly after forming.

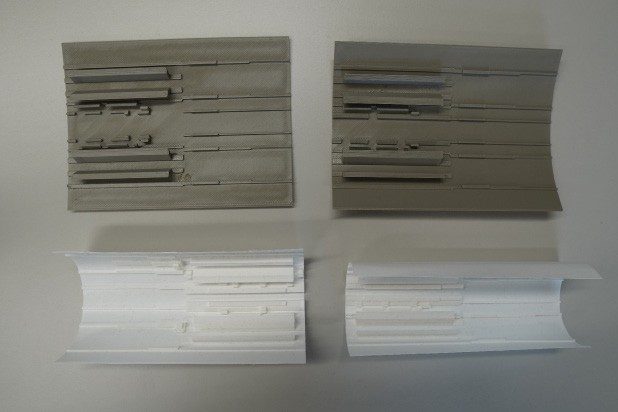
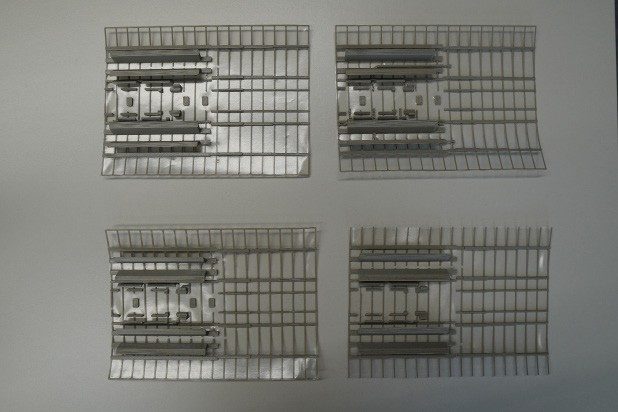
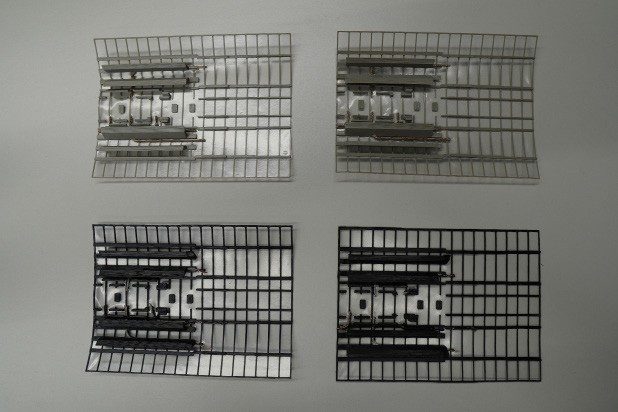
Printed iterations and formed housings
Iteration 1
Iteration 2
Iteration 3
Iterations of the flat print template
Final flat print template with conductors
Design

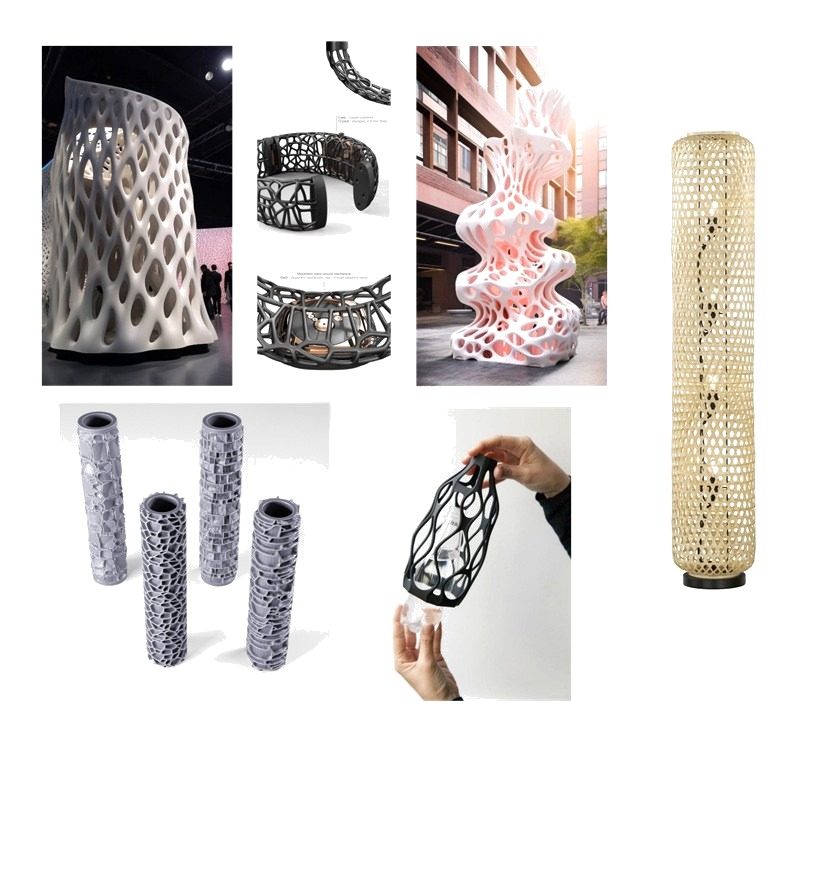
A Voronoi
shell

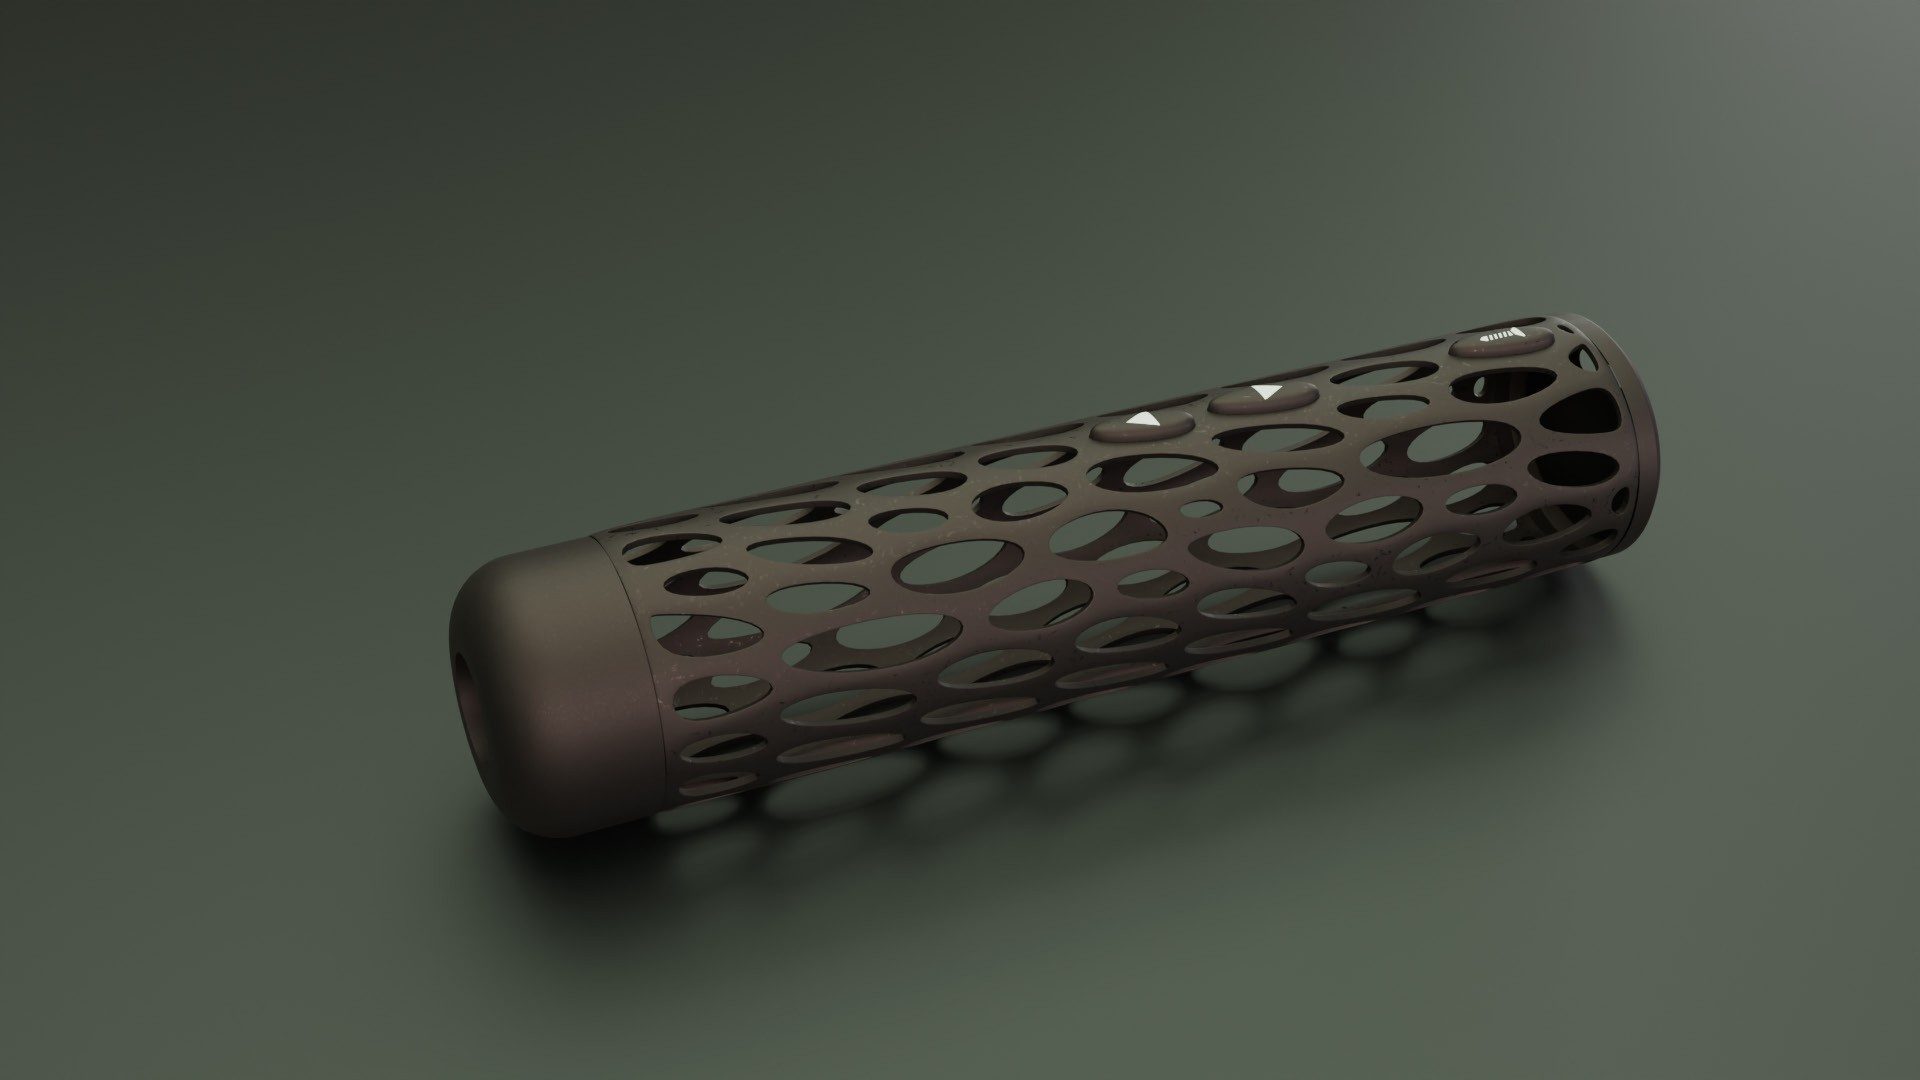
For the outer shell I chose a Voronoi structure. It is typical of additively manufactured objects and makes the production process visible, saves material without weakening stability too much, and clearly sets the tool apart from conventional screwdrivers.

An inserted film seals the openings against dust; end caps on both sides close the housing.

Voronoi moodboard
Moodboard
Rendering of the Voronoi housing
Result

Without a single
solder joint

The result is a working prototype: the flat-printed, formed housing holds all components precisely and connects them electrically – without a single solder joint. An animation made in Blender explains the whole process, from flat printing through assembly and forming to the finished device.

The project is a proof of concept. Repairability, recycling and robust contacting still need further development before series production – but the potential to fully automate assembly and wiring is clear.

Porsche 911 rendering in a concrete space
04

3D Modelling
& Rendering

Porsche 911 / Plasticity & Blender
Chapter 04 — 3D Modelling & Rendering

Car body

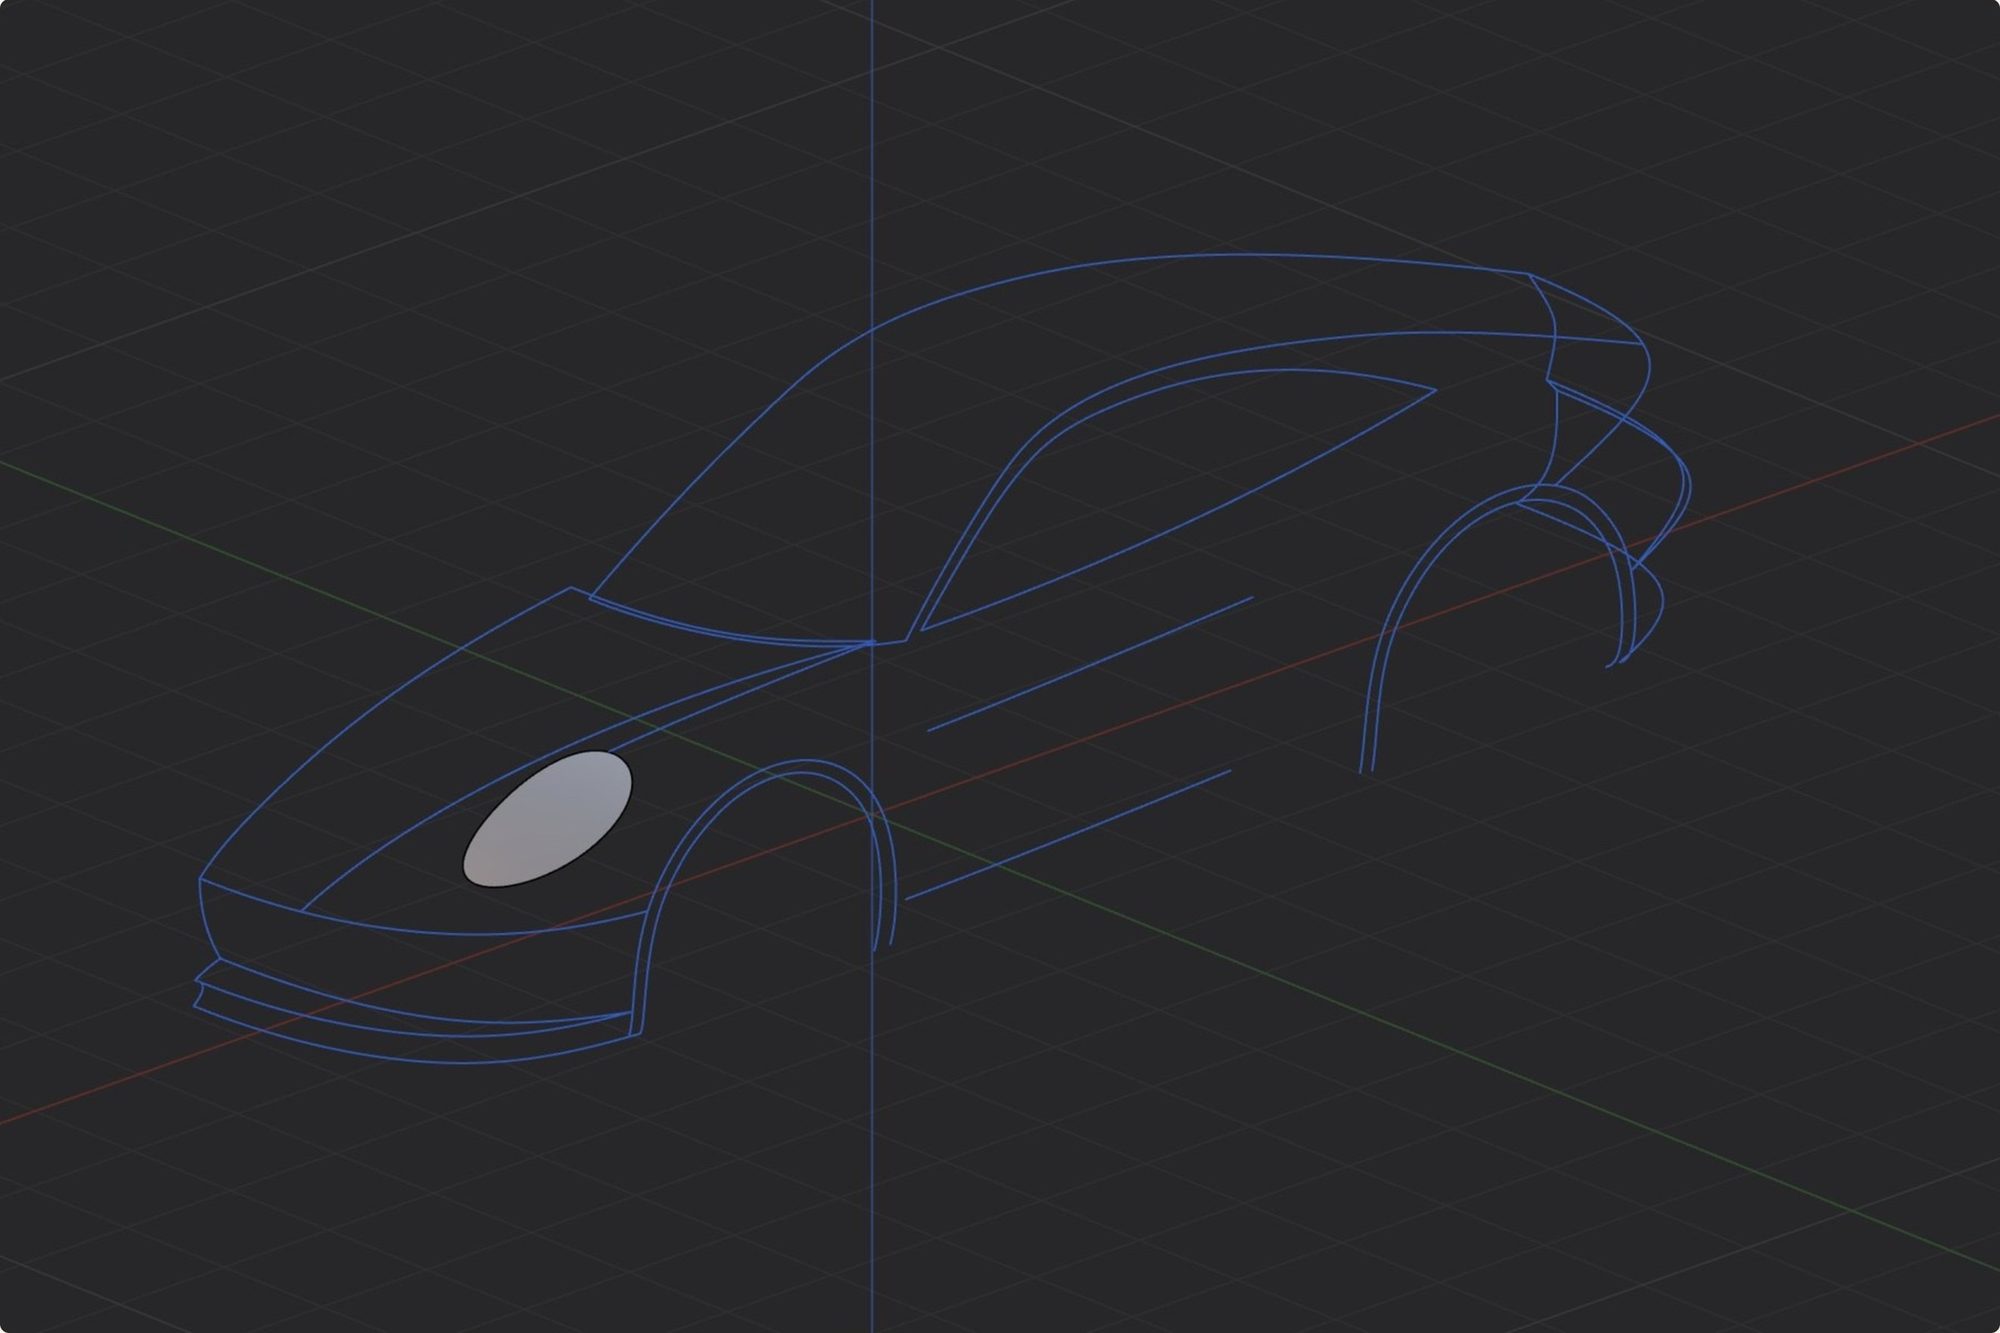
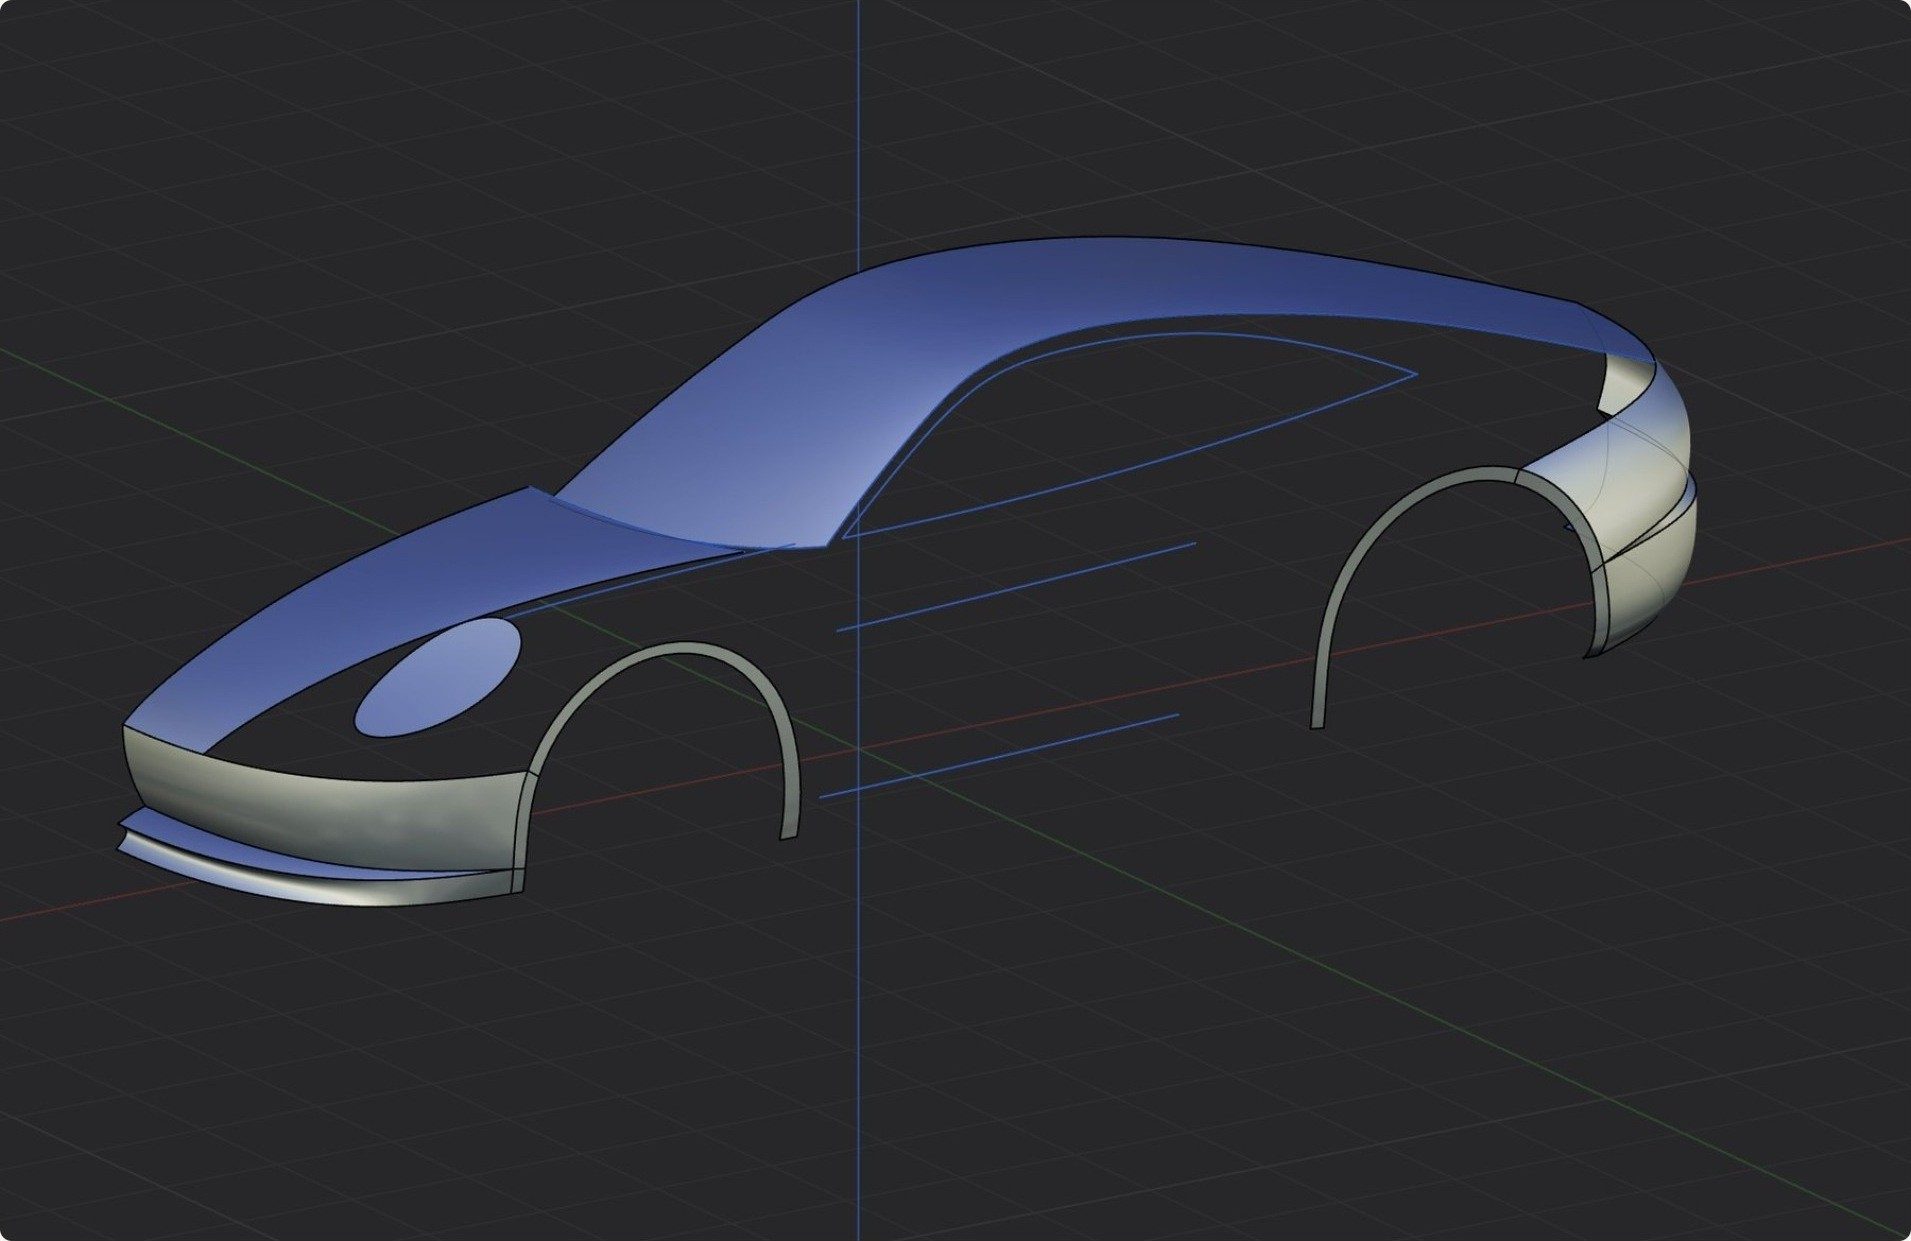
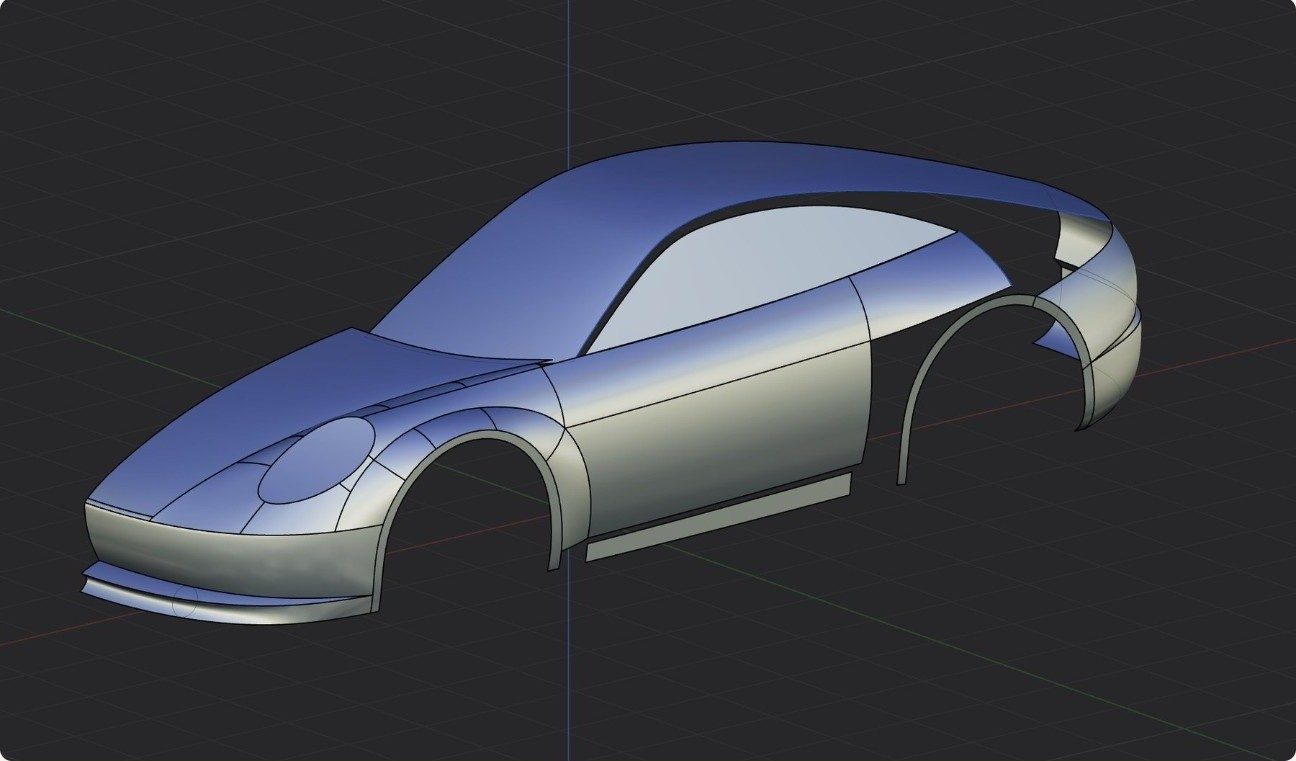
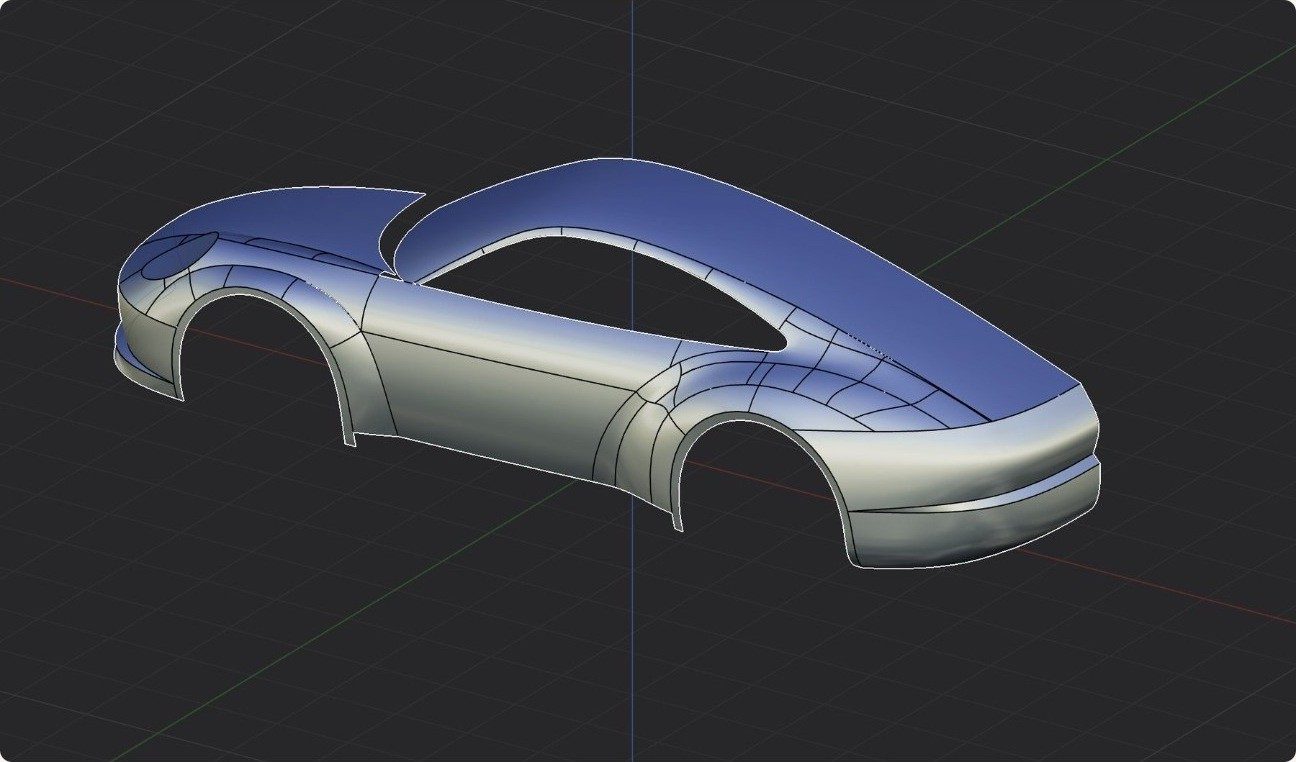
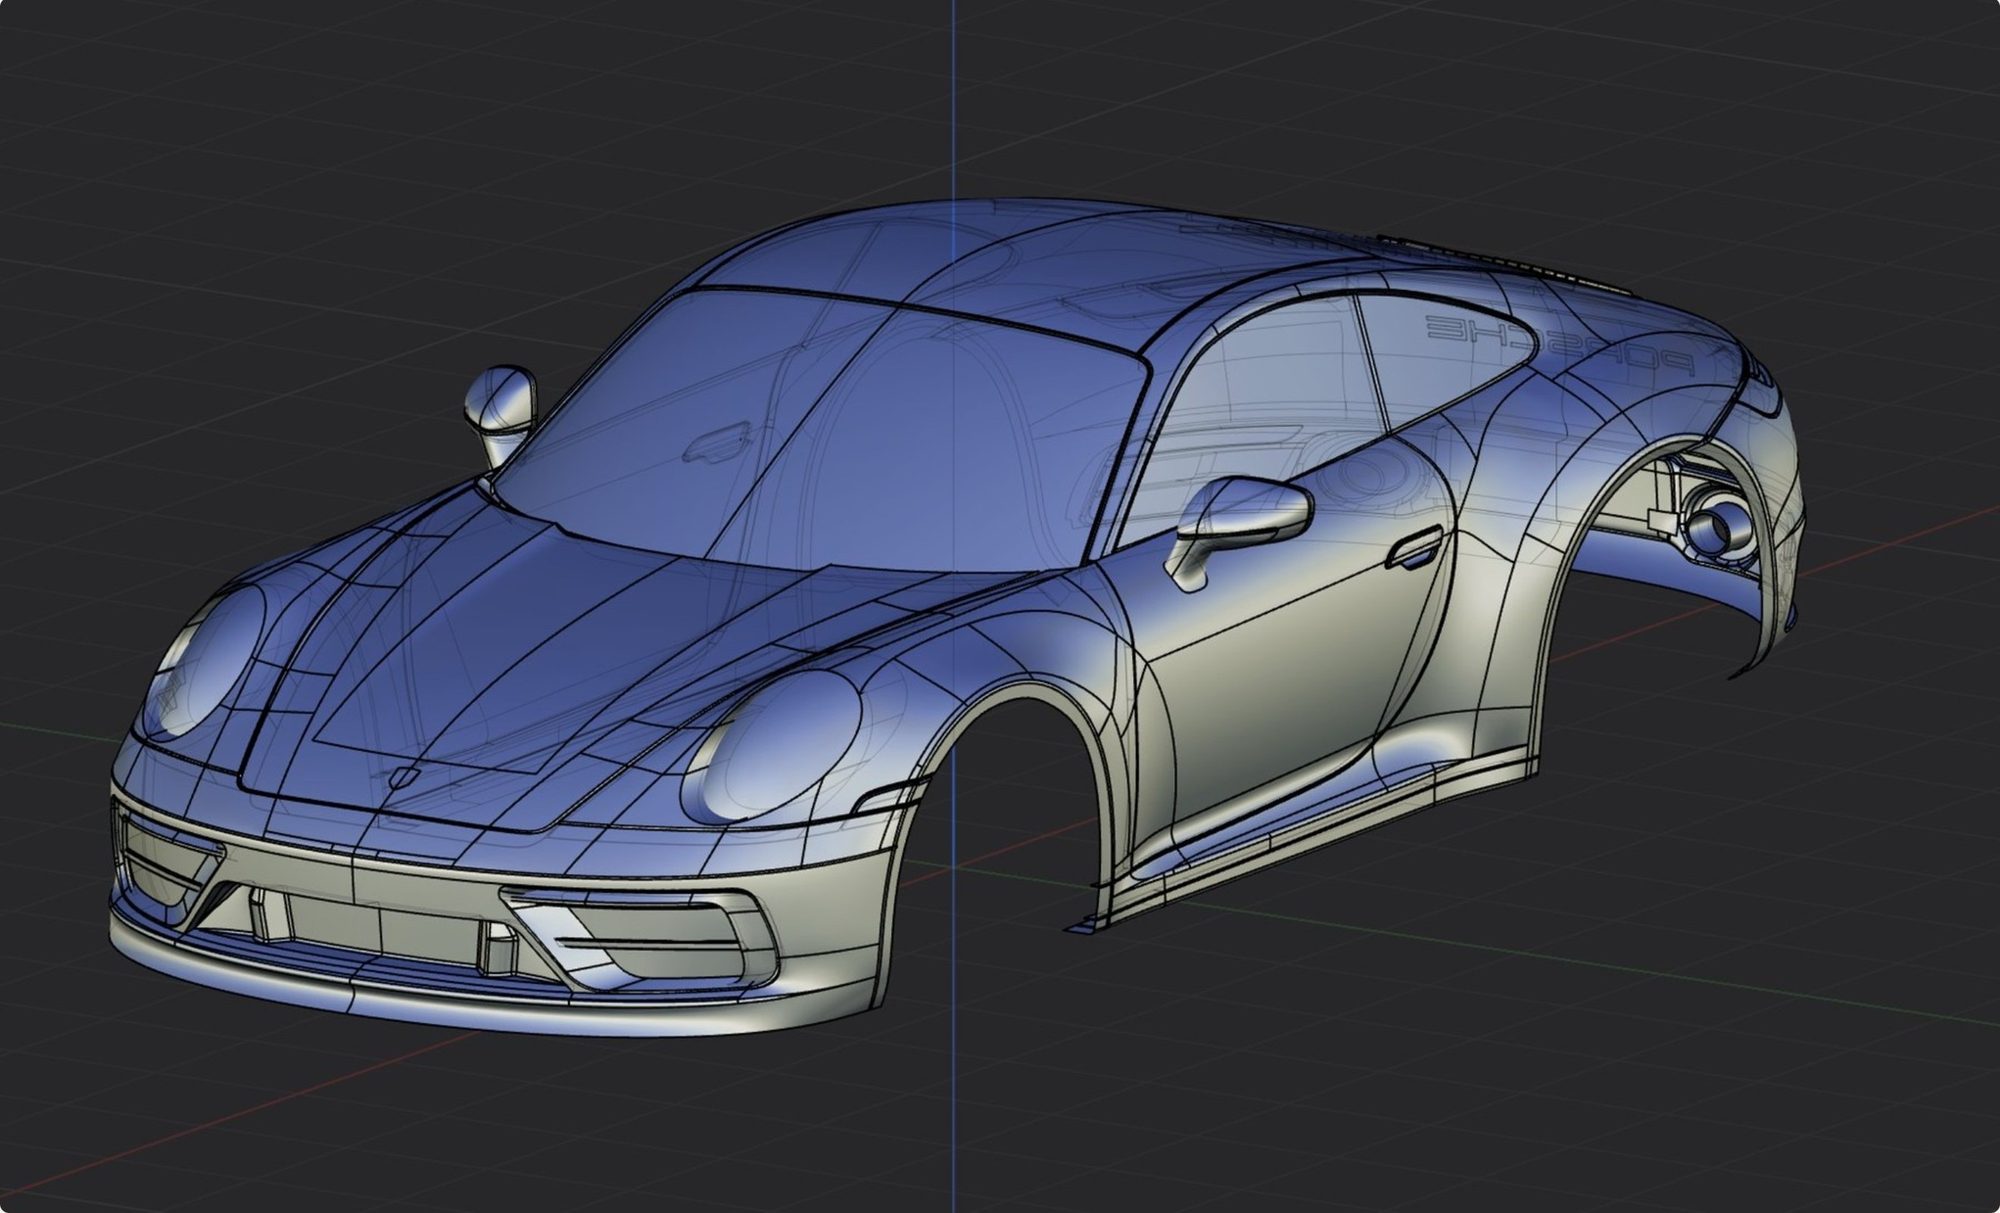
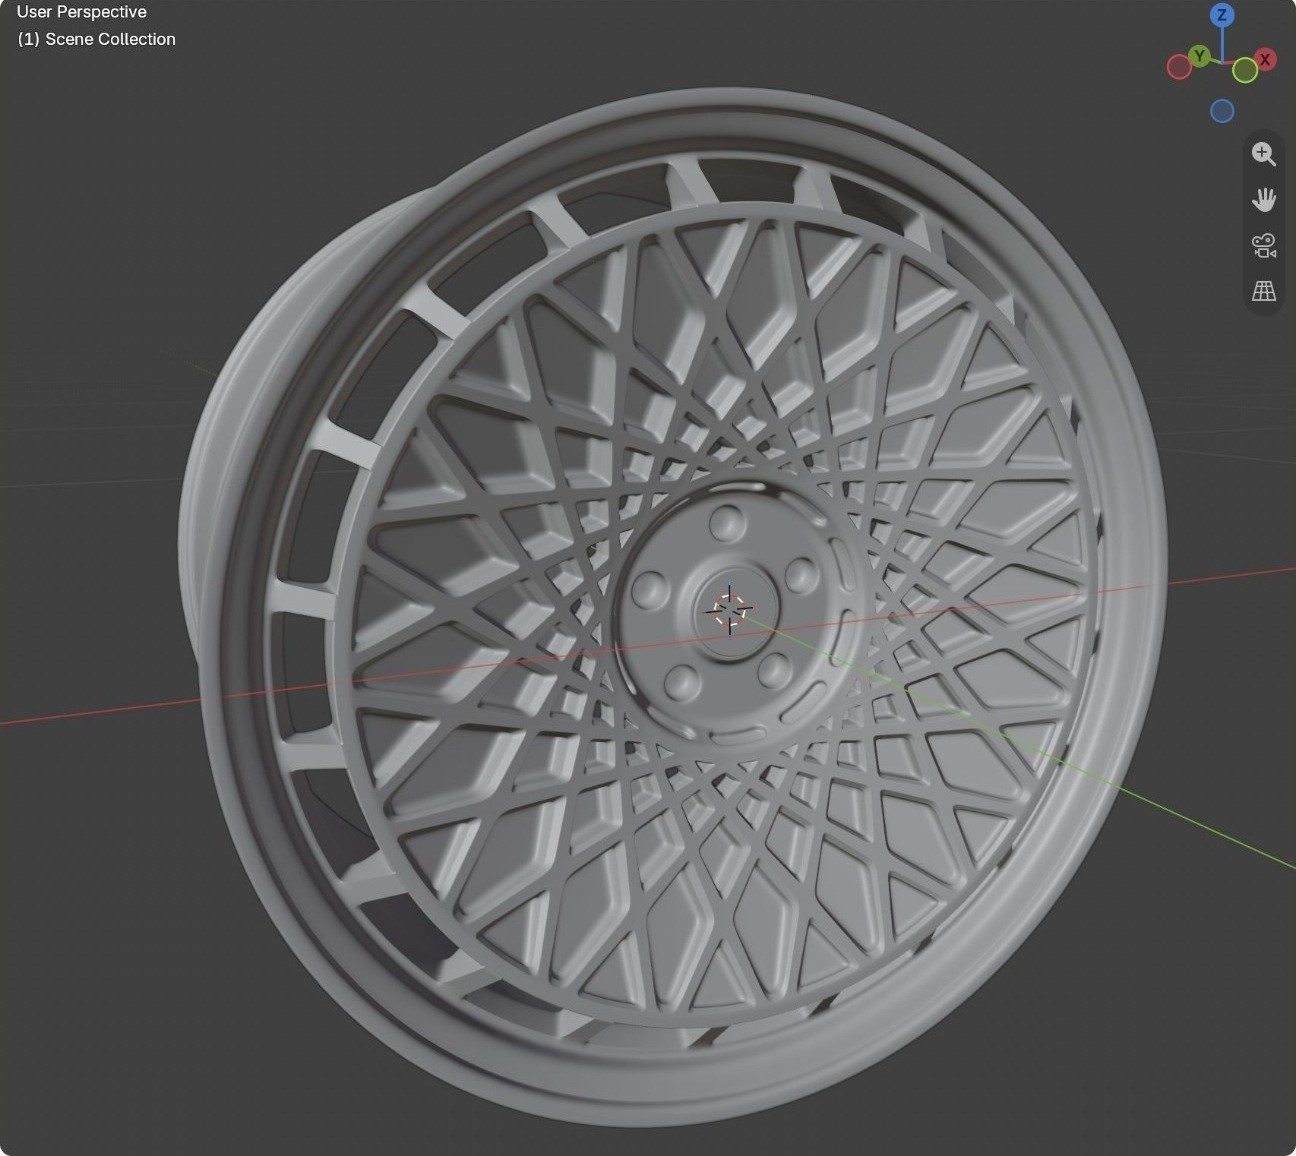
This chapter brings together my modelling and visualisation work. At its centre is a Porsche 911: the car body as a NURBS surface model in Plasticity, the wheel rim as a subdivision model in Blender – from the first curve network to the final studio rendering.

The aim for the body was calm, continuous surfaces with few control points, so that reflections flow cleanly across the entire form from the very beginning.

Spline cage
01Spline Cage
A curve cage of roofline, wings, shoulder and front defines the proportions – before a single surface exists.
Primary surfaces
02Primary Surfaces
The large, calm surfaces are spanned directly from the cage.
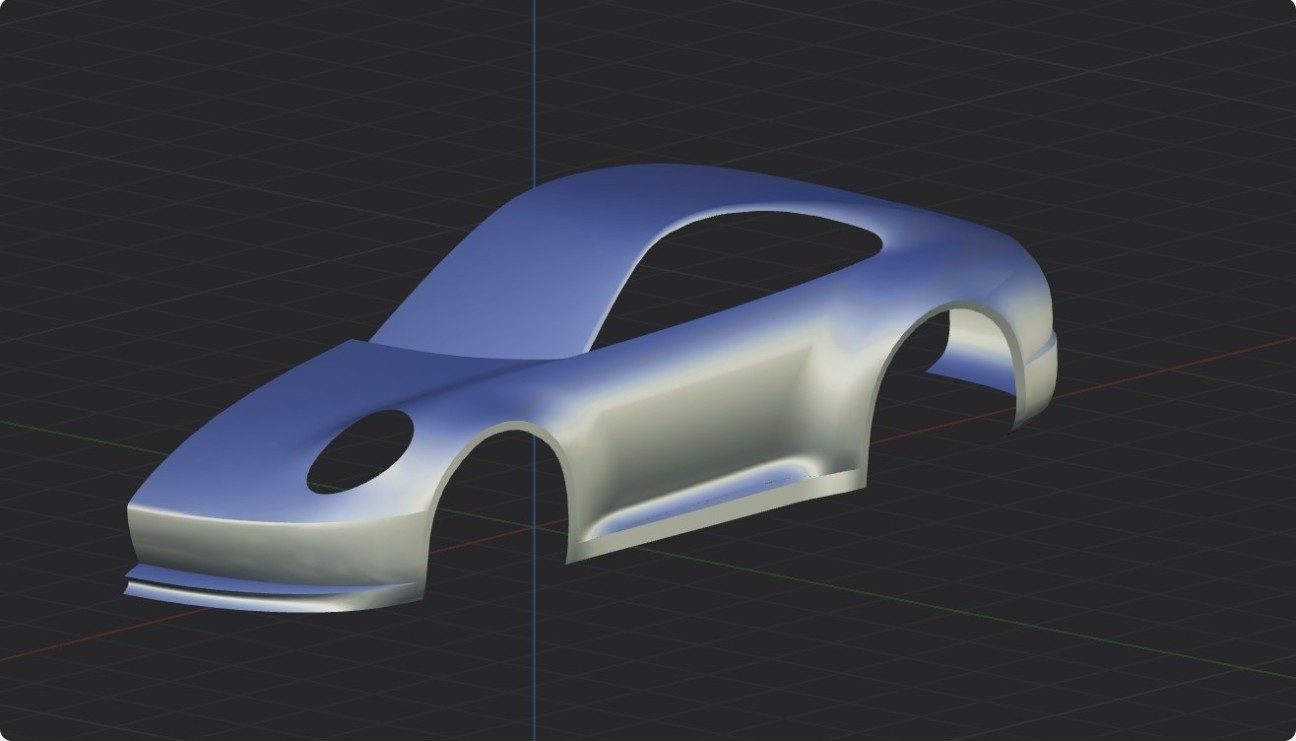
Closing surfaces
03Closing Surfaces
Flank, door and sill fill the gaps; the closed volume is used to check the flow of light.
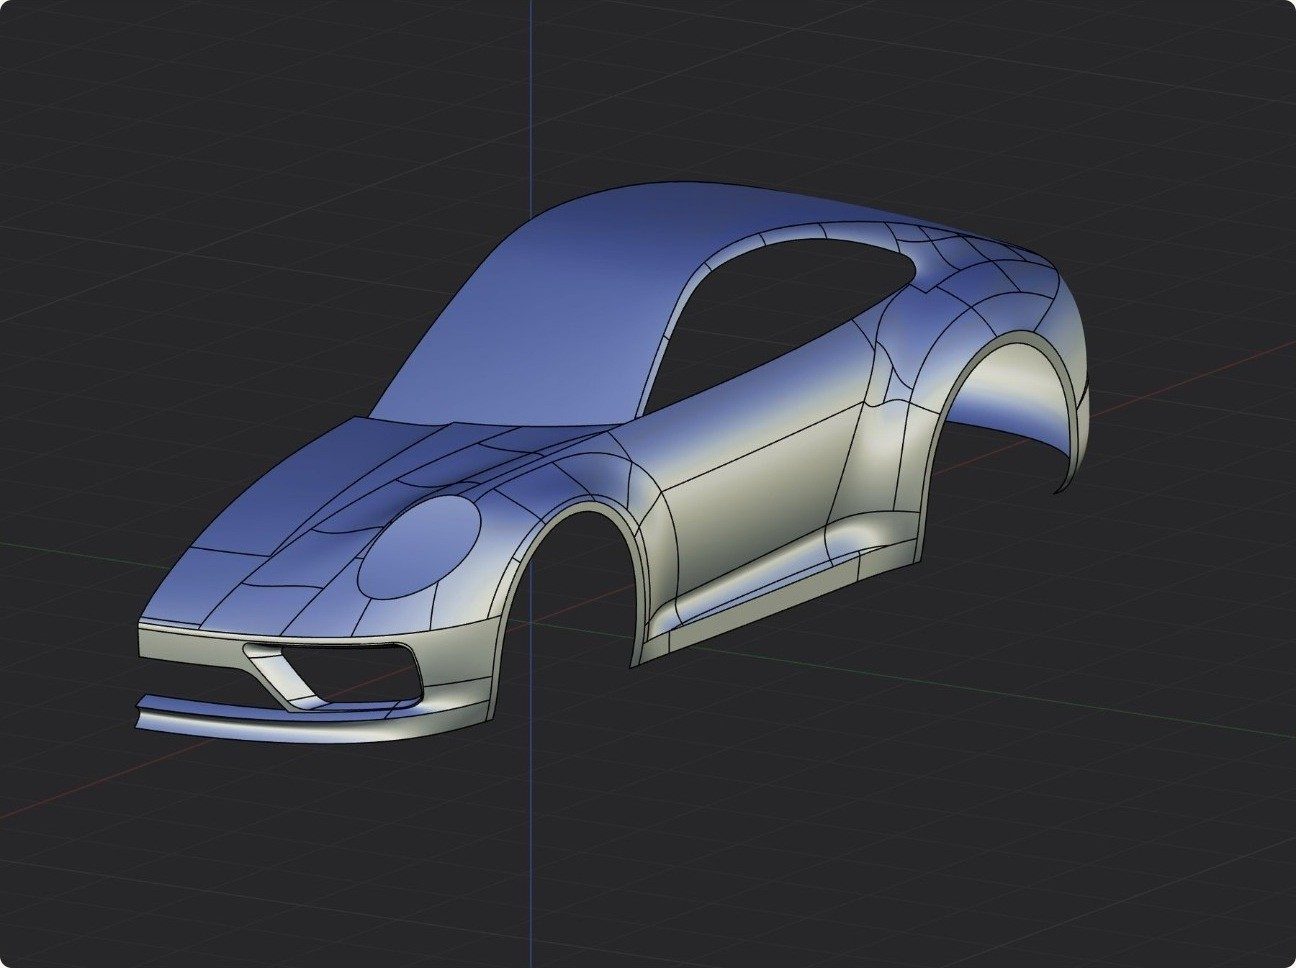
Detailing
04Detailing
Rear, air intakes and headlights are worked into the base surfaces.
Complete surface structure
Form check on the volume
Front and air intakes
Form check on the volume / front & air intakes
The patch structure stays readable and controlled through every detailing step – the basis for clean transitions and reflections in the rendering.
Wheel Rim

One segment,
twenty instances

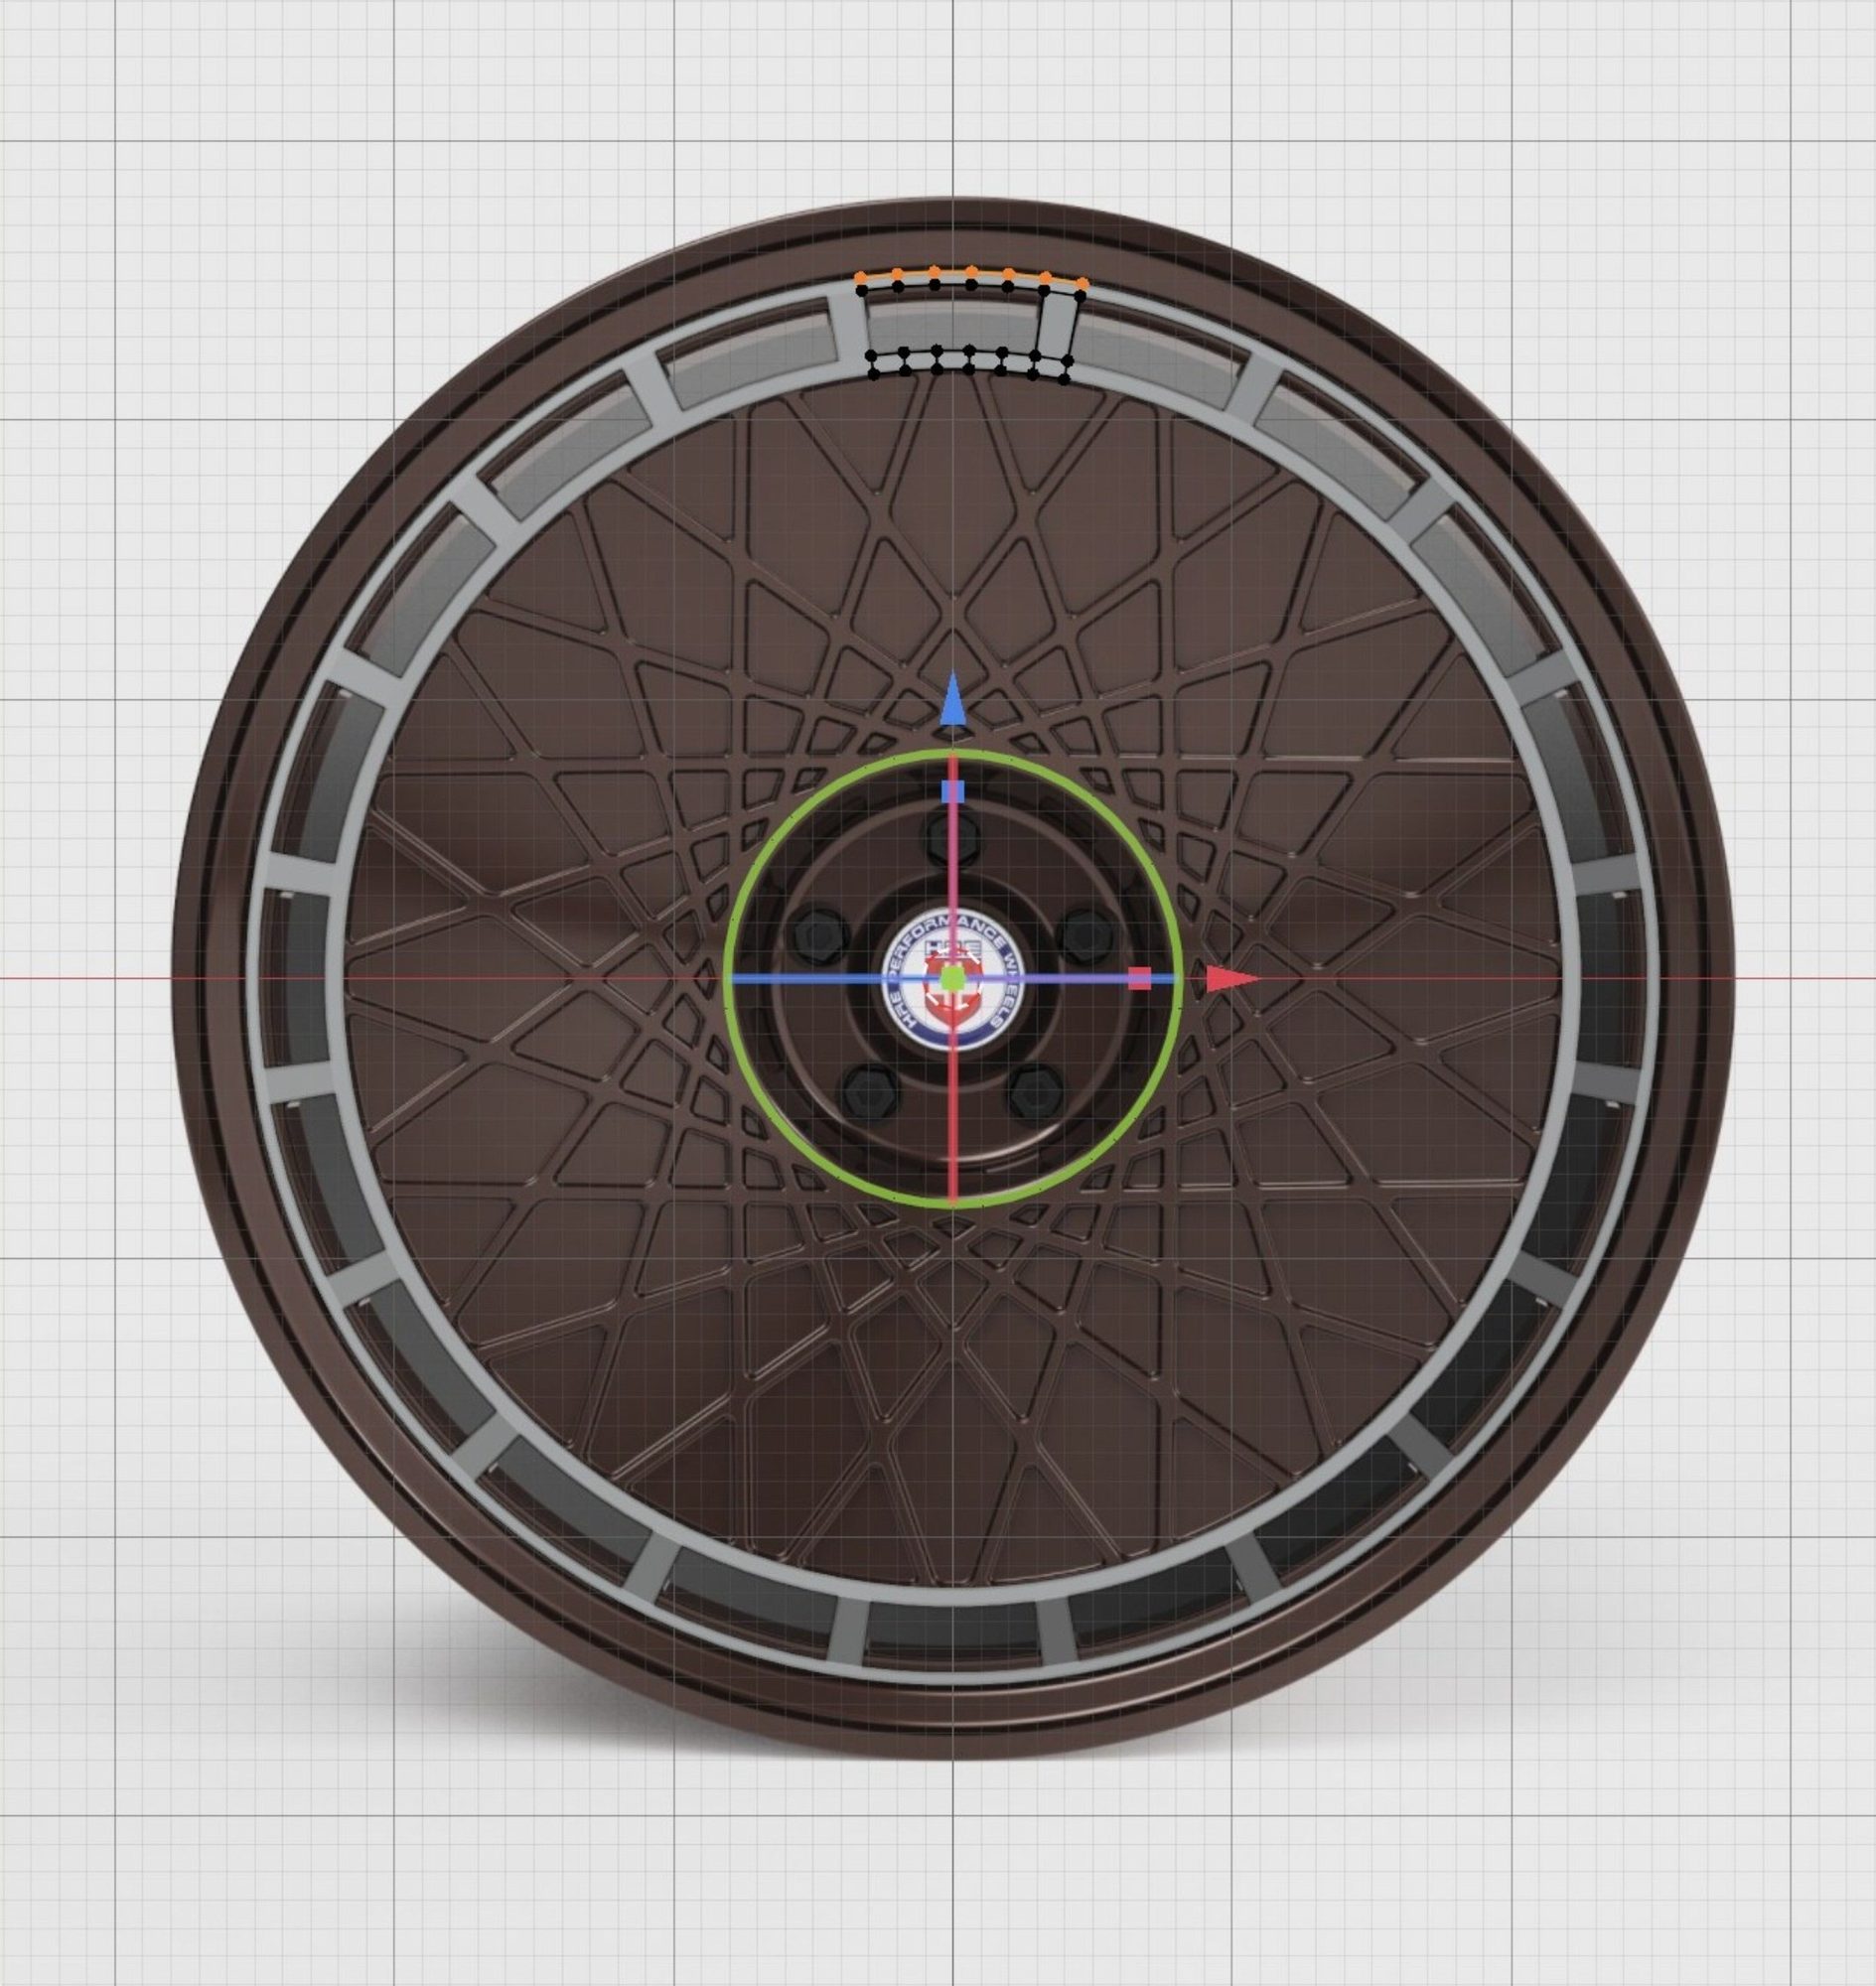
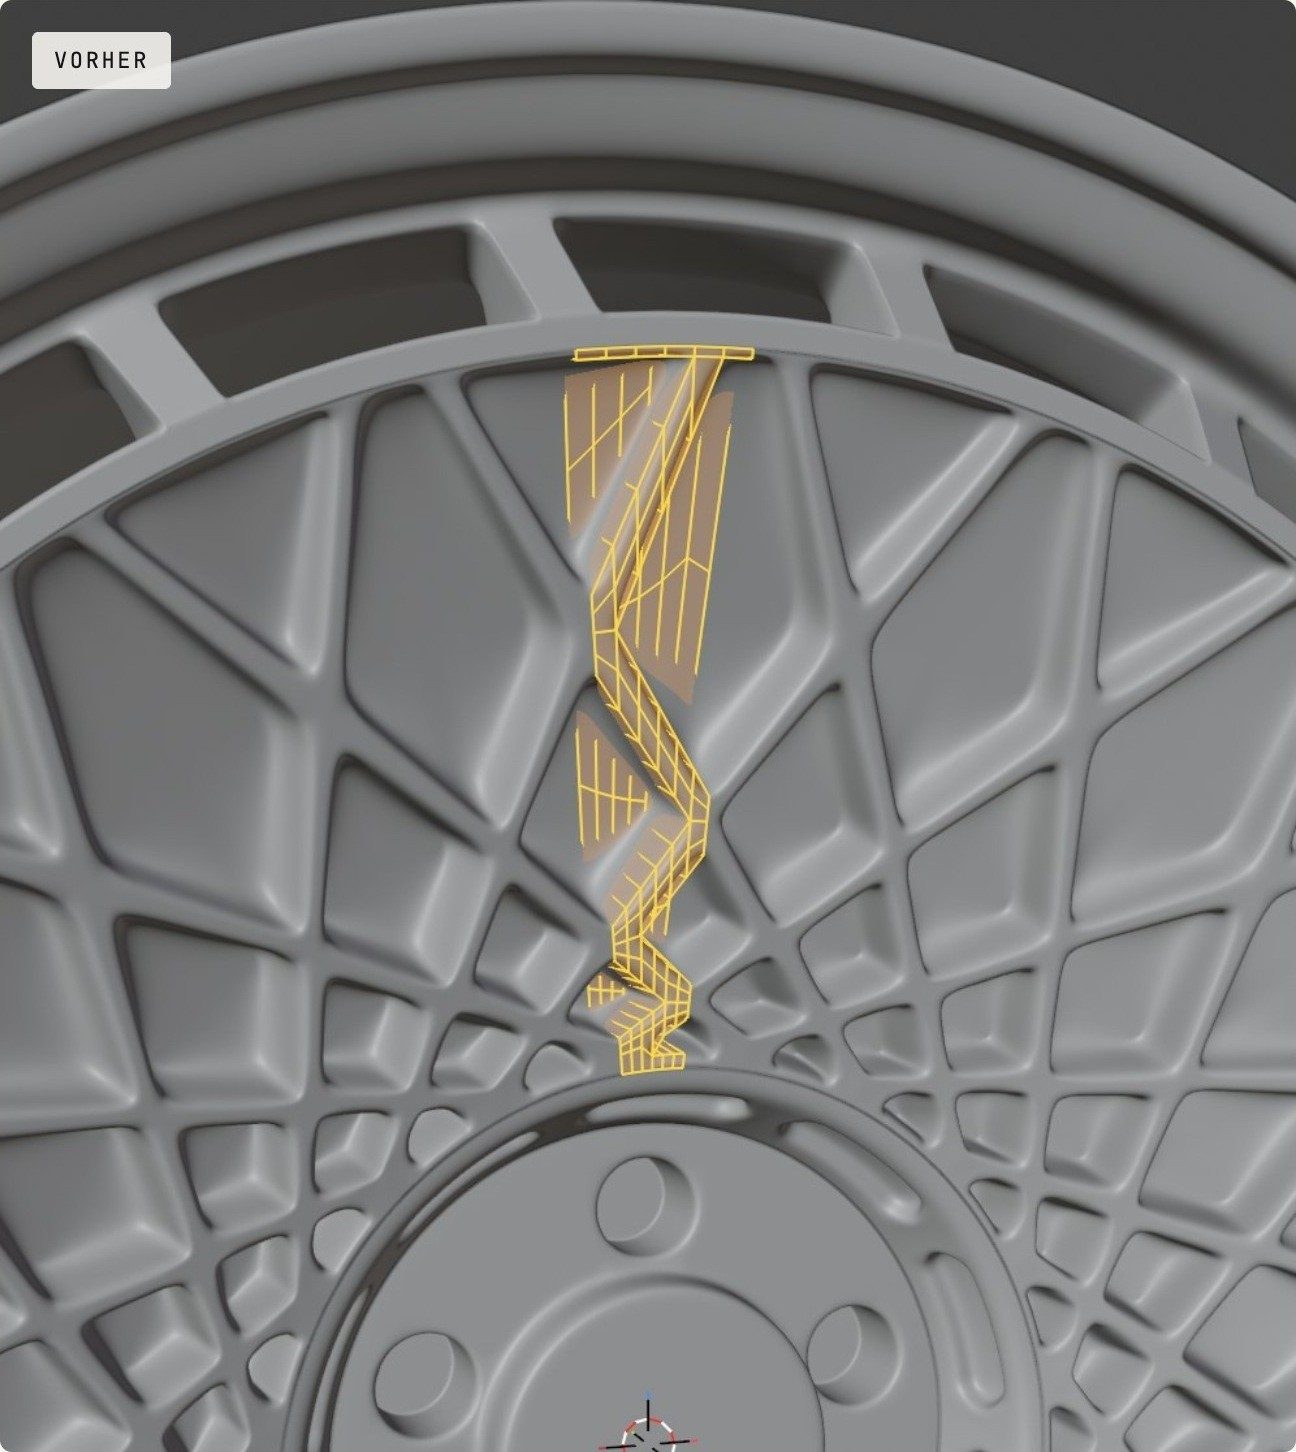
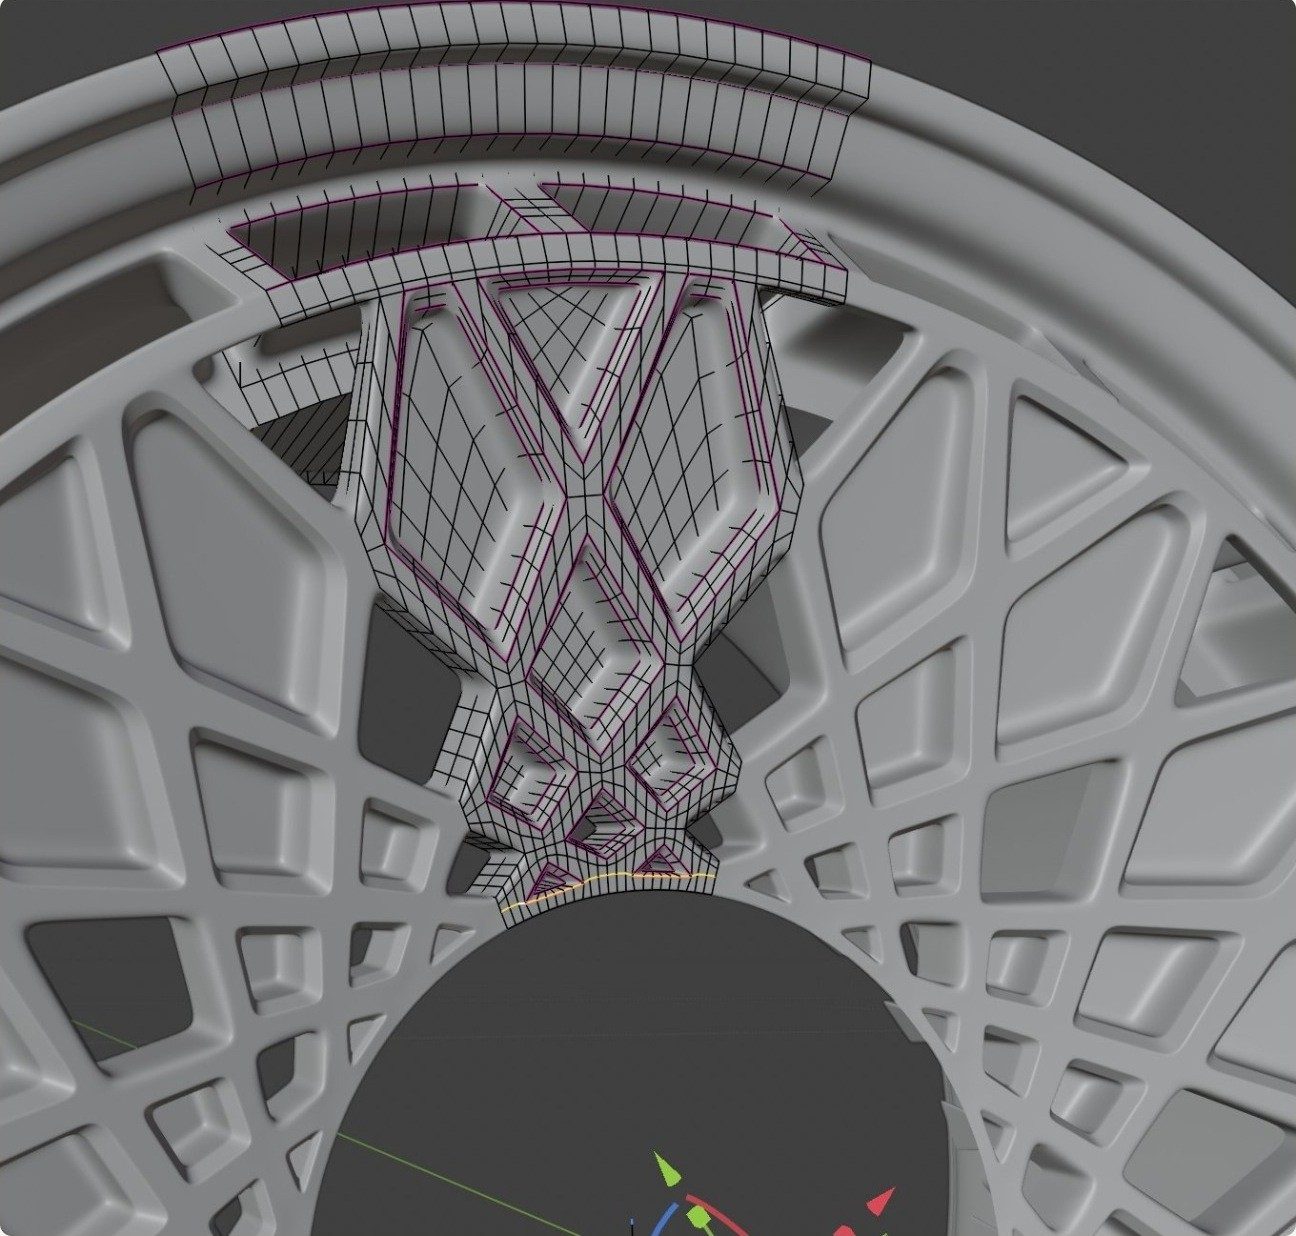
Only one segment is modelled; mirror and array modifiers (20 instances at 18°) build the complete wheel live. Quads only, faces as even as possible: between the first build and the optimised mesh, the edge flow of the segment was rebuilt from scratch.

Reference and modifiers
05Reference & Modifiers
Topology first build
06Topology
Segment detail in context
07Details
Finished rim
Finished Rim

Clean curves, clean topology – clean reflections.

Finally, body and rim are brought together and rendered in a studio setting. This is where it shows whether curves, surfaces and topology are truly clean: in the reflections.

Product Design

Topology
as craft

Detailed digital replicas of various Apple products, including an iPhone, a MacBook Pro and the AirPods Max.

The focus is the Apple Vision Pro. Its particular challenge lay in the highly complex surface reconstruction and the topologically demanding modelling of the housing – precise execution of flowing transitions and demanding curvature in the CAD process.

Audio Equipment

Texture, grain
and gain

A series of detailed renderings of high-end audio equipment: a Marshall amplifier, a condenser microphone and the OP-1 synthesizer.

The focus was on the photorealistic reproduction of material-specific textures – from the amplifier's characteristic surfaces to the precisely modelled controls of the synthesizer.

Perfume & Serum

Product as
narrative

Two product stagings from beauty and lifestyle: the perfume 'Phantom' by Rabanne and a serum bottle by Essence.

To add atmosphere to the serum image, a blueberry asset from the BlenderKit library was integrated – a composition that goes beyond pure object representation and places the product in a narrative context.

05
Chapter 05 — Drawings

Ideation
by the line

Freehand drawing is an essential tool for quick ideation and for analysing complex geometries. The studies shown here focus on perspective and on capturing proportion and volume.

The design of an underwater drone illustrates this process – from form-finding to constructive logic.

Calender Gearbox

Where design
meets tolerance

The complete design development of a calender gearbox – from the initial technical layout and calculation to the subsequent 3D modelling in SolidWorks.

Documented through the full assembly including a standard-compliant bill of materials and a detailed part drawing of the drive shaft. The work focused on precise technical documentation and a design suited to manufacturing.

06
Chapter 06 — Additive Manufacturing

Light, made
one layer at a time

A selection of 3D-printed lampshades. The designs are my own and deliberately use the aesthetic and technical possibilities of additive manufacturing to create filigree structures and individual light effects.

All models shown were realised as functional physical objects.

Archive

Earlier work

Form studies in clay

Form Studies

Six haptic surfaces from one material – clay.

Faculty logo mockup

Digital Mockups

Logos and festival identity, staged in photoreal mockups.

Faculty Christmas illustration

Illustrations

Christmas card motif for TU Dresden's Faculty of Mechanical Engineering.

Halloween pumpkin digital art

Digital Art

A pumpkin in a glass jar, drawn in Procreate.

Subway car interior render

Subway Interior

Design and high-end rendering of a subway car interior.

Interior bedroom render

Interior

Visualising furnishing scenarios from the original floor plan.

Iceberg nature render

Nature

Iceberg, meadow and underwater scenes, modelled in Blender.

Embossed line graphic from the portfolio cover

Portfolio 2026

The full portfolio as PDF – available on request.

Get in Touch

Let's make
something real

An der Litzelwiese 29 · 60488 Frankfurt am Main